

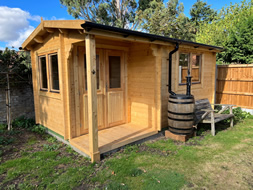
Every UK homeowner with a garden log cabin knows the struggle of chilly mornings and soaring heating costs when insulation falls short. Balancing warmth, sustainability, and durability is a real challenge, especially with timber structures that demand specific strategies. This guide brings practical advice and effective insulation solutions to help you create a comfortable, energy-efficient retreat for every season.
Table of Contents
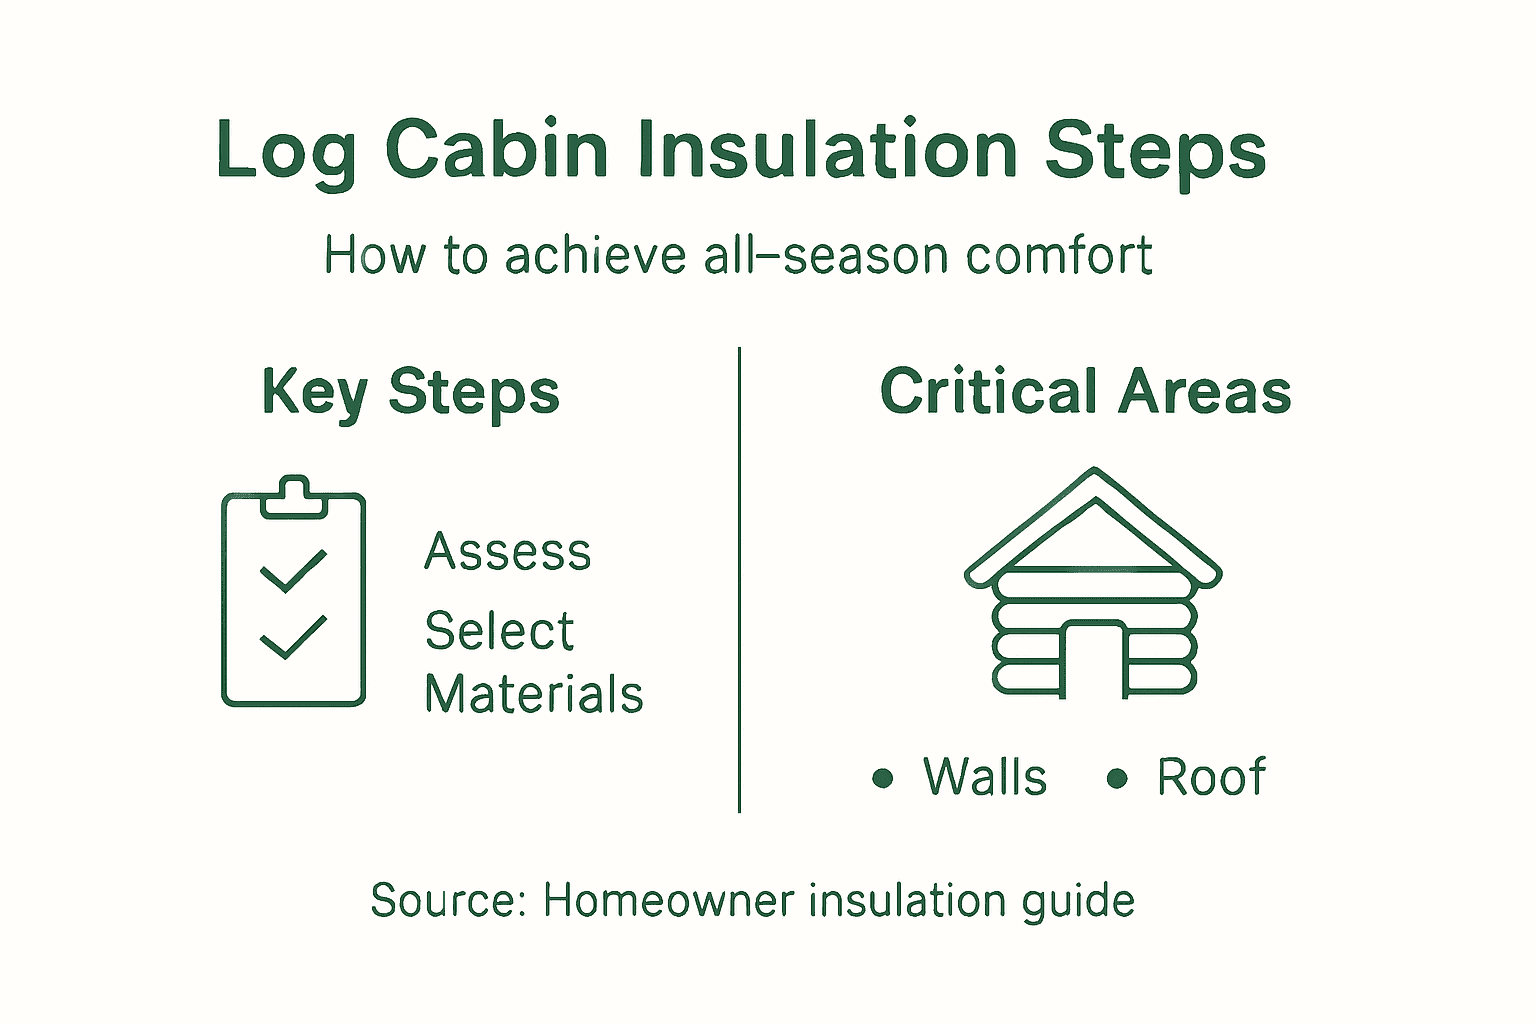
- Step 1: Assess Insulation Needs And Cabin Structure
- Step 2: Select Suitable Insulation Materials
- Step 3: Prepare Log Cabin Surfaces And Spaces
- Step 4: Install Insulation For Walls, Floors And Roof
- Step 5: Seal Gaps And Verify Insulation Performance
Quick Summary
| Key Message | Explanation |
|---|---|
| 1. Assess your cabin’s needs | Conduct a thorough evaluation of your cabin’s insulation requirements before selecting materials. |
| 2. Choose suitable insulation | Select insulation based on budget, performance, and compatibility with timber structures. |
| 3. Prepare surfaces properly | Ensure clean and dry surfaces to prevent moisture issues and enhance insulation effectiveness. |
| 4. Install insulation correctly | Pay attention to detail during installation to avoid gaps and ensure optimal thermal performance. |
| 5. Seal gaps and check performance | After installation, seal any gaps and verify insulation effectiveness through temperature checks. |
Step 1: Assess insulation needs and cabin structure
Before you pick up any insulation materials or call in the professionals, you need to understand what your bespoke log cabin actually needs. Every cabin is different, and what works brilliantly for your neighbour’s garden retreat might be completely wrong for yours. This step involves looking at your cabin’s current condition, understanding how it performs through the seasons, and identifying exactly where heat is escaping or cold is creeping in.
Start by walking around your cabin on a cold day and noticing where you feel draughts or temperature changes. Look at the exterior walls, paying particular attention to corners, around windows and doors, and where different building materials meet. Check your roof line carefully, as heat rises and much of your warmth loss happens through poor roof insulation. Don’t forget to examine the floor, especially if your cabin sits close to the ground with limited underfloor space. You’ll also want to assess the current cabin structure itself. Are the logs in good condition? Is there visible rot, warping, or gaps between the logs that have appeared over time? These structural issues directly affect how effective any insulation will be. Understanding wall insulation requirements helps you plan the right approach for your specific cabin layout.
Consider the practical aspects of your cabin’s design. How many windows does it have, and are they single or double-glazed? Is the cabin heavily shaded by trees, or does it catch full sun throughout the day? Think about how you actually use the space. Will you be heating it constantly throughout winter, or just using it occasionally? The answers to these questions shape your insulation strategy. You should also think about moisture transfer and building performance when assessing your cabin’s needs, as proper ventilation and moisture management are just as important as thermal insulation in the UK climate.
Next, document what you find. Take photographs of problem areas, note down the dimensions of your cabin, and record which areas feel coldest or draughtiest. This information becomes your roadmap for the insulation work ahead. If your cabin has existing insulation, try to identify what type it is and how old it might be. Older insulation often degrades and loses effectiveness. Don’t worry if you’re not entirely sure what you’re looking at, you’ll get clearer on that as you move forward. The key is gathering enough information to make informed decisions about where your money should go and what type of insulation will actually solve your problems.
The most expensive insulation is the kind you install in the wrong place. Getting your assessment right saves time, money, and frustration later.
One practical thing many people overlook is checking your cabin’s current energy use. If you have heating set up, look at your energy bills over the past year. A cabin that costs a fortune to heat tells you exactly where your biggest problems lie. Rooms that are always cold despite heating tell a clear story about where heat escapes fastest. This evidence-based approach beats guessing every time.
Pro tip: Take a thermal image with your smartphone’s thermal camera app (many newer phones have this built in) or hire a professional thermographer for around £100-150 to identify exactly where heat loss occurs, which pinpoints your insulation priorities far more accurately than visual inspection alone.
Step 2: Select suitable insulation materials
Now that you understand your cabin’s specific needs, it’s time to pick the right insulation materials. This isn’t a one-size-fits-all decision, and honestly, the options available today are far better than they were even five years ago. Your choice depends on your budget, environmental values, how much effort you want to put in, and what will actually perform best in your cabin’s particular situation.
Start by thinking about what matters most to you. Are you prioritising cost above all else, or are you willing to invest more in materials that are better for the environment and your health? Do you want something you can install yourself, or would you rather hire professionals? Log cabins have specific needs because the wood itself plays a role in insulation and moisture management, so you can’t just treat it like insulating a standard house. Natural insulation materials like sheep’s wool, hemp, and cellulose have become increasingly popular for cabins because they work brilliantly with timber structures. These materials are breathable, which means moisture can move through them without getting trapped, preventing rot and mould in your logs. You should explore sustainable insulation choices specifically designed for timber buildings, as these offer distinct advantages over rigid synthetic insulants.
Here’s what to consider when comparing different materials:
-
Sheep’s wool is naturally fire-resistant, regulates humidity well, and feels comfortable to handle during installation. It’s more expensive than some alternatives but performs exceptionally in variable UK climates.
-
Hemp insulation offers excellent thermal performance and is incredibly sustainable. It resists pests naturally and works well in wall cavities.
-
Cellulose comes from recycled paper and is affordable. It’s dense and performs well but requires careful installation to avoid settling over time.
-
Mycelium insulation is an emerging option that deserves serious consideration. Made from mushroom-based biomass waste, mycelium offers competitive thermal performance alongside exceptional sustainability credentials. It’s breathable, non-toxic, and perfectly suited to log cabin applications where you want the wood to remain healthy.
-
Spray foam can seal tricky gaps effectively, but it’s impermeable. For log cabins, this can trap moisture and cause problems over time, so use it sparingly and only in specific areas where you’ve thought through moisture management carefully.
When you’re evaluating materials, think practically about installation too. Some materials are genuinely DIY-friendly if you’re comfortable working with insulation, whilst others really need professional installation to perform properly. Sheep’s wool and hemp, for instance, can be tackled by someone with basic handyperson skills and patience. Cellulose usually needs a blowing machine, which you might hire or get a professional to handle. Spray foam absolutely requires professional application.
Don’t forget about your cabin’s specific weak points. If you identified that your floor is your biggest problem, you might choose one material. If your roof is the issue, you might pick something different. The thickness you need varies too, and thicker doesn’t always mean better if you’re working in confined spaces.
The best insulation material is the one that matches your cabin’s needs, your budget, and your willingness to maintain it over time. A cheaper material that’s wrong for your situation costs far more in the long run.
Take time to compare actual costs, not just the material price. Factor in the thickness you need, installation labour (if you’re hiring), and any specialist equipment. Request quotes from suppliers who understand log cabins, because they’ll recommend appropriate materials and thicknesses for your specific situation. When you’re comparing options, look at sustainability ratings and durability comparisons to see how different materials stack up across health, environmental impact, cost, and longevity.
One more thing to consider is future maintenance. Natural materials sometimes need checking over the years to ensure they’re performing well, whilst synthetic options generally just sit there doing their job. This isn’t necessarily a deal-breaker, it’s just something to be aware of.
To help differentiate insulation material options, review this comparison of their sustainability, installation, and longevity traits:
| Insulation Type | Sustainability | DIY Friendliness | Expected Longevity |
|---|---|---|---|
| Sheep’s wool | Renewable, low carbon | Very easy to install | 30+ years |
| Hemp | Highly sustainable crop | Easy for competent DIY | 30+ years |
| Cellulose | Recycled content | Needs machinery/professional | 20–30 years |
| Mycelium | Excellent, from waste | Specialist installation | Still being tested |
| Spray foam | Petroleum-based, non-breathable | Professional required | 20+ years |
Pro tip: Get samples of three materials that suit your needs, feel them, check their installation guides, and ask suppliers specific questions about how they perform in timber structures and UK humidity conditions—this hands-on approach beats reading specifications alone.
Step 3: Prepare log cabin surfaces and spaces
Before you start installing insulation, your cabin needs to be properly prepared. This step takes time but it’s absolutely worth doing properly because poor preparation leads to insulation that doesn’t perform well, moisture problems, and wasted money. Think of it as laying solid foundations before building a house. You’re essentially getting your cabin into the best possible state to accept insulation and perform brilliantly for years to come.
Start by clearing the cabin interior completely. Remove any furniture, fixtures, decorations, or anything else that’s going to get in the way. You need clear access to all the areas where insulation will go, whether that’s walls, ceilings, or floors. Next, inspect every surface carefully. Look for signs of dampness, rot, mould, or structural damage. If you spot any of these problems, they need addressing before insulation goes in. Damp wood and insulation are a terrible combination, so if your cabin has moisture issues, sort those out first. This might involve improving ventilation, fixing leaks, or applying treatments to affected timber. Understanding how to treat internal surfaces properly helps ensure your insulation won’t trap moisture against the wood.
Clean all surfaces thoroughly. Dust, cobwebs, and debris need to go because they prevent insulation from making good contact with the surfaces it’s meant to protect. Use a vacuum cleaner, brush, or cloth depending on what you’re dealing with. For walls, a quick wipe-down is usually enough. For floors, get them properly clean because you don’t want insulation sitting on dirty surfaces. Check that all surfaces are dry before you proceed. If your cabin has been closed up for a while, you might need to open windows and let it air out for a day or two to ensure moisture has evaporated.
Now look at the specific areas where insulation will be installed:
-
Wall cavities should be inspected for any existing insulation that’s degraded and needs removing. Make sure cavity walls are clear and accessible.
-
Pipes and wiring need to be accounted for. You’ll need to cut insulation carefully around these to avoid damaging them. Never compress pipes or cables under insulation as this can cause problems.
-
Windows and doors should be checked for gaps and draughts. Seal any obvious gaps with appropriate materials before you install wall or roof insulation.
-
Roof spaces need careful clearing. Remove any stored items and check for bird nests, rodent evidence, or other obstructions. Ensure there’s adequate ventilation space so insulation doesn’t block air flow.
-
Floor areas should be cleared and inspected. If your cabin has a suspended floor, check underneath for any issues.
Following proper surface preparation guidelines ensures your insulation performs as intended and lasts as long as it should. The National Insulation Association emphasises that surfaces must be clean, dry, and free from defects before installation begins.
Measure everything carefully and make a detailed plan of where insulation will go and how much you need. Take photographs of problem areas or anything unusual. If you’ve hired professionals to do the installation, they’ll do their own assessment, but having this information yourself helps you understand what’s happening and ask intelligent questions.
Proper preparation takes patience, but it’s genuinely the difference between insulation that works brilliantly and insulation that disappoints you year after year.
Check that your cabin is well-ventilated as standard. Insulation needs to work with ventilation, not against it. Make sure any existing air vents aren’t blocked and that your cabin can breathe properly. If you’re planning to seal things very tightly, think about installing mechanical ventilation to prevent moisture build-up.
One last thing is to ensure the structure itself is sound. If you notice soft spots in wood, signs of rot, or structural issues, these need professional assessment before you insulate. Insulation covers problems but doesn’t fix them, so dealing with structural issues first makes sense.
Pro tip: Create a detailed sketch or take a video tour of your cabin showing all measurements, problem areas, existing services, and access points—this becomes invaluable documentation for yourself or professionals and prevents expensive mistakes during installation.
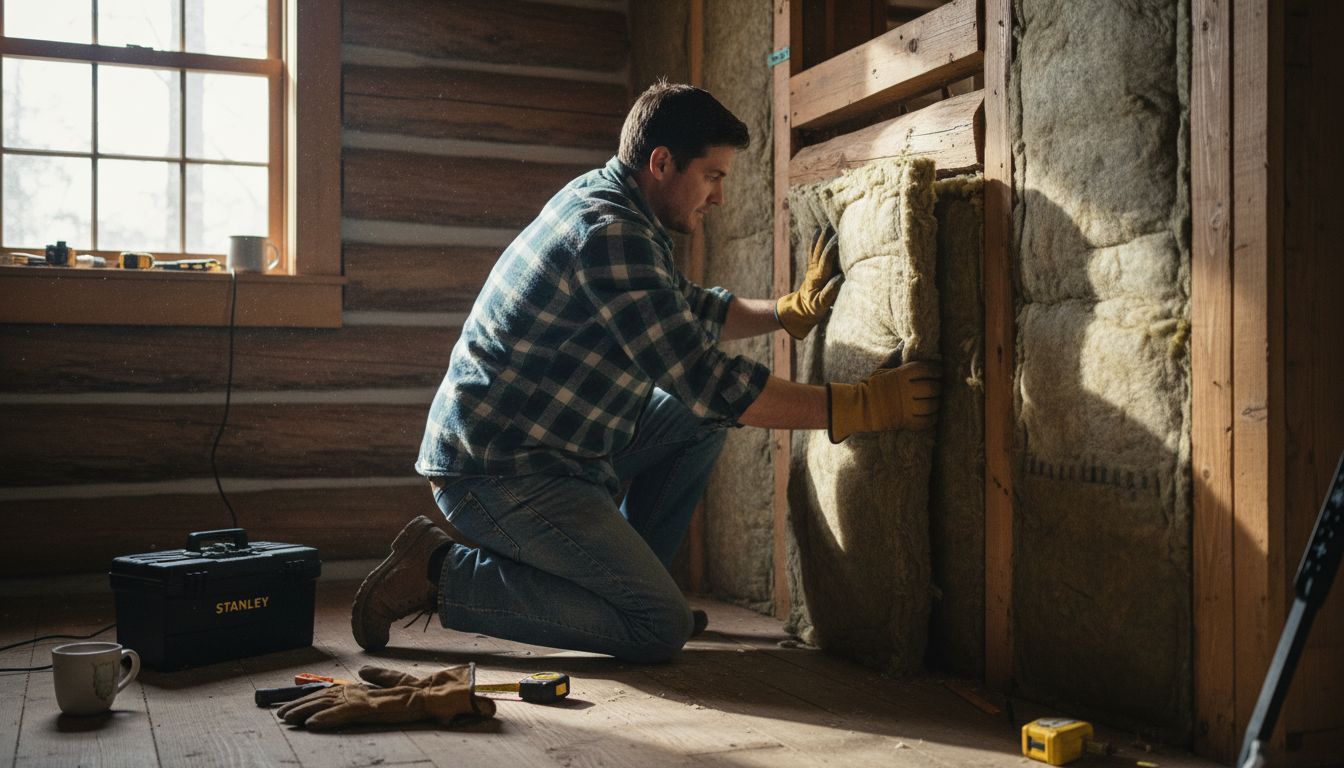
Step 4: Install insulation for walls, floors and roof
This is where your planning and preparation pay off. Installing insulation is the core work that transforms your cabin into a genuinely comfortable space year-round. Whether you’re doing this yourself or hiring professionals, understanding what’s involved helps you make better decisions and spot quality work when it’s happening.
Start with your wall insulation because walls are often where the most significant heat loss occurs. If you’re installing batts or blankets, begin at the bottom of the wall cavity and work upwards. Make sure the insulation sits snugly against the supporting structure with no gaps or compression. Cut insulation carefully around pipes, electrical outlets, and other services, but never compress it around these items as this reduces its effectiveness and can create safety hazards. For natural materials like sheep’s wool or hemp, you might use friction to hold them in place, whilst some materials require netting or supports. The key is ensuring air tightness and proper thermal bridging mitigation throughout the cavity to prevent heat escaping through gaps or weak points.
Moving to your roof insulation is equally important since heat rises and much of your warmth loss happens through the top of the cabin. This is typically more challenging than wall insulation because you’re often working in confined spaces and potentially at height. Ensure adequate ventilation space above the insulation, otherwise condensation will form and you’ll end up with damp. If you’re using batts, lay them between the roof joists and ensure they’re level and fully supported. If you’re using blown-in insulation, you might need specialist equipment. The roof space benefits particularly from careful planning to address ventilation and prevent thermal bridges that compromise performance.
Floor insulation completes the picture. Access underneath the floor if you have a suspended structure. Install insulation between the joists with the vapour barrier facing upwards towards the cabin interior. Make sure insulation is fully supported so it doesn’t sag over time, as sagging insulation performs poorly. If your cabin sits close to the ground with limited underfloor access, you might need to insulate from inside instead, though this reduces internal space slightly.
Here’s what to focus on for all three areas:
-
Tight fit against all surfaces is essential. Gaps let warm air escape, so take time to fit insulation properly.
-
No compression of insulation materials, as this destroys their effectiveness. Fluffed-up materials work better than squashed ones.
-
Air tightness means sealing gaps and preventing air pathways. This isn’t the same as trapping moisture, it’s about stopping draughts.
-
Ventilation needs to be maintained where required. Some cabins need breathing room, others benefit from controlled mechanical ventilation.
-
Support of insulation throughout its lifespan prevents sagging and settling that degrades performance.
If you’re hiring professionals, ask them to explain what they’re doing and why. Watch them work and ask questions if something doesn’t look right. Professional installation typically offers better results because they have experience with tricky details and know how to avoid common mistakes.
The difference between adequate insulation and exceptional insulation often comes down to attention to detail during installation. Those small gaps and compressed bits add up to significant heat loss.
One thing many people overlook is thermal bridging. This is where heat travels through conductive materials like studs or rafters that aren’t insulated. Good installation addresses this by wrapping insulation around these elements where possible, or using insulation materials that bridge thermal gaps more effectively than others.
Timing matters too. If you’re doing this yourself, don’t rush. Work in sections so you can focus properly. If you’re hiring professionals, ask how long they estimate the work will take and why.
Pro tip: Take photographs and video during installation showing the insulation thickness, coverage, and how it’s fitted around services so you have documentation of the work completed, which proves invaluable if you ever need to make warranty claims or sell the cabin later.
Step 5: Seal gaps and verify insulation performance
Your insulation is now installed, but the work isn’t finished yet. Sealing gaps and verifying that everything is performing properly ensures your investment actually delivers the comfort and energy savings you’ve paid for. This step separates good insulation jobs from exceptional ones.
Start by walking through your cabin and looking for any obvious gaps or voids around your insulation. These might be where materials didn’t fit perfectly, around pipes or wiring, or where you’ve cut insulation to fit around awkward shapes. Gaps are where warm air escapes, so finding and sealing them makes a genuine difference to performance. Use appropriate sealants depending on what you’re dealing with. Silicone caulk works well in many situations, whilst expanding foam is useful for larger gaps. For gaps around pipes, foam strips or specialist pipe insulation can work effectively. The key principle is that plugging gaps and avoiding voids around insulation materials significantly reduces thermal performance loss.
When sealing gaps, work systematically through each area you’ve insulated. Start at the top and work downwards so any drips from sealants don’t land on areas you’ve already finished. Around electrical outlets and switches, be careful not to block ventilation holes or create fire hazards. If you’re unsure about sealing near electrical work, get a qualified electrician to check it over. Pay particular attention to corners and junctions where different materials meet, as these are common places for gaps to hide.
Now comes the verification stage. This is where you check that your insulation is actually working as intended. There are several ways to do this:
-
Feel test involves walking around your cabin and feeling for draughts. Put your hand near walls, windows, and around doors to detect air movement that suggests gaps or poor insulation.
-
Temperature monitoring means checking different rooms over a few days to see if they maintain consistent temperatures. Significant variations suggest insulation problems in those areas.
-
Energy bills tell you the real story. If your heating bills drop noticeably after insulation, you know it’s working. Track your usage for a month or two before and after to get a clear picture.
-
Professional thermal imaging uses specialist equipment to visualize heat loss. A thermographer can identify cold spots and gaps that aren’t obvious to the naked eye. This costs around £150 to £300 depending on cabin size but gives you definitive answers.
If you spot problems during these checks, address them promptly. A small gap found now is far easier to fix than dealing with a cold cabin all winter. Assessing performance using thermal imaging and professional techniques helps identify defects that compromise comfort and energy savings.
One area people often overlook is checking that ventilation still works properly after insulation. If your cabin has air vents, make sure they’re not blocked. If you’ve sealed things very tightly, you might need to install mechanical ventilation to prevent moisture build-up. Open a window occasionally to allow air exchange if you don’t have mechanical ventilation.
The best time to spot and fix insulation problems is immediately after installation, whilst materials are still accessible and any sealants haven’t fully cured.
Don’t be afraid to contact your insulation supplier or installer if you’re concerned about performance. They should be willing to investigate areas you’re worried about and make adjustments if needed. If you hired professionals, most reputable installers offer a period where they’ll come back and address any issues that emerge.
Keep records of your insulation work. Document what materials were used, where they were installed, how thick they are, and any photos showing the work. This information becomes valuable for maintenance planning, selling the cabin later, or making warranty claims if something goes wrong.
Here is a summary of typical issues to watch for when verifying insulation performance in your cabin:
| Area | Common Problem Detected | Impact on Comfort |
|---|---|---|
| Walls | Air leaks at joints | Cold spots, energy loss |
| Roof | Inadequate coverage | Heat loss, condensation |
| Floor | Gaps near skirting | Draughts, cold flooring |
| Around services | Poor sealing | Persistent draughts |
Pro tip: Do a thermal imaging survey about two weeks after installation once sealants have fully cured and temperatures have stabilised; this gives you a clear picture of performance and identifies any problem areas before you settle into using the cabin through winter.
Transform Your Log Cabin Into a Year-Round Sanctuary of Comfort
Insulating your bespoke log cabin effectively is the foundation of achieving cosy warmth and energy efficiency throughout every season. From identifying draughty spots to selecting sustainable insulation materials like sheep’s wool or mycelium, every step requires careful planning and expert guidance. Don’t let poor preparation or guessing cost you time, money, and comfort. Our selection of garden log cabins at Log Cabin Kits lets you start with quality bespoke builds designed to work seamlessly with tailored insulation solutions.

Take control of your cabin’s comfort now by exploring our range of custom log cabins engineered for optimum thermal performance. Visit Log Cabin Kits to find your perfect fit and discover how expert craftsmanship combined with smart insulation planning ensures warmth and durability for years. Act today to upgrade your outdoor retreat with the peace of mind that comes from a well-insulated, professionally designed cabin.
Frequently Asked Questions
How do I assess my log cabin’s insulation needs?
To assess your log cabin’s insulation needs, examine areas where draughts or temperature changes occur, such as corners, windows, and the roof. Walk around your cabin on a cold day, noting where heat escapes, and document any structural issues like gaps or visible rot.
What insulation materials are suitable for a log cabin?
Suitable insulation materials for a log cabin include natural options like sheep’s wool, hemp, cellulose, and mycelium, which work well with timber structures. Choose materials based on your budget and whether you prefer DIY installation or professional help.
What preparation is required before installing insulation in my log cabin?
Before installing insulation, clear the cabin of furniture and fixtures for easy access, and inspect all surfaces for dampness, rot, or structural damage. Ensure surfaces are clean and dry to help the insulation perform effectively.
How should I install insulation in the walls, floor, and roof of my cabin?
To install insulation, begin with wall insulation, placing it snugly in cavities, then move to the roof, ensuring adequate ventilation space, and finish with floor insulation, securing it between joists. Pay attention to tight fits to prevent heat loss and avoid compressing the materials.
What steps can I take to ensure my insulation is performing effectively?
To ensure your insulation is performing effectively, conduct a thorough check for gaps and draughts, and monitor temperature consistency in different rooms. Consider using thermal imaging to spot cold areas and verify that your insulation is sealing properly after installation.
How can I maintain the insulation in my log cabin over time?
Maintain the insulation in your log cabin by periodically checking for signs of moisture build-up or sagging materials. Address any gaps or issues immediately and consider re-evaluating your insulation’s effectiveness after a few seasons of use.