
Winter use garden room: is it warm enough for year-round comfort?
Yes, you can use a garden room right through a British winter, but only if it’s built for it. Get the specification wrong and you’ll spend December huddled by a heater watching your breath fog up. Get it right, and your garden room becomes the warmest room in the house.
The difference comes down to five things working together, not one clever gadget:
- Walls, floor and roof insulated to sensible U-values
- A continuous, taped vapour control layer (VCL) with no gaps
- Proper ventilation to stop trapped moisture rotting the timber
- Heating suited to how often you’ll actually use the room
- Draught-free glazing and doors that don’t leak heat at the edges
One more thing worth knowing before you start: if you’re planning to sleep in your garden room, or use it as a self-contained annexe, Building Regulations kick in regardless of size. That changes the project from a weekend upgrade into something you need to plan properly.
Key Takeaways
A winter-ready garden room needs continuous insulation, a taped vapour control layer, adequate ventilation, and heating matched to actual use, not one of these alone.
| Point | Details |
|---|---|
| Insulation comes first | Fit walls, floor and roof insulation before choosing a heater, since a warmer building needs less heat to run. |
| Seal the vapour control layer | Tape every VCL joint and route cabling through a service void, never through the membrane itself. |
| Ventilate to prevent rot | Aim for around 0.5 air changes per hour using trickle vents plus an extract fan for moisture spikes. |
| Check your legal position early | Sleeping use or adding plumbing can trigger Building Regulations regardless of the room’s size. |
| Choose Logcabinkits for a proper spec | Our double skin log cabins and bespoke sizing let you match insulation and wall thickness to how you’ll actually use the room. |
Table of Contents
- Will your current garden room cope with a UK winter?
- How do you insulate walls, floors and roofs for winter use?
- What’s the best heating option for a garden room in winter?
- Why does ventilation matter as much as insulation?
- Do you need double glazing for a winter garden room?
- What building regulations apply to a winter-use garden room?
- What does it cost to insulate and heat a garden room properly?
- How do you keep a garden room in good shape through winter?
- How does Logcabinkits build for genuine winter use?
- What the winter-proofing conversation gets wrong
- Ready to build a garden room that works all year?
- Frequently asked questions
- Sources
Will your current garden room cope with a UK winter?
Before you spend a penny on insulation or heating, work out where you’re starting from. Grab a tape measure and answer three questions honestly.
- Measure the floor area and decide how you’ll use it. A home office needs to be warm for eight hours a day. A hobby room might only need heat at weekends. Sleeping accommodation is a different category entirely and brings Building Regulations into play.
- Check what’s actually in your walls. Tap the inside wall. If it sounds hollow with no give, you likely have single-skin timber with little or no insulation. If there’s a firmer, layered feel, you may already have twin-wall or insulated construction, though you’ll want to confirm whether a vapour control layer is present.
- Run through this pass or fail list:
- No draughts around doors or windows? Pass. Feel cold air at the edges? Fail, draught-proof first.
- Walls and roof insulated to a sensible thickness? Pass. Bare timber or thin foam only? Fail, insulate before heating.
- No condensation on the inside of windows or walls in cold weather? Pass. Damp patches or black mould spots? Fail, sort ventilation and vapour control immediately.
- Existing heating warms the room within 30 minutes? Pass. Heater runs constantly and still feels cold? Fail, the building is losing heat faster than you can add it.
Fail more than one of these and you’re better off treating this as a proper upgrade project rather than a quick fix.
How do you insulate walls, floors and roofs for winter use?
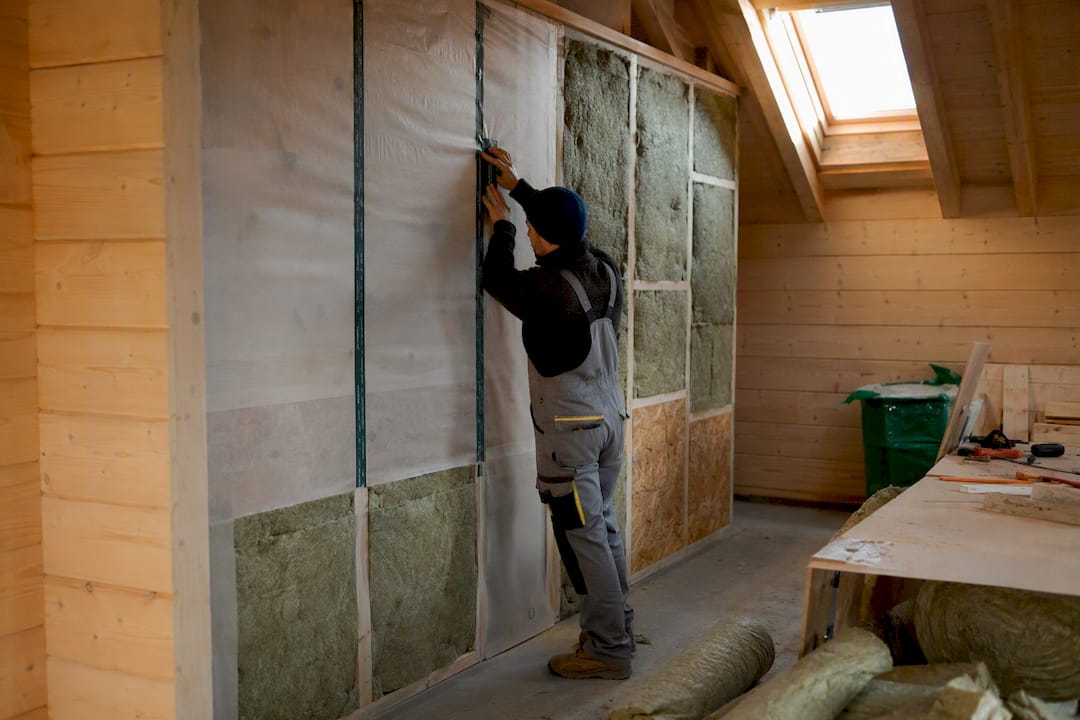
Insulation only works if it’s installed in the right order, with the right materials, and without gaps that let heat sneak out. Getting the layering wrong can actually make condensation worse, not better.
The standard build-up, working from outside to inside, runs like this: breathable membrane, structural sheathing, timber stud frame, insulation packed between and often over the studs, a taped vapour control layer, then your internal wall lining. Each layer has a job. Miss one and moisture finds a way to sit somewhere it shouldn’t.
Choosing the right insulation material
For walls and roofs, you’re mostly choosing between two families of insulation:
- Rigid PIR boards give you the best thermal performance for the least thickness, which matters in a garden room where wall cavities are often narrow. PIR boards paired with a proper VCL are a practical route to hitting sensible U-values without eating into your internal floor space.
- Natural fibre insulation, such as sheep’s wool or wood fibre, handles moisture more gently and helps regulate humidity, which makes it a good fit for a room that’s used daily rather than occasionally heated. It’s usually thicker for the same thermal performance, so it suits larger cabins better than compact ones.
For a full breakdown of how these compare on cost and performance, our guide to the best insulation types for UK garden buildings goes into more detail, and our U-value explainer is worth a read if the numbers feel unfamiliar.
Floors and roofs need their own approach
A raised timber floor with a ventilated void underneath keeps damp ground moisture away from your insulation, with the VCL sitting on the warm side, just under the floor covering. An insulated slab works too, but the detailing around the edges matters more, since that’s where cold bridges most easily creep in.
Roofs are where a lot of DIY jobs go wrong. A warm roof build, with continuous insulation sitting above the structural deck, performs far better than insulation squeezed between rafters. If you’ve got rooflights, they need careful detailing around the edges, and flat roofs with non-breathable coverings like EPDM need a ventilated gap above the insulation, roughly 50mm, with ventilation at the eaves so moisture doesn’t get trapped under the deck.
Thermal bridging is the quiet killer of insulation performance. It happens wherever insulation is interrupted, at corners, around windows, or where cables punch straight through a vapour barrier. Continuous insulation and careful detailing around these junctions stop cold spots forming, which is exactly where condensation likes to gather.
Pro Tip: Run your electrical cabling through a battened service void on the warm side of the vapour control layer, never through it. Punching holes in a VCL for sockets and switches is one of the most common mistakes we see, and it undoes a lot of the good work the insulation is doing.
If you’re starting from an existing cabin, our guide on taking a log cabin from summer use to a year-round garden room walks through the upgrade path in more depth.
What’s the best heating option for a garden room in winter?
The right heater depends entirely on how often you’ll be in the room and how well it’s insulated. Choosing a system before you’ve sorted the insulation is one of the most expensive mistakes people make.
For occasional use, electric panel heaters or oil-filled radiators are the simplest option. No installation fuss, no flue, and you can move them if you rearrange the room. Pair one with a thermostat and a timer and you’ll only heat the room when someone’s actually in it, rather than burning electricity all day for an empty space.
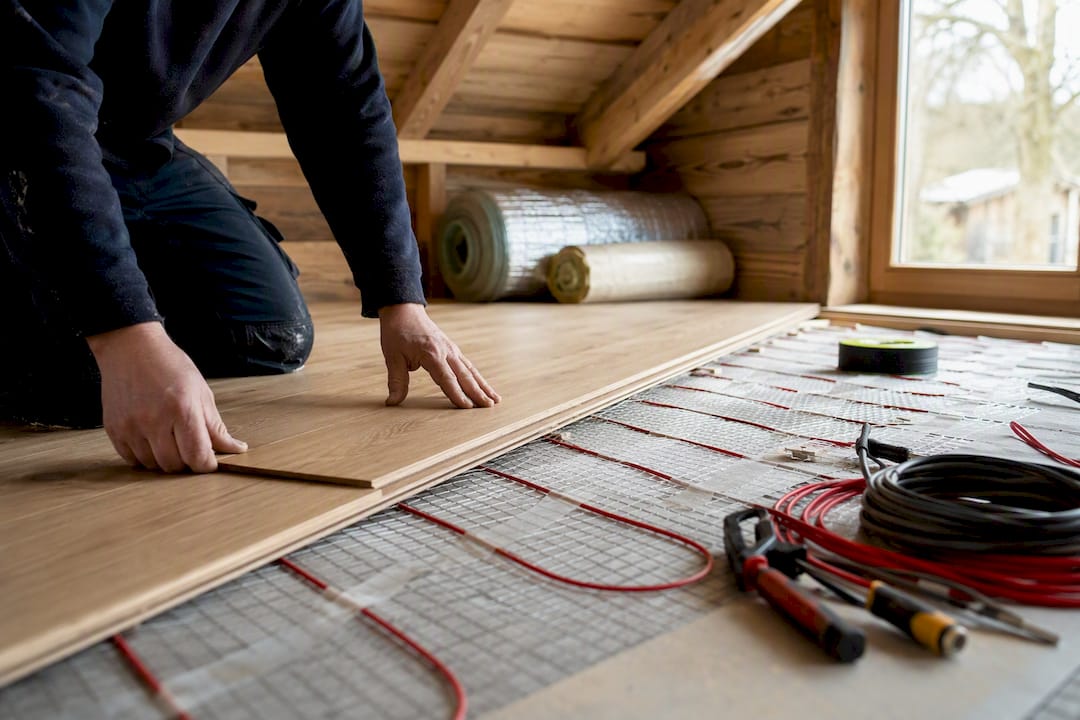
For daily use, electric underfloor heating gives a more even warmth than a single heater blasting from one corner. It works well under most floor coverings, though it’s worth checking compatibility before you commit, and it’s far easier to fit during a build or refit than retrofitted later.
For a cabin used most days through winter, an air source heat pump or mini-split system is worth the higher upfront cost. Running costs are lower than direct electric heating, but only if the building is well insulated first. Fit one of these in a leaky, uninsulated room and you’re throwing money at a system that can’t do its job.
For a real fireside feel, a woodburning stove brings genuine warmth and atmosphere, but it comes with strings attached. You’ll need a compliant flue, a proper hearth, and to check your local smoke control area rules before fitting one. Ventilation also has to allow for combustion air, which is a different requirement to the general ventilation your room already needs. Our fire safety guide for garden cabins covers the practical checks worth doing first.
Whatever you choose, proper insulation combined with the right heating and ventilation is what actually makes a garden room usable year-round in the UK climate, not the heater alone. A humidity-aware thermostat is a smart addition too. It nudges the heating on before condensation has a chance to form, rather than reacting after the windows have already misted up.
- Electric panel heaters: low cost, flexible, best for occasional use
- Underfloor heating: even warmth, best fitted during a build
- Woodburning stove: atmosphere and heat, but needs flue and smoke control checks
- Air source heat pump: lower running costs, but only pays off in a well-insulated room
Why does ventilation matter as much as insulation?
Seal a room up tight and insulate it well, and you’ve solved half the problem. The other half is making sure moisture has somewhere to go. Get this wrong and you’ll trade cold for damp, which is arguably worse for the building’s long-term health.
The golden rule is simple to say and easy to get wrong in practice: breathable on the outside, sealed on the inside. Warm, moist air from breathing, cooking, or just being alive tries to push through your walls towards the cold outside. A taped VCL on the warm side stops it getting into the insulation, where it would condense and eventually cause rot.
Getting the VCL right matters more than people expect. Every joint needs taping, every penetration needs sealing, and cabling should run in a service void rather than through the membrane itself. Skipping the taping step is one of the most common reasons DIY insulation jobs develop damp within a year or two.
On the ventilation side, you’re aiming for roughly 0.5 air changes per hour, which sounds technical but is genuinely modest to achieve. Trickle vents built into window frames handle background ventilation, and a small extract fan deals with sudden moisture spikes, like when three people are in the room breathing and chatting for an evening.
- Trickle vents for constant background airflow
- Extract fan for moisture spikes (showering, cooking, a full room)
- Taped VCL joints with no unsealed penetrations
- Service void for cabling, never through the membrane
Pro Tip: If your garden room doubles as a shower room or has any plumbed water use, treat ventilation as a priority, not an afterthought. A simple office needs far less airflow than a room generating steam.
Our guide to ventilation in garden rooms covers the mechanical options in more depth if you want to go further than trickle vents and a fan.
Do you need double glazing for a winter garden room?
Windows and doors are usually where the most heat escapes, often more than the walls. A well-insulated wall with a cheap single-glazed window is like wearing a thick coat with the zip undone.
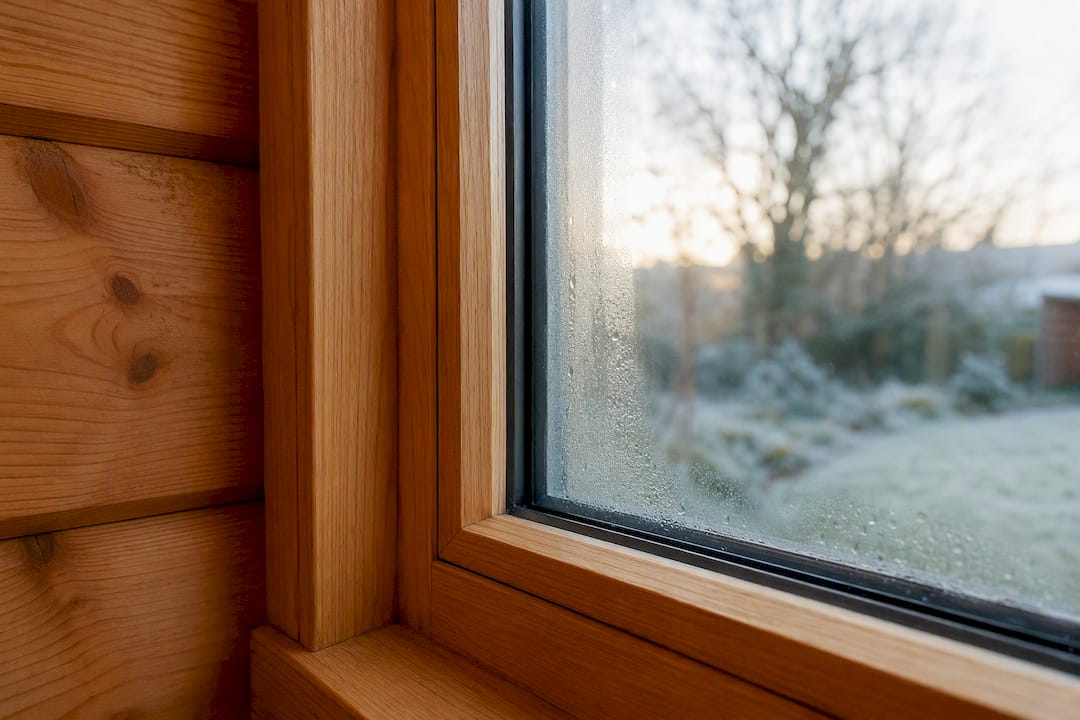
Double glazing with a low-E coating is the sensible baseline for any garden room you plan to use through winter. Low-E glass reflects heat back into the room rather than letting it escape through the glass, and it makes a genuine difference on a frosty morning.
Doors matter just as much as windows. An insulated composite door, or a solid timber door that’s properly sealed, holds heat far better than a thin, hollow door with gaps around the frame. Pay attention to the threshold too. A cheap draught strip along the bottom of the door can stop more heat loss than you’d think for the price.
If your garden room has a large glazed wall, and many contemporary designs do, condensation at the reveals (the edges around the frame) is worth watching. Thermal blinds or curtains help retain heat at night, and in a really exposed spot, secondary glazing is worth considering if you can’t justify replacing the whole window.
Before you spend money on anything else, work through these draught checks:
- Run a hand around door and window frames on a cold day to feel for cold air leaking in
- Replace worn or perished draught strips, they’re cheap and take minutes
- Check letterbox-style gaps or old vent covers that were never sealed properly
- If a window frame has swollen, warped, or rotted, patching it is a waste of time, replace it
What building regulations apply to a winter-use garden room?
The moment you decide to sleep in your garden room, the legal picture changes. Building Regulations apply to any structure used as a bedroom or annexe, regardless of its floor area, and Permitted Development rights generally cover uses incidental to the house, not permanent living space.
Size matters too, though in a different way. Broadly speaking, garden buildings under 15 square metres with no sleeping accommodation sit outside Building Regulations control in most cases. Between 15 and 30 square metres, rules tighten depending on proximity to boundaries. Above that, or with any sleeping use, you’re firmly into Building Regulations territory.
Permitted Development Class E sets further limits: single storey only, height restrictions depending on proximity to boundaries, and a cap of 50% coverage of your garden’s usable space. It specifically excludes buildings used for primary living accommodation, which rules out kitchens or bedrooms without extra approval.
A few things trigger extra scrutiny beyond size and sleeping use:
- Adding plumbing (a shower room, a kitchenette) usually needs Building Control involvement
- Fixed heating systems, particularly anything with a flue, need checking against Part L and Part F guidance
- Conservation areas and properties with an Article 4 direction often have tighter local rules than the national default
If you’re planning a larger, multi-room build, our guide to multi-room log cabin planning permission rules covers the detail for bigger projects.
Before you start any winterising work, check with your local authority on:
- Whether your intended use (sleeping, plumbing, fixed heating) changes your building’s regulatory status
- Whether your property sits in a conservation area or has an Article 4 direction
- Whether the size of your existing or planned building already exceeds Permitted Development limits
What does it cost to insulate and heat a garden room properly?
Budgets vary a lot depending on the size of your room and what state it’s currently in, but there’s a sensible order to spend your money in.
Insulating a typical garden room properly, walls, floor and roof combined, tends to fall somewhere between £1,500 and £4,000, depending on the size of the room and the materials chosen. Heating costs sit on top of that: a couple of electric panel heaters might cost some hundreds of pounds fitted, while a heat pump installation runs considerably higher, though it pays back over time through lower running costs.
Here’s the thing that surprises a lot of people: insulation almost always pays for itself faster than a fancier heater does. A well-insulated room needs a smaller, cheaper heater to keep it warm, and proper insulation can reduce heating demand compared with an unheated or poorly specified room, which is where the real savings show up over a winter.
If your budget is tight, work through these priorities in order:
- Stop the draughts first. It’s the cheapest fix and gives an immediate, noticeable improvement.
- Insulate the floor next. Cold rises from beneath more than people expect, especially with a raised timber floor.
- Insulate roof and walls. This is the bigger job, but it’s what makes the room genuinely warm rather than just draught-free.
- Upgrade heating and ventilation last, once the building itself is holding heat properly.
For anything beyond basic insulation boards, particularly flue installations or major structural changes, hiring a professional is worth the cost. Certification for gas or solid fuel appliances, and Building Control sign-off where required, typically adds a few hundred pounds to a project but protects you if you ever sell the property.
How do you keep a garden room in good shape through winter?
A garden room that’s well built still needs a bit of looking after, especially once the weather turns properly cold and wet. None of this takes long, but skipping it is how small problems become expensive ones.
- Check the outside in autumn. Look at cladding for any signs of the timber treatment wearing thin, check roof membranes and flashings for gaps, and clear gutters and downpipes before the leaves properly fall.
- Watch the inside for early warning signs. Condensation on windows now and then is normal. Persistent damp patches, a musty smell, or black spotting on walls is not, and it usually means ventilation or vapour control needs attention.
- Service your heater before the cold really sets in. A quick check now avoids a breakdown on the coldest night of the year.
- Fix small things immediately. A loose seal, a gap in a draught strip, a flashing that’s lifted slightly, these take minutes to sort and prevent much bigger repairs later.
- Call in a tradesperson for anything structural. Rot, ongoing damp that won’t clear, or flue problems on a woodburner are not DIY jobs. Catching them early is far cheaper than catching them late.
- Store furniture sensibly. Keep fabric-covered pieces away from exterior walls where cold spots are more likely, and avoid stacking boxes directly against walls where airflow can’t reach.
Our UK climate guide for log cabins covers seasonal maintenance in more depth if you want a fuller checklist.
How does Logcabinkits build for genuine winter use?
Martin, who leads on cabin specification at Logcabinkits, has spent years working through exactly this problem with customers: how do you take a standard garden building and make it genuinely liveable through a British winter, without over-specifying and wasting money?
The short answer is that it starts with the wall build, not the heater. Our double skin log cabins use twin-wall construction with insulation between the layers, which gets you most of the way to a proper U-value before you’ve even thought about a heat source. From there, wall thickness options and bespoke sizing mean the specification can be matched to how the room will actually be used, an occasional studio needs less than a daily home office.
A typical upgrade path we walk customers through looks like this:
- Start with the intended use (occasional, daily, or year-round) to set the insulation target
- Choose wall thickness and insulation type to suit that target
- Confirm glazing spec and door detailing to match
- Add heating sized to the finished building, not guessed beforehand
Our garden log cabins range covers this full spec conversation, and it’s worth having before you order rather than after.
What the winter-proofing conversation gets wrong
Most advice on this topic treats insulation as the whole answer, when it’s really the vapour control layer and ventilation that decide whether a build lasts. I’ve seen plenty of well-insulated garden rooms develop damp within two winters, not because the insulation was poor, but because nobody taped the joints or thought about where the moist air was supposed to go.
The conventional advice also tends to skip past Permitted Development limits far too quickly, as if a garden room is automatically exempt from planning rules because it’s small. It isn’t, particularly the moment sleeping use or plumbing enters the picture. That’s worth checking before you spend a penny on insulation boards.
If you’re working to a limited budget, prioritise draught-proofing and floor insulation before you even think about a heat pump. A cheap heater in a well-sealed room outperforms an expensive one in a leaky building, every single time.
Ready to build a garden room that works all year?
If you’ve read this far, you already know that winter-proofing an existing building means retrofitting insulation, vapour control and ventilation into a structure that wasn’t necessarily designed for it, which is fiddly, and sometimes involves undoing work to do it properly. Logcabinkits takes a different route: build the specification in from the start, so there’s nothing to retrofit later.

Our garden log cabins range comes with double-skin wall options and a choice of wall thicknesses, so you can specify the insulation level to match how you’ll actually use the room, whether that’s a daily office or an occasional garden pavilion. If your needs don’t fit the standard range, our bespoke cabin design service lets you adjust dimensions, glazing, and layout to suit. For larger households wanting separate zones under one roof, our multi-room log cabins give you that flexibility without compromising on wall build-up.
Not sure which spec fits your garden and your budget? Try the cabin selection wizard to find a starting point, or get in touch for a bespoke quote built around genuine year-round use.
Frequently asked questions
Can you really live in a garden room through a British winter? Yes, provided it’s insulated to a sensible U-value, has a sealed vapour control layer, adequate ventilation, and heating sized to the room. A basic, uninsulated timber building will struggle badly once temperatures drop.
What’s the minimum insulation needed for a winter garden room? There’s no single legal minimum for most garden rooms, since many fall outside Building Regulations by size. Good practice, though, points to rigid PIR boards or natural fibre insulation thick enough to bring walls and roof to a reasonable U-value, paired with a taped VCL.
Do I need planning permission to winterise my garden room? Usually not for insulation and heating alone, but adding sleeping accommodation, plumbing, or exceeding Permitted Development size limits changes that. Check with your local authority before starting.
How much does it cost to make a garden room warm in winter? Insulating a typical garden room properly tends to cost between £1,500 and £4,000, with heating costs on top depending on the system chosen. Insulating first, then choosing heating, is nearly always the cheaper route overall.
What heating is cheapest to run in a garden room? For occasional use, electric panel heaters with a timer are the cheapest to install. For daily use in a well-insulated room, an air source heat pump costs more upfront but is usually cheaper to run over a winter.
Sources
- When does a garden room require building regulations? - Wood Create
- Gov
- Garden Room Insulation for Year‑Round Use | Axiom Eco Homes
- Insulating a garden room, shed or van: a complete guide