

Blog

You’ve invested in a beautiful garden cabin for leisure or growing your favourite plants, but without proper weatherproofing, the UK’s unpredictable climate can wreak havoc on your structure. Rain, humidity, and temperature swings threaten timber integrity, cause condensation, and lead to costly repairs. This guide walks you through essential weatherproofing steps to protect your bespoke garden cabin, ensuring it remains a functional and inviting space for years to come. From understanding weather threats to applying treatments and maintaining seals, you’ll gain practical knowledge to safeguard your outdoor retreat.
Table of Contents
- Key takeaways
- Understanding the challenges of weatherproofing garden cabins
- Preparing your garden cabin for weatherproofing
- Step-by-step guide to weatherproofing your garden cabin
- Maintaining and checking your garden cabin’s weatherproofing
- Explore bespoke garden cabins at Log Cabin Kits
- Frequently asked questions
Key Takeaways
| Point | Details |
|---|---|
| Immediate treatment after installation | Timber should be treated within two days of installation to prevent rapid moisture ingress. |
| Vulnerable points | Focus on corners, joints, roof edge, door thresholds and window frames to stop moisture entry. |
| Adequate ventilation | Ensure adequate ventilation to control humidity and condensation and prevent mould growth. |
| Cladding and sealing | Cladding and sealing around openings are essential to keep water out and extend the cabin’s life. |
| Foundation protection | Foundation should sit on well drained ground with a damp proof membrane between foundation and timber to stop moisture rising. |
Understanding the challenges of weatherproofing garden cabins
The UK climate presents unique challenges for garden cabins. Persistent rainfall saturates untreated timber, whilst UV exposure dries and cracks wood surfaces. Temperature fluctuations cause expansion and contraction, weakening joints and creating gaps for water penetration. Condensation forms inside insulated cabins when warm, moist air meets cold surfaces, leading to mould growth and structural decay.
Timber cabins demand immediate attention after installation. Modular cabins fail without immediate cladding and weatherproofing, as exposed wood absorbs moisture within days of assembly. Kit cabins without protective treatments deteriorate rapidly, with visible warping and discolouration appearing in weeks rather than months.
Common weather threats include:
- Heavy rainfall causing water pooling around foundations
- Wind-driven rain penetrating gaps in cladding or roofing
- Prolonged damp conditions encouraging rot and fungal growth
- Intense summer sun bleaching and splitting untreated timber
- Frost damage expanding moisture trapped in wood fibres
Understanding these risks helps you prioritise protection measures. A garden cabin used for potting plants faces higher humidity than one used as a home office, requiring different ventilation strategies. Bespoke cabins with large windows need extra attention to seal integrity, whilst cabins in exposed locations benefit from additional cladding layers.
“Without proper treatment and cladding, even premium timber cabins show weather damage within the first season. Prevention costs far less than remediation.”
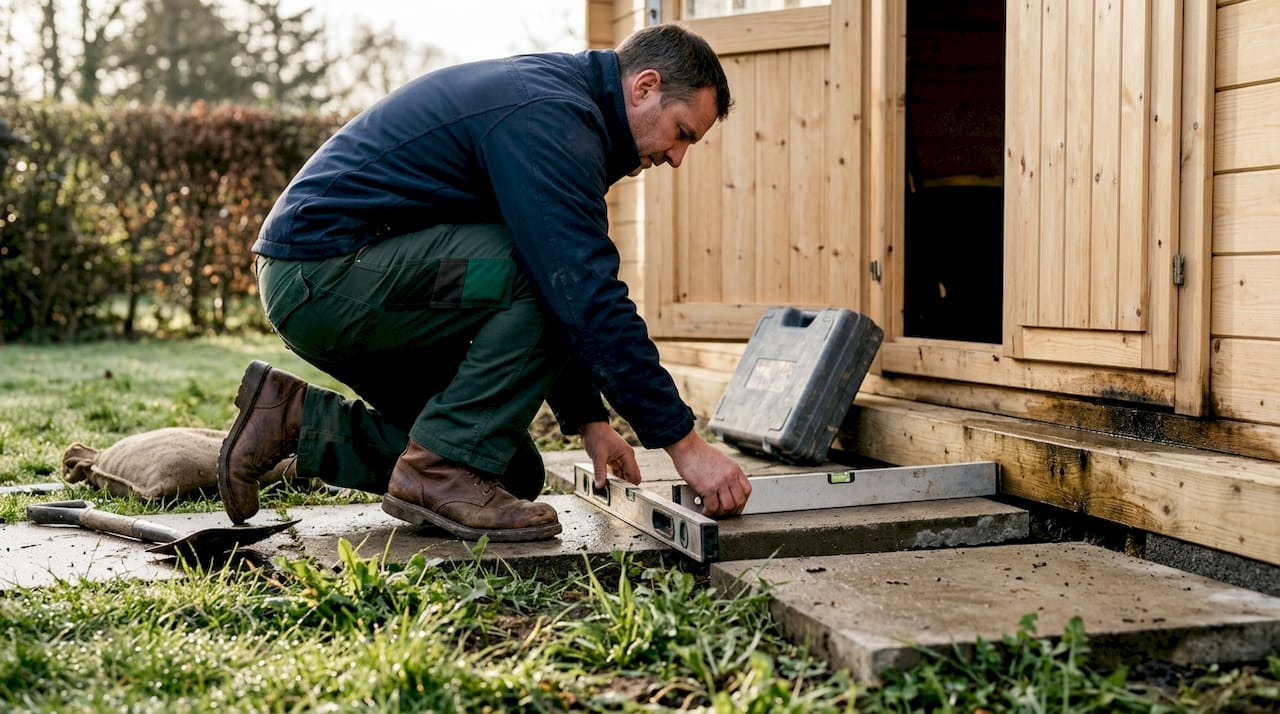
Recognising vulnerability points guides your weatherproofing approach. Corners, joints, and horizontal surfaces collect water, making them priority areas for treatment. The roof edge, door threshold, and window frames require robust sealing to prevent the most common entry points for moisture. Learning to weatherproof a log cabin systematically addresses each vulnerable area, extending your cabin’s functional life significantly.
Preparing your garden cabin for weatherproofing
Proper preparation determines weatherproofing success. Gather materials before starting to ensure continuous application without delays that expose untreated timber. Quality products deliver better protection and require less frequent reapplication, saving time and money over your cabin’s lifetime.
| Material | Purpose | Application Timing |
|---|---|---|
| Wood preservative | Protects against rot and insects | Immediately after assembly |
| External treatment | Seals timber and repels water | Within 48 hours of installation |
| Roofing felt | Creates waterproof roof barrier | During roof construction |
| Cladding boards | Adds protective outer layer | After initial treatment dries |
| Sealant | Fills gaps around openings | After cladding installation |
Essential materials include:
- High-quality wood preservative suitable for external use
- Water-repellent timber treatment with UV protection
- Paintbrushes in various sizes for detailed application
- Roofing felt or membrane rated for garden buildings
- External-grade sealant for windows and doors
- Cladding materials if adding an extra protective layer
Timing matters enormously. Timber absorbs moisture rapidly when freshly cut or assembled, making immediate treatment critical. Apply external wood treatment methods within two days of cabin assembly to prevent moisture ingress. Delaying treatment allows water to penetrate wood fibres, reducing treatment effectiveness and requiring additional coats.
Foundation preparation prevents ground moisture rising into cabin walls. Ensure your base sits on well-drained ground with a damp-proof membrane between foundation and timber. Adequate clearance between soil and cabin floor allows air circulation, reducing humidity buildup underneath the structure.
Pro Tip: Choose microporous treatments that allow timber to breathe whilst repelling water. These products prevent moisture trapping inside wood, reducing rot risk compared to impermeable coatings that seal moisture in.
Weather conditions affect application success. Apply treatments during dry weather with temperatures above 5°C, allowing proper absorption and curing. Avoid treating timber in direct sunlight, as rapid drying prevents deep penetration. Following waterproofing top tips ensures your preparation work delivers maximum protection.
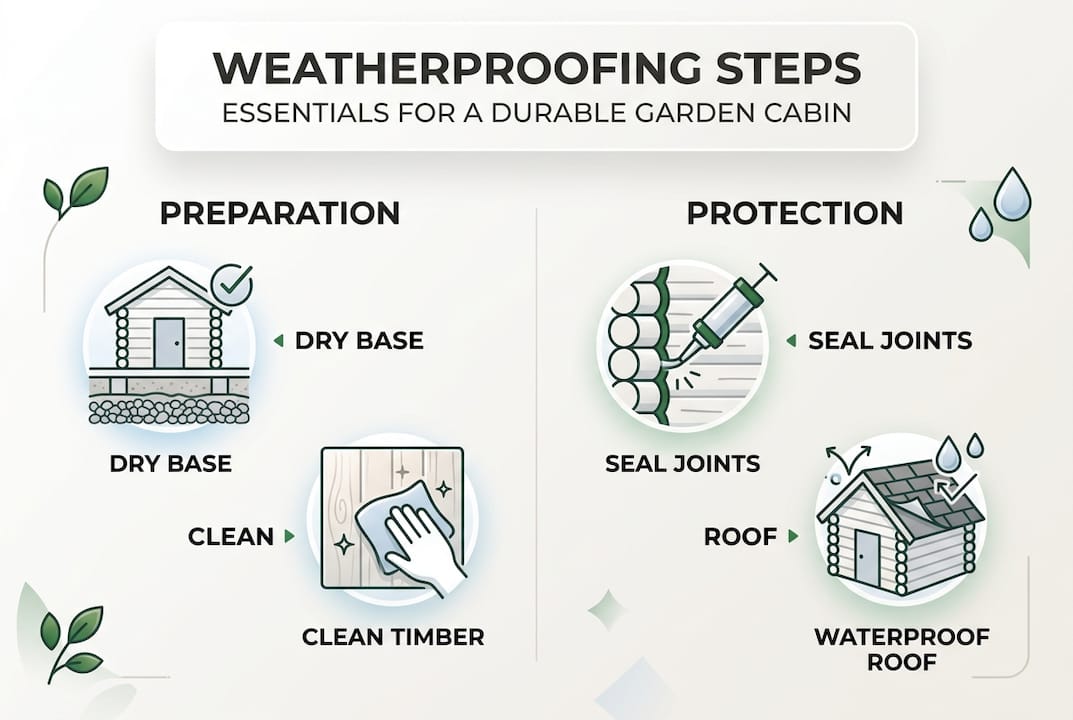
Step-by-step guide to weatherproofing your garden cabin
Systematic application ensures comprehensive protection. Follow these steps sequentially, allowing adequate drying time between stages. Rushing the process compromises effectiveness, whilst methodical work creates lasting weather resistance.
-
Apply base coat treatment. Brush wood preservative onto all external timber surfaces, paying extra attention to end grains where moisture penetrates fastest. Cover every surface, including areas that will be hidden by cladding. Allow 24 hours drying time before proceeding.
-
Add protective topcoat. Apply water-repellent treatment in thin, even coats. Two thin coats provide better protection than one thick application. Work systematically from top to bottom, ensuring complete coverage without pooling or runs.
-
Install weatherproof roofing. Lay roofing felt overlapping each strip by at least 50mm. Secure with galvanised nails or staples, working from eaves to ridge. Add ridge capping to seal the apex. Consider upgrading to EPDM rubber membrane for superior longevity.
-
Fit cladding if required. Install horizontal or vertical cladding boards with proper overlaps to shed water. Leave expansion gaps at corners and edges. Treat cladding boards before installation for complete protection.
-
Seal all openings. Apply external-grade sealant around window frames, door frames, and any penetrations for utilities. Tool sealant smooth to ensure water runs off rather than pooling. Check manufacturer specifications for curing time.
-
Install ventilation systems. Fit air vents near floor level and roof apex to create airflow. Ventilation and dehumidifiers are critical for condensation control in insulated cabins. Adjustable vents allow seasonal control of air exchange rates.
Ventilation deserves special attention. Insulated cabins trap moisture from activities like plant watering or simply from occupants breathing. Without adequate airflow, condensation forms on cold surfaces, particularly windows and corners. Install vents that allow continuous background ventilation whilst excluding rain.
Key ventilation points:
- Low-level vents allow cool air entry
- High-level vents enable warm, moist air escape
- Cross-ventilation prevents stagnant air pockets
- Trickle vents in windows provide adjustable airflow
Pro Tip: Install guttering to channel roof runoff away from cabin foundations. Downpipes directing water at least one metre from walls prevent ground saturation and foundation damage.
Monitor humidity levels inside your cabin, especially if using it for plant cultivation. Maintain indoor humidity below 60% to prevent condensation. Consider winterising your garden cabin with additional measures if you plan year-round use. Proper garden cabin insulation combined with ventilation creates a stable internal environment resistant to weather extremes.
Maintaining and checking your garden cabin’s weatherproofing
Ongoing maintenance preserves weatherproofing effectiveness. Regular inspections catch problems early, preventing minor issues from becoming structural failures. Establish a seasonal checking routine to maintain your cabin’s protection year-round.
Inspection priorities include:
- Roof condition and felt integrity
- Gutter clearance and downpipe function
- External treatment condition and coverage
- Sealant flexibility around openings
- Wood condition for signs of rot or splitting
- Internal surfaces for condensation or mould
Roof maintenance prevents the most common weatherproofing failures. Clear gutters quarterly to prevent overflow that saturates walls. Check roofing felt for tears, lifting edges, or punctures. Replace damaged sections promptly, as small holes allow significant water ingress. Inspect flashing around chimneys or roof penetrations, resealing if gaps appear.
| Maintenance Task | Frequency | Signs of Needed Attention |
|---|---|---|
| Gutter cleaning | Quarterly | Overflow during rain |
| Treatment recoat | Every 2-3 years | Fading, water absorption |
| Sealant check | Annually | Cracks, gaps, hardening |
| Ventilation clear | Bi-annually | Condensation increase |
| Timber inspection | Seasonally | Discolouration, soft spots |
Wood condition reveals treatment effectiveness. Healthy treated timber sheds water, showing beading on the surface. If water soaks in, reapply treatment promptly. Check for soft spots indicating rot, particularly near ground level and around door frames. Address rot immediately by removing affected timber and treating surrounding areas.
Monitor humidity year-round with ventilation and dehumidifiers to prevent condensation damage. Insulated cabins used in winter require particular attention, as temperature differences between inside and outside create ideal condensation conditions. A hygrometer helps track internal humidity, alerting you to ventilation inadequacy before visible problems develop.
“Year-round ventilation matters more than most owners realise. Even unused cabins benefit from continuous airflow preventing moisture buildup and preserving timber condition.”
Treatment reapplication timing depends on product quality and exposure. South-facing walls receive more UV damage, requiring more frequent attention. Horizontal surfaces like window sills weather faster than vertical walls. Inspect annually and recoat when water absorption increases or colour fades noticeably.
Common troubleshooting:
- Persistent condensation: Increase ventilation, reduce internal moisture sources, check insulation continuity
- Water stains on walls: Inspect roof above affected area, check gutter overflow, examine external treatment
- Door sticking: Check for wood swelling from moisture absorption, improve ventilation, reapply treatment
- Musty smell: Indicates mould growth from excess humidity, increase airflow, check for leaks
Follow roof maintenance tips to address the most critical weatherproofing element. A well-maintained roof protects everything below. If using your cabin for gardening and potting, implement extra humidity control measures, as plant watering and soil moisture significantly increase internal moisture levels.

Explore bespoke garden cabins at Log Cabin Kits
Protecting your garden cabin investment starts with quality construction designed for UK weather. Log Cabin Kits specialises in bespoke garden cabins engineered for durability, with customisation options addressing your specific weatherproofing needs. Whether you need enhanced ventilation for a potting shed or robust insulation for year-round leisure use, expert guidance ensures your cabin specifications match intended purpose.
Explore bespoke cabin design options tailored to your garden’s microclimate and usage requirements. Browse the garden log cabin gallery for inspiration, seeing how others have created weatherproof outdoor spaces. Discuss your vision with specialists who understand timber behaviour and weatherproofing requirements, ensuring your cabin arrives ready for proper protection.
Custom build log cabins offer flexibility in materials, dimensions, and features. Specify treated timber, upgraded roofing, or additional weatherproofing measures during construction rather than retrofitting later. Quality materials and expert craftsmanship provide the foundation for effective weatherproofing, making maintenance easier and extending your cabin’s lifespan significantly.
Frequently asked questions
What is the best way to weatherproof a garden cabin?
Apply wood preservative immediately after assembly, followed by water-repellent treatment within 48 hours. Install quality roofing felt, ensure proper ventilation, and seal all window and door frames with external-grade sealant. Regular maintenance every 2-3 years maintains protection.
How often should I reapply weatherproofing treatment to my cabin?
Reapply external treatments every 2-3 years depending on exposure and product quality. South-facing walls and horizontal surfaces require more frequent attention. Inspect annually and recoat when water no longer beads on the surface.
Can I weatherproof a cabin in winter?
Avoid applying treatments in temperatures below 5°C or during wet weather. Products require dry conditions and moderate temperatures for proper absorption and curing. Plan weatherproofing for spring or autumn when conditions suit application.
What causes condensation in garden cabins?
Condensation forms when warm, moist air contacts cold surfaces. Insufficient ventilation, high internal humidity from activities, and poor insulation contribute. Install adequate ventilation and use dehumidifiers if needed, particularly in insulated cabins.
Do I need planning permission to weatherproof my garden cabin?
Weatherproofing maintenance requires no planning permission. However, adding cladding that significantly changes appearance or increases cabin size might require approval. Check with your local planning authority if making substantial alterations.
How do I prevent rot in my garden cabin?
Ensure proper drainage around foundations, maintain treatment coverage, fix leaks promptly, and provide adequate ventilation. Keep gutters clear and check regularly for water damage. Immediate treatment application after assembly prevents moisture ingress that causes rot.


