
How to soundproof a garden cabin: step-by-step guide
TL;DR:
- Most garden cabins are built with lightweight materials that allow sound to leak easily.
- Effective soundproofing involves sealing gaps, adding insulation, and upgrading windows and doors.
- A DIY soundproofing project costing around £1,200 to £2,500 can significantly reduce noise to suitable levels.
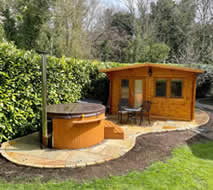
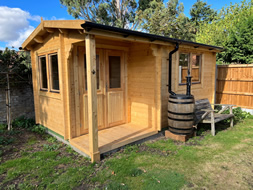
Whether you’re using your garden cabin as a home studio, a quiet office, or a space to practise guitar without the neighbours raising an eyebrow, unwanted noise can quickly ruin the experience. Sound leaks in and out of most standard garden cabins far more easily than people expect. The good news? With the right materials and a methodical approach, you can significantly reduce noise transfer yourself, without spending a fortune or calling in expensive contractors. This guide walks you through everything you need to know, from understanding the basics of sound travel to testing your results.
Table of Contents
- Understanding why sound escapes: basics of garden cabin noise
- What you need: tools and materials for soundproofing
- Step-by-step soundproofing: how to seal and upgrade your cabin
- Spotting common mistakes and verifying results
- Why professional-grade soundproofing is overkill for most cabins
- Create your ideal soundproofed garden cabin
- Frequently asked questions
Key Takeaways
| Point | Details |
|---|---|
| Start with insulation | Proper insulation is the foundation for both sound and heat control in your garden cabin. |
| Seal every gap | Tiny holes around windows, doors, or vents are major culprits for leaking sound. |
| Position matters | Placing your cabin away from fences and neighbours reduces outside noise naturally. |
| Test your results | Use straightforward tests to check that your soundproofing delivers real improvement. |
Understanding why sound escapes: basics of garden cabin noise
Now that you’re aware of common noise frustrations, let’s break down how and where sound is escaping from your garden cabin.
Garden cabins are built for outdoor living and storage, not acoustic performance. Unlike your main house, which has dense brick walls, thick floors, and double-glazed windows as standard, most cabins are constructed with relatively thin timber boards and lightweight roofing. That lack of mass is the core problem. Sound waves pass through thin, light materials far more easily than through dense, heavy ones.
Sound also finds any gap it can. Even a small crack around a door frame, a poorly sealed window edge, or an uninsulated floor cavity can let a surprising amount of noise through. Think of it like water, it always finds the weakest point.
Here are the main routes sound travels through a garden cabin:
- Walls: Thin single-skin timber offers minimal resistance to airborne noise (music, voices, TV)
- Floor: Often uninsulated or laid directly onto a concrete base, allowing both airborne and impact noise to travel
- Roof: Lightweight felt or shingle roofing with no insulation layer above the ceiling boards
- Windows: Single-glazed windows are notoriously poor for sound reduction
- Doors: Standard wooden doors with no seals around the frame create a direct path for noise
- Gaps: Any crack, socket hole, or vent without acoustic treatment acts as an open channel
“UK Approved Document E sets a benchmark of 45 dB airborne sound reduction between dwellings. To put that in context, a drum kit at 110 dB reduced by 50 dB sounds like normal conversation at 60 dB outside.”
That 45 dB benchmark gives you a useful target to aim for. It’s also reassuring to know that soundproofing garden cabins to a meaningful level is genuinely achievable with the right approach, even in a DIY setting.
What you need: tools and materials for soundproofing
Once you understand where noise comes in and escapes, it’s time to choose the right materials for the job.
The market for acoustic materials has grown considerably, and there are now good-quality options at every price point. Here’s a breakdown of what you’ll need for a full cabin soundproofing project.
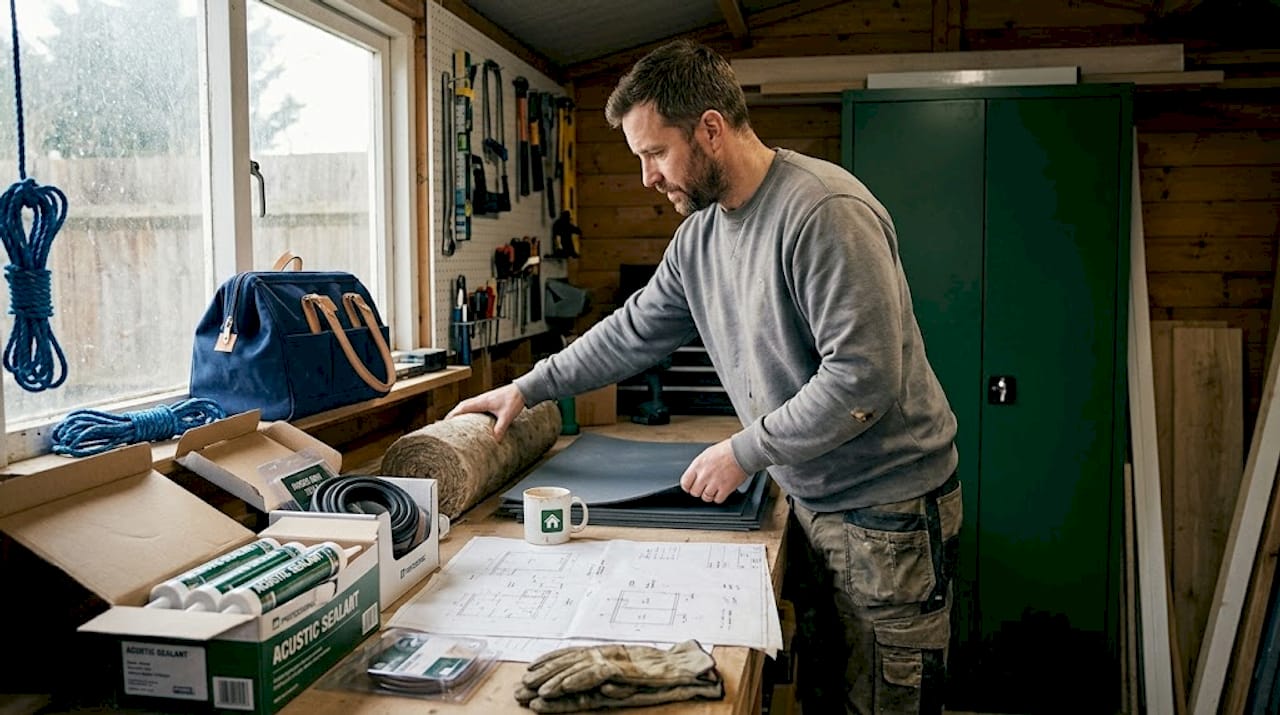
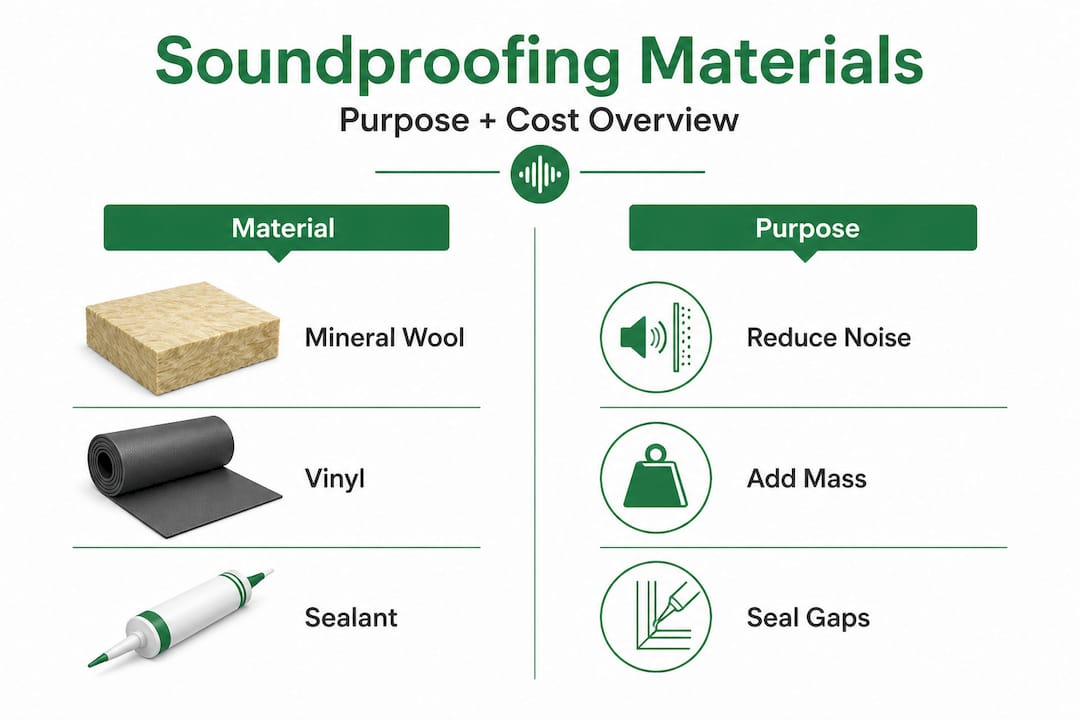
Core soundproofing materials
| Material | Purpose | Approx. cost |
|---|---|---|
| Acoustic mineral wool (e.g. Rockwool) | Wall, floor, and ceiling insulation | £3–£6 per m² |
| Mass loaded vinyl (MLV) | Dense barrier layer for walls and floor | £8–£15 per m² |
| Acoustic sealant / mastic | Sealing gaps around frames, sockets, edges | £5–£10 per tube |
| Resilient bar / acoustic clips | Decoupling internal wall lining from structure | £2–£5 per unit |
| Acoustic plasterboard or OSB | Heavy inner lining to add mass | £10–£20 per sheet |
| Double or secondary glazing | Replacing or upgrading windows | £150–£400 per window |
| Acoustic door seals and threshold strips | Sealing gaps around doors | £20–£50 per door |
| Acoustic vents | Ventilation without sound leakage | £30–£80 per vent |
For best results, combine several of these materials in layers. No single product does the job on its own.
Tools you’ll need
- Tape measure and pencil
- Utility knife and straightedge
- Staple gun (for MLV and insulation)
- Caulk gun (for acoustic sealant)
- Drill and screws
- Spirit level
- Safety gloves and dust mask (essential when cutting mineral wool)
Budget guide
DIY soundproofing costs between £1,200 and £2,500 for a full set of materials, while professional installation ranges from £3,000 to £6,000. A quality acoustic pack averages a 31.65 dB reduction, which brings you close to the UK’s 45 dB guideline when combined with other upgrades.
Pro Tip: Don’t forget to budget for secondary items like acoustic sealant and door seals. These small additions are inexpensive but make a big difference to the overall result.
You’ll also want to consider window upgrades carefully. Noise reduction shutters are worth exploring as an alternative or addition to glazing upgrades, particularly if your cabin faces a noisy road or garden boundary. For wall and ceiling layers, choosing the right insulation materials from the outset saves time and rework later.
Step-by-step soundproofing: how to seal and upgrade your cabin
Armed with the right tools and supplies, you’re ready to start the soundproofing process. Work through these steps in order for the best results.
-
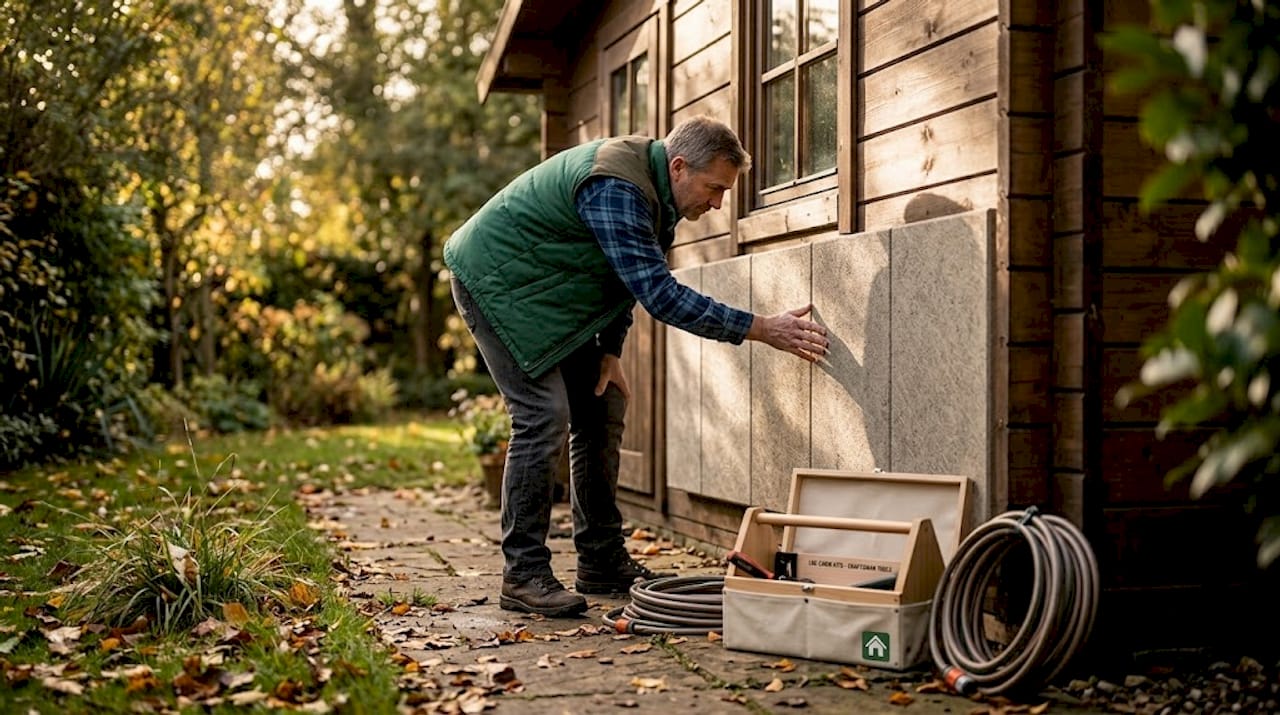
Clear and inspect the cabin. Move all furniture and contents out. Check every wall, floor, ceiling, door, and window for visible gaps, cracks, or thin spots. Mark any problem areas with masking tape.
-
Seal all gaps first. Before adding any insulation, fill every crack, gap, and socket hole with acoustic sealant. Pay particular attention to where walls meet the floor, and around window and door frames. This step is cheap and often overlooked, but it makes a significant impact.
-
Insulate the walls. Remove any existing internal cladding if possible. Fit acoustic mineral wool between the studs, then cover with a layer of mass loaded vinyl before re-lining with heavy plasterboard or OSB board. If you can’t remove the cladding, build a secondary internal stud wall with insulation inside.
-
Insulate the floor. Lift or build up the floor to add a layer of acoustic mineral wool between joists, topped with mass loaded vinyl and a new solid floor surface. This tackles both airborne and impact noise from below.
-
Insulate the ceiling. Add mineral wool between ceiling joists and hang the ceiling boards on resilient bars or acoustic clips rather than fixing them directly to the structure. This “decoupling” method significantly reduces the transmission of sound vibrations.
-
Upgrade windows. Replace single-glazed windows with double-glazed units or add secondary glazing panels on the inside. Even a 100mm air gap between two panes of glass makes a substantial difference to airborne noise.
-
Upgrade doors. Replace hollow-core cabin doors with solid-core options. Fit acoustic threshold strips at the base and compression seals around all four edges of the frame.
-
Install acoustic vents. If your cabin needs ventilation, use purpose-built acoustic vents rather than standard air bricks. Acoustic vents can achieve up to 55 dB reduction while still allowing adequate airflow.
-
Consider cabin placement. Sound drops by 6 dB every time the distance from the source doubles. If you’re planning a new build or can reposition your cabin, placing it as far as possible from boundaries and neighbours will reduce the noise that reaches them without any additional treatment. Thinking carefully about garden cabin placement before installation is one of the simplest wins available to you.
Comparing wall treatment options
| Method | Approx. dB reduction | Cost | DIY-friendly? |
|---|---|---|---|
| Acoustic mineral wool only | 15–20 dB | Low | Yes |
| MLV added to mineral wool | 25–35 dB | Medium | Yes |
| Decoupled stud wall with MLV and plasterboard | 40–50 dB | Higher | With guidance |
| Professional acoustic wall system | 50+ dB | High | No |
If you’re planning the cabin layout at the same time, it’s worth factoring in where equipment or instruments will sit, as corners and hard surfaces can amplify internal sound reflections too.
Pro Tip: Always work from the inside out. Seal gaps, then insulate, then add mass layers. Skipping straight to the heavy materials without sealing first is a common and costly mistake.
Spotting common mistakes and verifying results
Completing the main steps is only part of the battle. It’s just as essential to check for missed details and ensure your cabin truly meets your expectations.
Even well-intentioned DIY soundproofing projects often fall short because of a handful of recurring mistakes. Here’s what to watch out for:
- Leaving gaps around sockets and light fittings. These small holes are a direct path for sound. Fill behind every socket with acoustic sealant and use putty pads behind socket faceplates.
- Forgetting the ceiling. Many people insulate walls and floor but skip the ceiling. Sound travels upward just as easily, especially for low-frequency bass.
- Not sealing the door threshold. A door with no threshold strip at the base is essentially open at the bottom as far as sound is concerned.
- Using the wrong type of insulation. Standard thermal insulation like fibreglass batts performs less well acoustically than dense acoustic mineral wool. The two look similar but behave very differently.
- Not decoupling surfaces. If you fix your internal wall lining directly to the structure, vibrations travel straight through. Resilient bars or acoustic clips break that path.
“A quality acoustic pack averages 31.65 dB reduction, putting a well-executed DIY project well within reach of the 45 dB benchmark.”
Once you’ve finished, test your results properly. Use a free sound meter app on your smartphone, set up a loud music source inside the cabin, then measure the level outside. You’re looking for a difference of at least 30 dB between inside and outside readings. Ideally, 45 dB or more.
You might also notice that good acoustic insulation brings the added benefit of improved thermal performance. That’s because the same materials doing the acoustic work also reduce heat loss significantly. If you want to understand that benefit more, read about how insulation and heat loss are connected in garden cabins.
Set realistic expectations. A typical DIY project in a standard garden cabin will achieve 31 to 45 dB of reduction, which is enough for most uses. A dedicated music practice space, podcast studio, or quiet home office is absolutely achievable at this level.
Why professional-grade soundproofing is overkill for most cabins
After examining the technicalities, it’s important to step back and consider what truly matters for most users.
There’s a tendency in the acoustics industry to push for the highest possible specification. Professional studios spend tens of thousands of pounds on floating floor systems, double-leaf walls, and specialist doors. That level of performance is remarkable, but it solves a problem that most garden cabin owners simply don’t have.
Think about what you’re actually trying to achieve. If you’re working from home, you need enough reduction that a client call doesn’t sound like it’s happening in a garden. If you practise guitar, you want to avoid complaints from next door after 9pm. If you’re using your cabin as a reading room or creative retreat, keeping general road noise at bay is the goal.
For all of these uses, a well-executed DIY project costing between £1,200 and £2,500 in materials will do the job. Spending £6,000 or more on professional installation might push your reduction from 40 dB to 55 dB. In real-world terms, that extra 15 dB is the difference between “neighbours can’t hear you” and “your next-door neighbour’s dog can’t hear you.” For most people, the first outcome is more than enough.
The uncomfortable truth is that the final marginal gains in soundproofing cost a disproportionate amount of money. Beyond a certain point, you’re paying for performance you won’t meaningfully use. Our advice? Spend wisely on the fundamentals, seal everything, layer your materials, and upgrade windows and doors. Then test the result. If it meets your real-world needs, you’re done.
If you do find that your requirements are more demanding, for instance you’re recording professionally or teaching music lessons, then it’s worth revisiting soundproofing for peace with a more targeted brief before committing to a higher spend.
Create your ideal soundproofed garden cabin
With practical steps and caveats in mind, it’s easier than ever to source a garden cabin designed with proper soundproofing potential.
If you’re starting from scratch, the cabin you choose makes a real difference to how effectively you can soundproof it. Thicker walls, quality construction, and a well-designed layout all give you a better starting point before you’ve spent a penny on acoustic materials.

We specialise in garden log cabins built with quality timber and designed to be upgraded. Whether you want a ready-to-go structure or something tailored to your garden and needs, our bespoke log cabins can be specified with thicker wall profiles and features that make soundproofing easier from day one. Browse our range or get in touch to talk through your options. We’re happy to help you find the right cabin for your project.
Frequently asked questions
How much does it cost to soundproof a typical garden cabin in the UK?
DIY soundproofing costs between £1,200 and £2,500 for materials, while professional installation ranges from £3,000 to £6,000, depending on the size of the cabin and specification chosen.
Do I need planning permission or to comply with building regulations to soundproof a garden cabin?
Most garden cabin soundproofing work is internal and doesn’t require planning permission, though it’s always worth checking with your local authority. As a performance target, aim for at least 45 dB airborne sound reduction in line with UK Approved Document E guidelines.
What is the most effective material to start with for cabin soundproofing?
Acoustic mineral wool and mass loaded vinyl are the best starting points, as they tackle both airborne noise and vibration transfer, and can be installed by a competent DIYer without specialist equipment.
Can soundproofing help with thermal insulation too?
Yes, many acoustic upgrades pull double duty on thermal performance. Mineral wool in particular is highly effective at reducing heat loss, and cabin insulation can cut heat loss substantially, keeping your cabin warmer in winter as well as quieter year-round.
How do I know my soundproofing works after installation?
Play music loudly inside the cabin and measure the sound level outside using a free noise meter app. If your project has worked well, the reduction should reach around 50 dB, bringing outside noise down to the level of a normal conversation even when music is playing at high volume inside.