
SIP cabin construction: what it is and how it works
TL;DR:
- SIP cabin construction uses prefabricated panels that combine insulation and structural elements into one unit. It enables quick assembly, with the shell typically built in 3 to 5 days, offering high thermal performance and durability. Proper foundation preparation and careful planning are essential for a successful, energy-efficient cabin build.
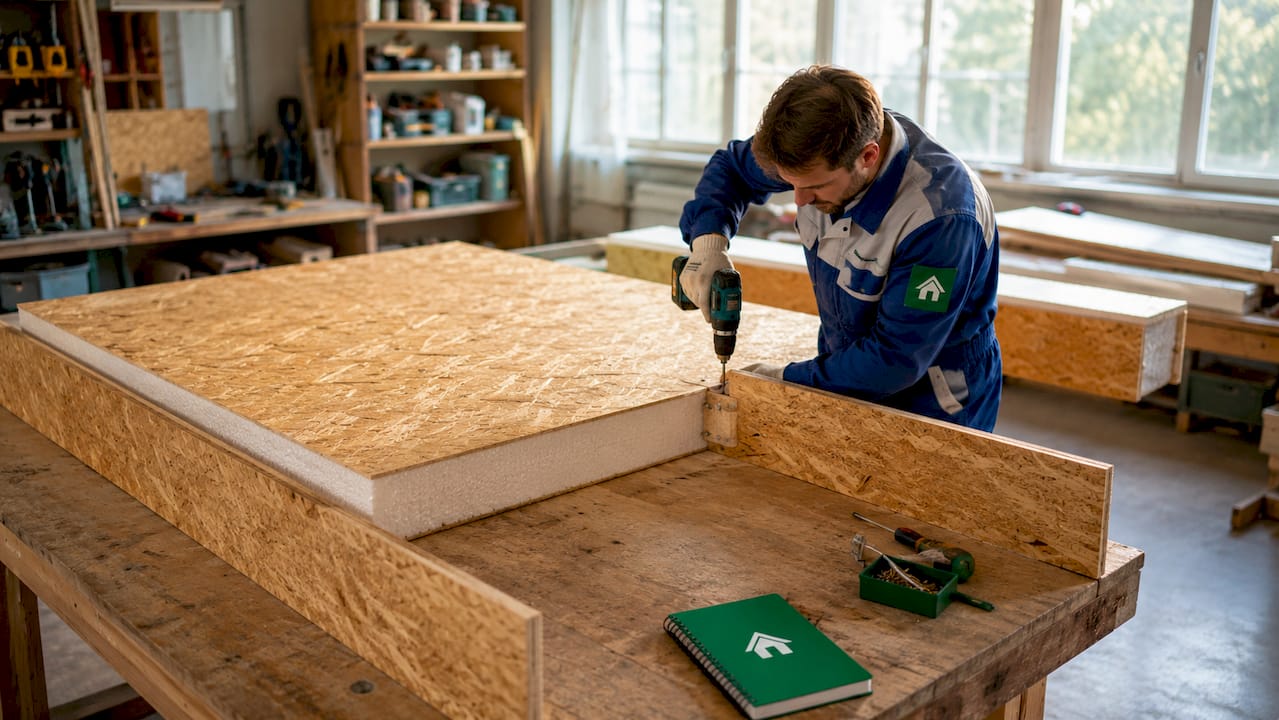
SIP cabin construction is defined as a building method that uses Structural Insulated Panels, precision-made prefabricated units that combine rigid foam insulation with structural engineered facings, typically Oriented Strand Board (OSB), into a single integrated system. Each panel does the job of both a wall frame and insulation layer at once. Panel thicknesses range from 72mm for hobby rooms up to 222mm for high-performance buildings designed for year-round use. That range means SIP construction suits everything from a weekend retreat to a fully habitable garden studio. Logcabinkits works with customers exploring both SIP and traditional timber options to find the right fit for their site and lifestyle.
What is SIP cabin construction and how does it work step by step?
SIP cabin construction follows a clear sequence from design to a finished, insulated shell. Understanding each stage helps you plan your project with confidence and avoid the most common delays.
Step 1: Foundation preparation
Your foundation is the single most important factor in a successful SIP build. A concrete slab offers the most reliable base for a permanent, year-round cabin. It must be level, square, flat, load-bearing, and moisture protected before any panels arrive on site. Timber base foundations are a cost-effective alternative, but they need careful moisture protection and structural stiffness. Incorrect timber base design can cause deflection and panel misalignment over time. Ground screw foundations are popular for speed, but they demand a precisely designed, braced, and stiff frame. If that frame flexes or twists, your SIP shell alignment suffers despite the tight tolerances of the panels themselves.
Pro Tip: Get your foundation frame independently checked for stiffness before panels are delivered. A small correction at this stage costs far less than realigning a partially built shell.
Step 2: CAD drawing and manufacturing
Once your site is confirmed, the design phase begins. A professional CAD drawing phase typically takes 1–2 weeks, followed by at least one week of factory manufacturing. During manufacturing, panels are cut to exact dimensions, openings for windows and doors are pre-formed, and every panel is labelled for on-site sequencing. Factory control means consistent bonding, precise cutting, and quality checks that on-site timber framing simply cannot match.
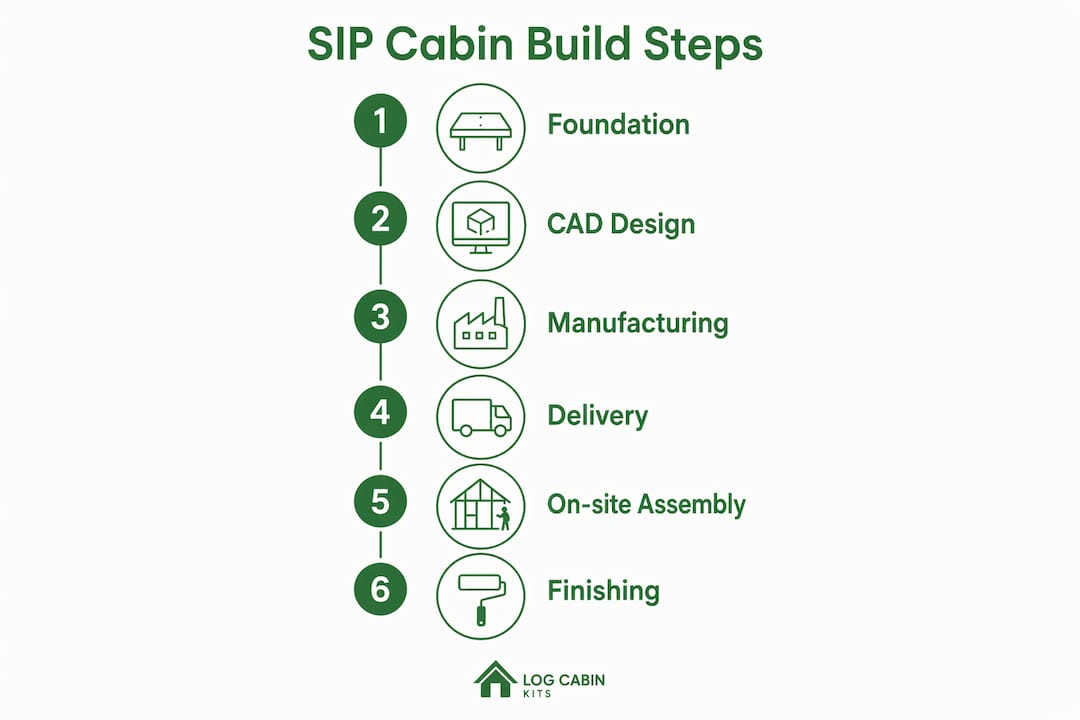
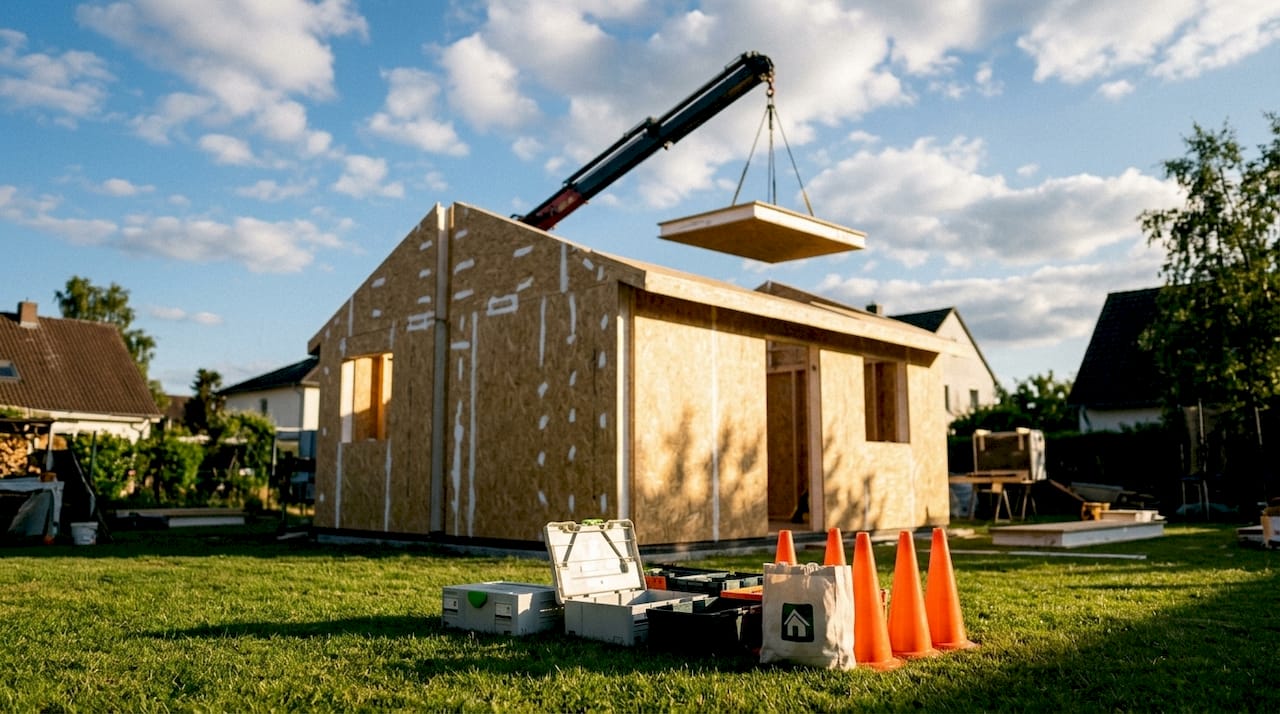
Step 3: On-site assembly
Delivery arrives with labelled panels ready to position in order. The shell assembly typically takes 3–5 days on site. Panels connect using splines and fixings, with joints carefully detailed to maintain a continuous thermal envelope. That speed is roughly 2–3 times faster than a traditional timber frame shell of the same size. You can review a full cabin build timeline to see how SIP assembly fits into a broader project schedule.
What are the benefits of a SIP cabin over a traditional timber cabin?
SIP cabins offer several practical advantages that make them worth serious consideration, particularly if you want a well-insulated, low-maintenance building that goes up quickly.
- Speed of build. Building the SIP shell takes 3–5 days compared to 7–14 days for a traditional timber frame. That shorter programme reduces weather exposure risk and gets you to a weathertight shell faster.
- Superior thermal performance. SIPs combine structure and insulation into a continuous thermal envelope when joints are carefully detailed. This delivers airtightness and energy efficiency that is difficult to replicate with standard timber framing.
- Reduced on-site labour. Pre-cut panels and pre-formed openings mean fewer measurements, fewer cuts, and less room for human error. A smaller crew can erect a SIP shell safely and accurately.
- Strength and durability. The bonded OSB and foam core creates a panel that is structurally rigid and resistant to racking forces. SIP walls perform well under wind and snow loads relevant to UK conditions.
- Sustainability. Factory fabrication reduces material waste significantly. SIP manufacturers typically use sustainably sourced timber for OSB facings, and the insulation core reduces the building’s energy demand over its lifetime.
Once the shell is up, SIP cabins offer a square, insulated structure that allows interior and exterior trades to start simultaneously. That parallel working speeds up overall completion considerably.
What materials and thicknesses do SIP panels come in?
SIP panels consist of OSB facings bonded to a rigid foam core, with PIR (Polyisocyanurate) insulation being the most common choice for high thermal performance. EPS (Expanded Polystyrene) is used in lower-specification applications. The foam core is factory-bonded under controlled conditions for consistent strength and insulation value.
Panel thickness determines both thermal performance and the building’s intended use. Here is a practical guide:
| Panel thickness | Typical application |
|---|---|
| 72mm | Hobby rooms, seasonal use, unheated storage |
| 97mm | Hobby rooms and light recreational cabins |
| 172mm | Year-round habitable spaces, Building Control required |
| 222mm | Low-energy and high-performance buildings |
Choosing the right thickness depends on how you plan to use the cabin. A 97mm panel suits a garden hobby room used occasionally. A 172mm or 222mm panel is the right choice for a year-round home office or studio where you need consistent warmth and where Building Control approval applies.
Pro Tip: If you are unsure whether your planned use requires Building Control approval, check with your local authority before ordering panels. Getting this wrong after manufacturing is an expensive mistake.
Associated components matter just as much as the panels themselves. Splines connect panels at junctions, fixings secure panels to the base and to each other, and breather membranes manage moisture at the building envelope. Roof coverings must be compatible with the SIP roof panel specification. Logcabinkits can help you think through bespoke cabin design options if you want a tailored approach rather than a standard kit.
How do you plan and customise a SIP cabin build?
Good planning before you order is what separates a smooth SIP build from a frustrating one. Getting the details right at the start saves time, money, and stress later.
- Finalise your drawings first. Clear, finalised drawings including all dimensions, opening positions, and roof type are needed before panels go into production. Changes after manufacturing begins are costly.
- Assess your site carefully. Soil type, ground slope, and site access all affect your foundation choice. A sloped site may suit ground screws; a flat, accessible plot may suit a concrete slab or timber base.
- Know when to involve professionals. Building Control input is advised for habitable rooms, large spans, or complex sites. A structural engineer may be needed for challenging ground conditions.
- Plan your delivery logistics. SIP panels are large and heavy. You need clear vehicle access, a flat unloading area, and a plan for sequencing panels on site in the correct order.
- Think about what comes after the shell. Electrical first fix, plumbing, internal lining, and external cladding all follow the shell erection. Booking trades in advance avoids delays once the shell is weathertight.
If you want something beyond a standard kit, Logcabinkits specialises in custom-build cabins and bespoke designs that can be adjusted to your exact site and requirements. You can also browse the full garden log cabins range to see what standard options look like before deciding whether to go bespoke.
Key takeaways
SIP cabin construction delivers a fast, well-insulated, and structurally strong building shell because factory-fabricated panels combine structure and insulation in a single, precision-made unit.
| Point | Details |
|---|---|
| Panel thickness drives performance | Choose 97mm for hobby use, 172mm or above for year-round habitable spaces. |
| Foundation precision is critical | A level, square, stiff base prevents panel misalignment regardless of foundation type. |
| Build speed is a genuine advantage | SIP shell assembly takes 3–5 days, roughly 2–3 times faster than traditional timber framing. |
| Planning before ordering saves money | Finalised drawings and site assessment must be complete before panels go into production. |
| Sustainability is built in | Factory fabrication reduces waste, and the insulation core lowers the building’s energy demand long term. |
Why I think SIP construction deserves more attention from cabin builders
I’ve spoken with a lot of people who assume SIP construction is complicated or only suited to large commercial projects. That assumption is wrong, and it costs them time and money.
The reality is that SIP construction is one of the most forgiving methods available to a self-builder, precisely because the complexity happens in the factory rather than on site. By the time panels arrive, the hard decisions are already made and locked into the manufacturing drawings. What’s left is assembly, and a well-labelled SIP kit is genuinely manageable for a competent team.
The area where I see people come unstuck is the foundation. Not the panels, not the design, not the budget. The foundation. A slightly out-of-square or flexing base causes problems that ripple through every subsequent stage. Spending extra time and money on getting the foundation right is never wasted.
The other thing I’d encourage is early engagement with Building Control if there’s any chance your cabin will be used as a habitable space. The rules are not as daunting as people fear, and getting clarity early means you can choose the right panel thickness from the start rather than retrofitting insulation later.
For anyone serious about a low-waste, energy-efficient cabin that goes up quickly and performs well for decades, SIP construction is worth a proper look. It’s not the only good option, but it’s a very good one.
— Martin
Logcabinkits and your next cabin project
Thinking about a garden building that performs well all year round? Logcabinkits offers a wide range of garden log cabins alongside fully bespoke design services for customers who want something built around their exact site and needs.
Whether you’re drawn to the thermal efficiency of SIP construction or prefer the warmth and character of traditional timber, the Logcabinkits team can help you find the right fit. The bespoke cabin design service is a good starting point if you have a specific size, layout, or use in mind. You can also use the cabin selection wizard to narrow down options based on your requirements without trawling through every page on the site.
FAQ
What is a SIP panel made from?
A SIP panel consists of two OSB (Oriented Strand Board) facings bonded to a rigid foam insulation core, most commonly PIR or EPS. Factory-controlled manufacturing ensures consistent bonding and precise dimensions throughout.
What thickness SIP panel do I need for a year-round cabin?
A 172mm panel is the standard recommendation for year-round habitable spaces in the UK, and Building Control approval is typically required at this specification. For occasional hobby use, a 97mm panel is usually sufficient.
How long does it take to build a SIP cabin?
The full process from design to finished shell takes around 3–5 weeks. The CAD drawing phase takes 1–2 weeks, manufacturing takes at least one week, and on-site shell assembly typically takes 3–5 days.
Do SIP cabins need planning permission?
Planning permission depends on the size, location, and intended use of the cabin rather than the construction method. Habitable rooms and larger structures are more likely to require both planning permission and Building Control approval.
Can I build a SIP cabin myself?
Yes, self-build is possible with a well-labelled SIP kit and a competent team. The most important preparation is getting the foundation level, square, and stiff before panels arrive on site.
Recommended
- Building a Log Cabin - Installation Tips | Log Cabin Kits
- blog apex cabin roof explained design benefits build tips | Specialist Garden Cabin Supplier
- blog cabin build timelines explained your planning guide | Specialist Garden Cabin Supplier
- blog articles soundproofing multi room log cabins | Specialist Garden Cabin Supplier