

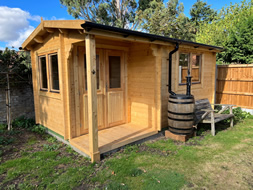
Cabin Owners: 4 Simple Habits That Stop Cabin Pests Before They Start
Keep your timber dry, seal every gap you can find, treat exposed wood with a preservative then a water-repellent coat, and check the whole cabin twice a year. Do those four things, and you’ll head off almost every pest problem before it starts. Today, move any stacked firewood away from the walls, clear the gutters, and walk the cabin looking for gaps you can seal by hand. Book your next full check for six months from now, and call in help the moment you spot mud tubes or a soft, hollow-sounding wall panel.
TL;DR:
- Regularly inspect the timber for signs of pests, paying close attention to soft, hollow, or crumbling areas that may indicate active infestation.
- Seal all gaps under doors, around windows, vents, and along joints with flexible sealant and metal mesh to prevent pests from entering the cabin.
- Keep firewood away from the cabin and ensure gutters are clear, especially above foundations, to avoid moisture buildup that attracts pests.
- Reapply preservative every three to five years and refresh water-repellent coatings more frequently on south-facing or weathered walls.
- Act promptly if you find mud tubes, clustered exit holes, or hollow-sounding timber, by isolating the area and consulting a licensed professional for treatment options.
Table of Contents
- What is cabin pests prevention and why does it matter so much?
- Sealing, exclusion and site management (practical fixes you can do)
- Wood treatments and finishes: what to apply and when
- Routine inspection, monitoring and simple checks you should schedule
- When to call a professional and what treatments they may use
- Practical tips from Logcabinkits: maintenance habits and links to how-to guides
- Seasonal behaviour: when cabin pests are most active
- Natural and non-chemical ways to deter pests
- Does your cabin’s location change your pest risk?
- What to do if you spot a severe infestation
- Author’s short maintenance perspective
- Building in pest resistance from day one often includes advice on the right preservative and top coat for timber thickness and site; professional installation helps ensure the base, ventilation gaps, and drainage are set up correctly from the start.
- Sources
- FAQ
What is cabin pests prevention and why does it matter so much?
Cabin pests prevention means the regular habits that stop insects and rodents from ever getting a foothold in your timber, rather than treating an infestation once it’s taken hold. For log cabins, this matters more than for brick houses because the entire structure is made of the exact material pests want to eat or nest in. Get your prevention routine right and you’re protecting the whole building, not just patching a problem.
The pests that cause the most damage to garden cabins fall into a short list, and knowing what each one leaves behind is half the battle.
- Wood-boring beetles (including the common furniture beetle) leave small, round exit holes and fine powdery frass, often first spotted on windowsills or in loft corners.
- Carpenter ants don’t eat wood like termites do, but they tunnel through it to nest, leaving smooth, sawdust-like shavings rather than mud.
- Termites are less common in UK gardens but not unheard of, and they build distinctive mud tubes up foundations and leave timber that sounds hollow when you tap it.
- Carpenter bees and solitary wasps drill neat, round holes into softwood eaves and fascias to lay eggs, usually appearing in late spring.
- Rodents chew ragged holes near ground level, leave droppings along skirting boards, and often nest in insulation or roof voids.
Check the same spots every time: eaves, door frames, window sills, the underside of the floor bearers, and anywhere firewood has ever touched the cabin wall. A torch and ten minutes is usually enough to catch trouble early. If timber feels soft, sounds hollow when tapped with a knuckle, or crumbles slightly at the edge, treat that as a warning sign worth investigating further, not a coincidence.
Sealing, exclusion and site management (practical fixes you can do)
Sealing gaps properly is one of the cheapest, most effective things you can do for cabin insect control, and most of it takes an afternoon.
- Re-chink log joints with a flexible sealant designed to move with the timber. Log cabins expand and contract with the seasons, so rigid fillers crack and fail within a year.
- Fit door sweeps and check window seals, since gaps under doors are a favourite entry point for both insects and small rodents.
- Cover vents and gaps with fine hardware cloth (a metal mesh with holes smaller than 6mm) rather than plastic grilles, which rodents can chew through.
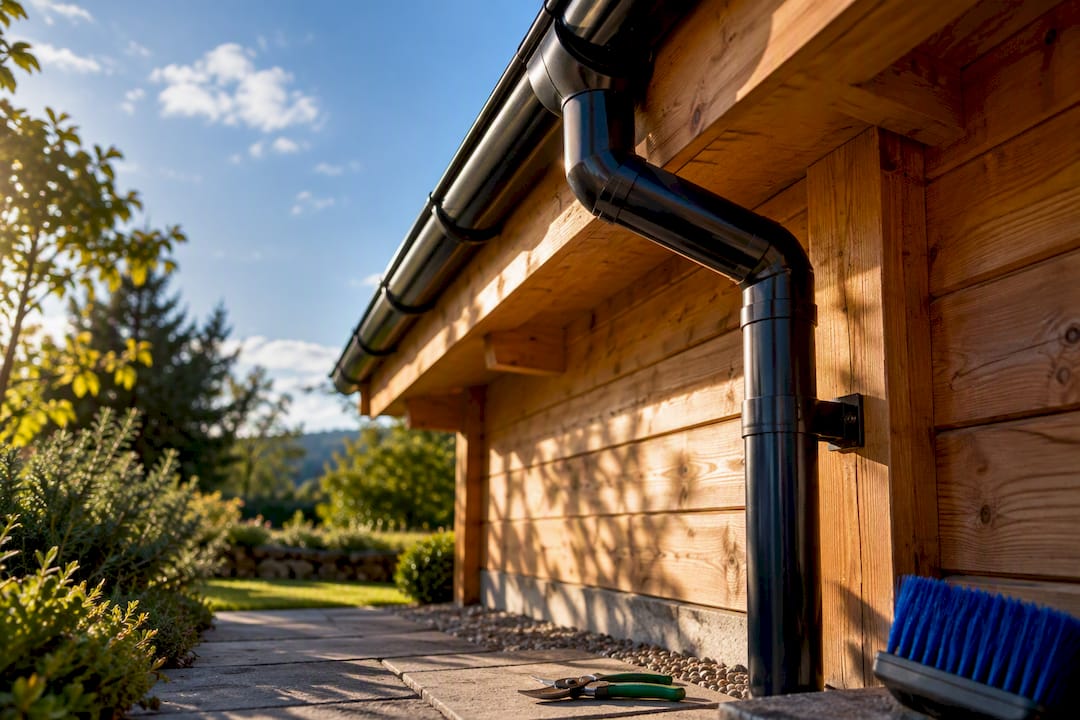
- Extend downspouts so rainwater is thrown at least five feet from the base of the cabin, which stops the perimeter soil staying damp and attractive to pests, a point backed by UK government guidance on preventing pest damage.
- Keep firewood well away from the cabin and stacked elevated off the ground, since woodpiles touching the wall are one of the most common ways pests move house, according to Log Masters’ guidance on pest-proofing log homes.
Vegetation matters too. Trim back shrubs and climbing plants so nothing touches the walls, and keep at least a foot of bare, ventilated space around the base of the cabin.
Pro Tip: Check your gutters aren’t feeding water straight down the back wall. A cracked gutter joint above a cabin is one of the most overlooked causes of damp timber, and damp timber is what draws every pest on this list.
Wood treatments and finishes: what to apply and when
The correct sequence is a deep-penetrating preservative first, then a hydrophobic top coat, and skipping either step leaves the cabin exposed. A biocide or borate preservative soaks into the timber to kill fungal spores and deter insects from the inside out. On its own, though, it does nothing to stop rain getting in, which is why a water-repellent stain or paint goes on afterwards to seal the surface against moisture and UV damage, a two-stage approach confirmed by DIY’s guide to wood preservatives and treatments.
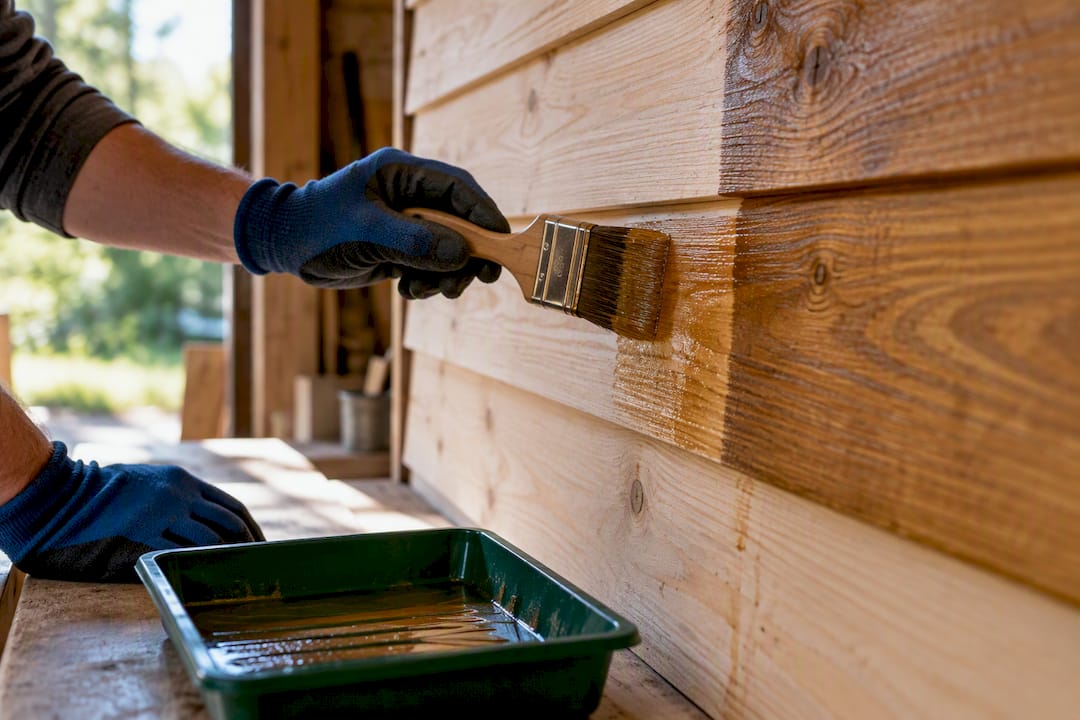
Reapplication timing depends on the product and exposure, but preservatives typically need reapplying every three to five years, with the top coat sometimes needing a refresh sooner on south-facing or heavily weathered walls.
A few practical notes worth following:
- Apply in dry, mild weather, since damp or freezing conditions stop the treatment soaking in properly.
- Pay special attention to end grain, the cut ends of logs and beams, where most moisture ingress occurs, according to Garden Chic’s expert guide to timber longevity.
- Water-based products dry faster and have less odour; solvent-based ones tend to penetrate deeper but need better ventilation while curing.
- For older or heritage timber, a timber conservator may recommend non-chemical options like ventilation and selective replacement instead of heavy chemical treatment, per Lambleys’ guide to wood-boring insects.
A full wood treatment care guide is available for a step-by-step version.
Routine inspection, monitoring and simple checks you should schedule
Two proper inspections a year, one in spring and one in autumn, catch most problems while they’re still cheap to fix.
- Run the water-bead test: splash a little water on the treated surface. If it beads and rolls off, your top coat is still working. If the wood darkens and absorbs it, the hydrophobic barrier has failed and needs redoing.
- Tap suspect areas with a knuckle or small hammer, listening for a hollow or papery sound that suggests hidden damage.
- Check gutters and downspouts are clear and still directing water away from the base.
- Use a moisture meter where you can, aiming to keep near-surface timber moisture under roughly 20%.
- Photograph anything that looks off and keep a simple maintenance log with dates, since a written record with photos makes any future professional survey faster and more accurate.
When to call a professional and what treatments they may use
Some signs mean it’s time to stop DIYing and get a survey booked. Mud tubes running up the foundation, several exit holes clustered together, timber that sounds distinctly hollow, or a DIY treatment that hasn’t stopped the frass appearing are all red flags worth acting on quickly.
Licensed pest controllers typically use one of a few approaches, chosen based on the species and how far the infestation has spread:
- Injection treatments, where insecticide is pumped directly into affected timber.
- Fumigation, reserved for severe, widespread infestations and carried out by licensed applicators only.
- Heat treatment, which raises timber temperature enough to kill pests without chemicals, often preferred for sensitive or older structures.
- Pressure injection, used for deeper structural timber where surface treatment won’t reach far enough.
Before you agree to anything, ask the contractor to identify the exact species, explain the treatment scope, confirm health and safety precautions, and put any warranty or follow-up visit in writing.
Practical tips from Logcabinkits: maintenance habits and links to how-to guides
A few small habits make a real difference over the years:
- Check the roof and gutters every spring and autumn.
- Mark your calendar for treatment reapplication before the three to five year window closes.
- Keep ventilation gaps clear so damp air isn’t trapped inside wall cavities, covered in our ventilation guide for log cabins.
- Note treatment and inspection dates somewhere you won’t lose them.
Treatment recommendations suited to timber and location help cut long-term pest risk from the start. Our guide to fitting gutters and external treatment application guide are worth bookmarking.
Seasonal behaviour: when cabin pests are most active
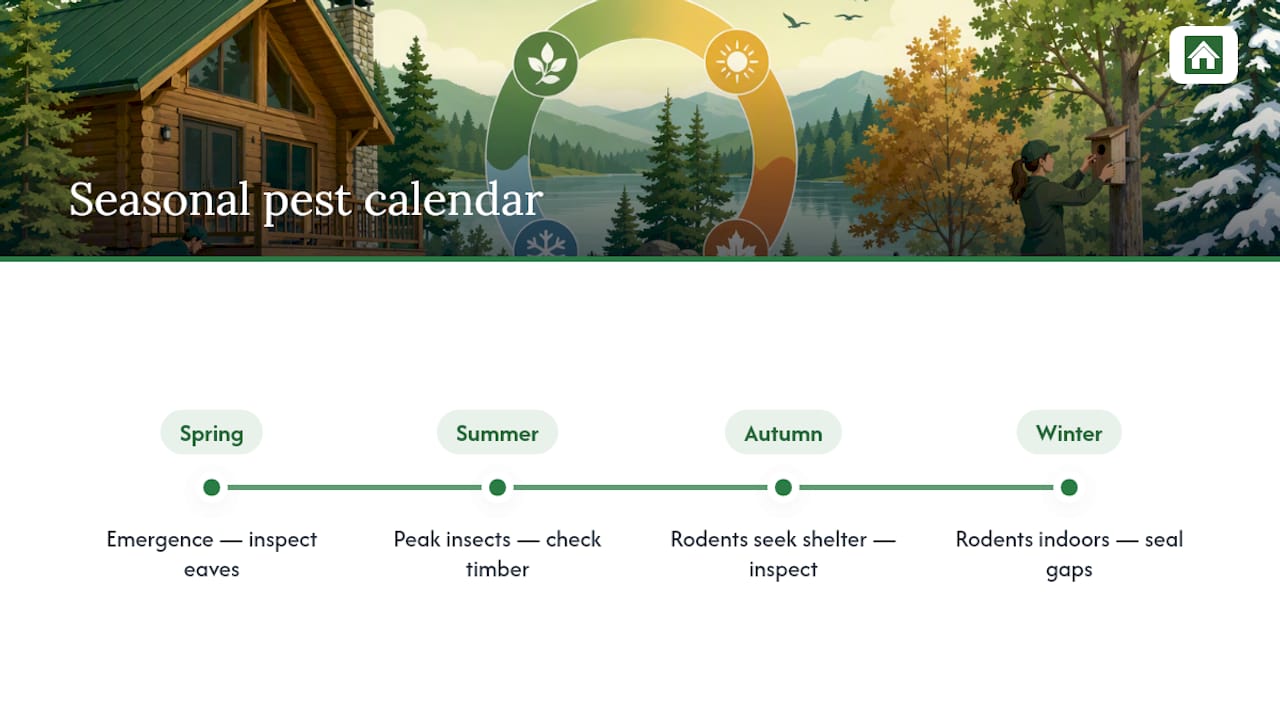
Pest activity follows a fairly predictable calendar, and knowing it helps you time your checks. Spring, roughly March to May, is when carpenter bees and solitary wasps emerge and start drilling into soft, untreated eaves and fascias, and it’s also when woodworm beetles that overwintered as larvae begin to pupate and fly, leaving fresh exit holes. Rodents, having spent winter indoors or in sheltered spots, start scouting for new nesting sites once the weather warms, often through gaps that opened up over winter frosts.
Summer brings the highest overall insect activity, with carpenter ants foraging widely and termites, where present, at their most active for feeding and colony expansion. This is also prime time for the sap and moisture that draws insects in the first place, since warm, humid spells keep timber surfaces damp for longer after rain.
Autumn is when rodents ramp up their search for winter shelter, making September and October the months when mice and rats are most likely to try their luck at gaps around doors and vents. It’s also a sensible time for your second biannual inspection, since summer growth and any storm damage will have had a chance to show.
Winter activity mostly drops off for insects, but that doesn’t mean the risk disappears. Cold weather drives rodents indoors in search of warmth, and any moisture that gets trapped over winter sets up perfect conditions for pest activity the moment spring arrives.
Natural and non-chemical ways to deter pests
Not every deterrent needs to come from a bottle. Good site management does a surprising amount of the work on its own, and it costs nothing beyond a bit of effort.
Cedar and cedar oil have a natural reputation for repelling some insects, and cedar shavings or sachets placed near vulnerable timber can offer a mild, low-effort deterrent, though they’re a supplement to proper sealing and treatment, not a substitute. Diatomaceous earth, a fine powder made from fossilised algae, can be dusted into cracks and voids to deter crawling insects without chemicals, though it needs reapplying after rain.
Keeping the area around your cabin genuinely inhospitable to pests matters just as much as any product. Trimmed vegetation, clear gutters, and dry ground around the base remove the food, shelter, and moisture that pests need to survive, which is really what most “natural” prevention comes down to. For outdoor perimeter management more broadly, Jeffi’s guide to yard habits that reduce pest attraction covers useful ground on keeping garden areas less appealing to insects generally.
Ultrasonic rodent deterrents are popular, though their effectiveness varies and they work best as one layer among several rather than a standalone fix. The same goes for peppermint oil as a mouse deterrent: it can make an area less appealing short term, but it won’t replace sealing the gap the mouse got through in the first place.
Does your cabin’s location change your pest risk?
Where your cabin sits in the garden has a real bearing on how much pest pressure it faces. A cabin tucked under overhanging trees gets more shade, more falling leaf litter into the gutters, and more damp bark and branches brushing against the roof, all of which raise moisture levels and give wood-boring insects and carpenter ants an easier route in.
Cabins near woodland, hedgerows, or compost heaps face higher rodent pressure simply because they sit closer to existing nesting populations. A sunny, open spot with good airflow dries out faster after rain and generally sees less pest activity than a shaded corner against a fence line.
Ground conditions matter too. A cabin sitting on poorly drained clay soil, or one without a raised, ventilated base, holds moisture against the underside of the floor for longer after wet weather, which is exactly the environment wood-boring insects favour. Raising the cabin on a proper base and keeping a gap for airflow underneath addresses this directly.
If you’re choosing a spot for a new build, or deciding where to reposition an existing structure, favour a position with morning sun, distance from dense shrubs or tree canopy, and ground that drains well rather than pools. It’s a decision worth making before the base goes down, since it’s far harder to fix afterwards.
What to do if you spot a severe infestation
Finding extensive damage, live insects in numbers, or multiple mud tubes calls for a calm, methodical response rather than panic.
First, isolate the area if you can. Move furniture, stored items, or firewood away from the affected section so you’re not spreading frass, droppings, or insects further into the cabin. Take clear photographs from several angles, including close-ups of any holes, tubes, or droppings, since these help a professional identify the species quickly rather than needing a second visit just to look.
Next, resist the urge to seal or paint over the affected timber before it’s been assessed. Covering damage can trap active pests inside and makes it harder for a contractor to gauge how deep the problem runs. Stop any DIY spray treatments too, since mixing products can complicate a professional’s diagnosis and treatment plan.
Contact a licensed pest control contractor promptly, and mention what you’ve already tried, along with when you first noticed the signs. Ask whether the affected area needs to stay closed off or ventilated while you wait for the appointment.
Finally, check nearby structural elements, floor bearers, roof joists, adjoining walls, for signs the problem has spread, and note anything unusual in your maintenance log. Early, decisive action at this stage is usually what separates a straightforward treatment from a costly structural repair.
Author’s short maintenance perspective
The cabins that fail early almost always have one thing in common: nobody checked the end grain. It’s the unglamorous fifteen minutes people skip. DIY covers most of it, but once you’re looking at hollow timber, call someone.
— Martin
Building in pest resistance from day one often includes advice on the right preservative and top coat for timber thickness and site; professional installation helps ensure the base, ventilation gaps, and drainage are set up correctly from the start.

If you’re planning a new build, our bespoke log cabin service lets you specify wall thickness, layout, and finish suiting a shadier or more exposed spot, and our team can talk you through which treatment schedule fits your chosen location. Browse the full garden log cabin range to see standard layouts, or look at our garden pavilions and multi-room cabins if you need something larger. Get in touch for a bespoke quote and we’ll talk you through the treatment and maintenance plan that suits your garden.
Sources
For treatment schedules and inspection guidance, see DIY’s wood preservative guide and government pest prevention guidance.
- DIY — wood preservatives and treatments
- UK government guidance — prevention of damage by pests (guidance for landlords)
- Lambleys — Wood boring insects
- Log Masters — pest‑proofing log homes
FAQ
What is the hardest pest to get rid of in a cabin?
Termites and established wood-boring beetle infestations are generally the hardest to clear fully, since damage is often hidden deep inside structural timber before it’s noticed. Both usually need professional injection or fumigation treatment rather than DIY sprays, as outlined by Lambleys’ guide to wood-boring insects.
What is the five-day mouse rule?
There’s no official “five-day rule” in UK pest control guidance, and definitions of this vary online. If you’re dealing with a suspected rodent problem, the safer approach is to act on the signs you see, droppings, chewed holes, scratching noises, rather than waiting out any fixed number of days.
What are the three C’s of pest control?
Definitions vary depending on the source, but the concept generally points to controlling Conditions (moisture and shelter), Cleanliness (removing food and clutter), and Closure (sealing entry points). These three principles line up closely with the sealing and moisture control steps covered above.
How do I mouse-proof a cabin?
Seal every gap larger than 6mm using fine hardware cloth rather than plastic mesh, fit proper door sweeps, and keep firewood well away from the walls. Combine that with clearing vegetation around the base and checking vents twice a year, and you remove most of the easy entry points mice rely on.
How often should I treat cabin timber against pests?
A deep-penetrating preservative typically needs reapplying every three to five years, with the water-repellent top coat sometimes needing a refresh sooner on exposed walls, according to DIY’s wood treatment guidance. Running the water-bead test at each biannual inspection tells you quickly whether it’s time to redo the top coat.