Installing The Roof Components
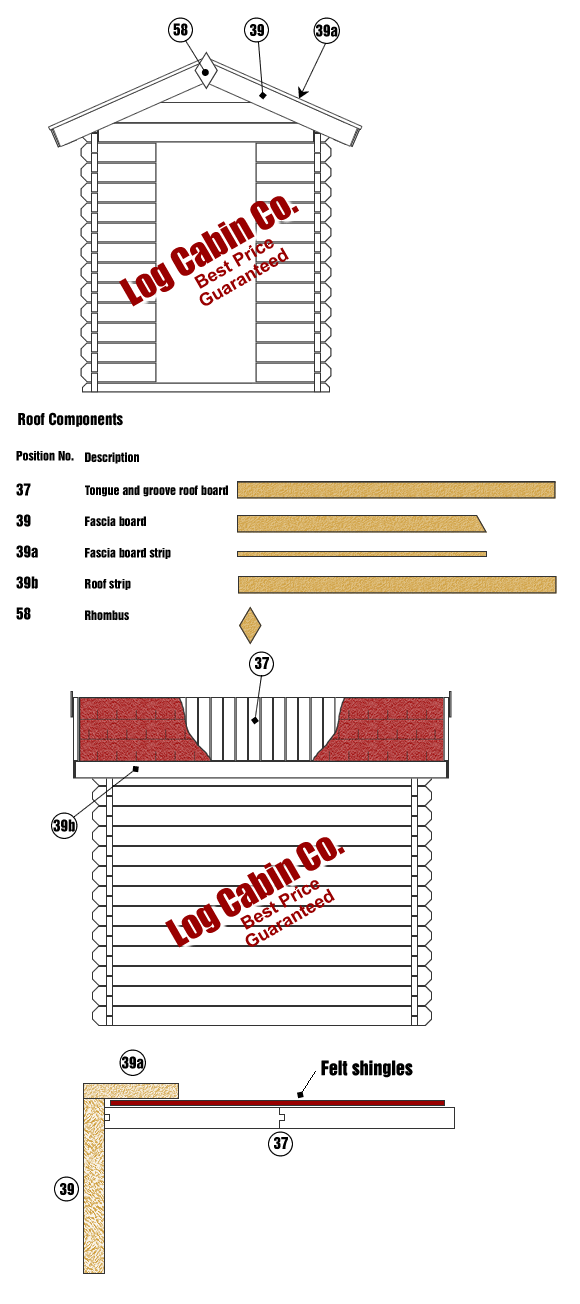
To assist you with the identification of the roof components and how they are used, I thought it would be of benefit to put a post together providing this information. (The supplied instructions sometimes leave a little to be desired !)
So, you've built the walls up to roof height and positioned all the roof joists. In some cabins where the span is quite wide, these joists are sometimes doubled up in depth. It is good practice to screw these joists together using the supplied fixings increasing the strength of the supports to the roof.
The sequence of building the roof is as follows :
- Fit the tongue and groove roof boards (position 37)
- Fit the Roof Strip (position 39b)
- Fit the fascia board (position 39)
- Lay felt shingles or shed felt
- Fit the fascia board strip (position 39a)

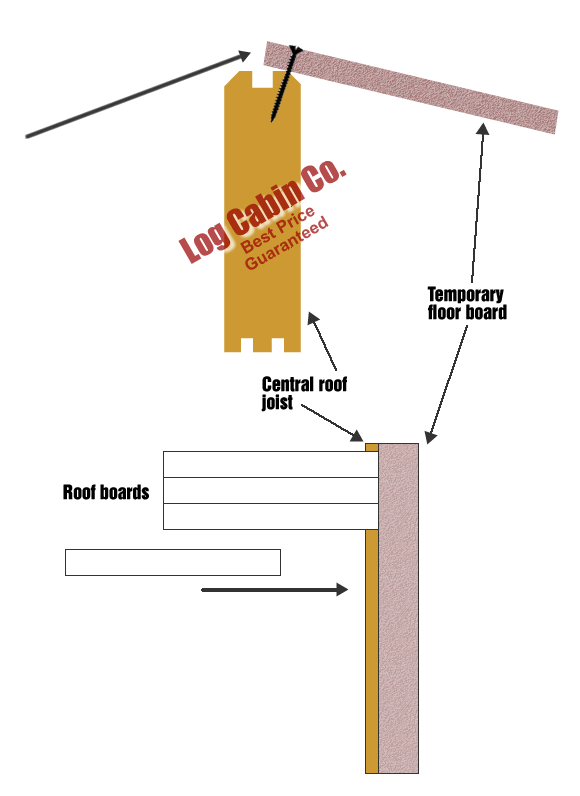
- Fit the tongue and groove roof boards starting from the front of the cabin and working your way to the back on one side only. Tip - temporarily screw a floor board on the central roof joist to help keep all the roof boards in the correct position as you offer them up to the central joist. Once you have completed one side, work your from the front to the back on the second side. When you come to fit the last board it may be necessary to reduce its width - this will depend on how tightly you have made the T and G joints.

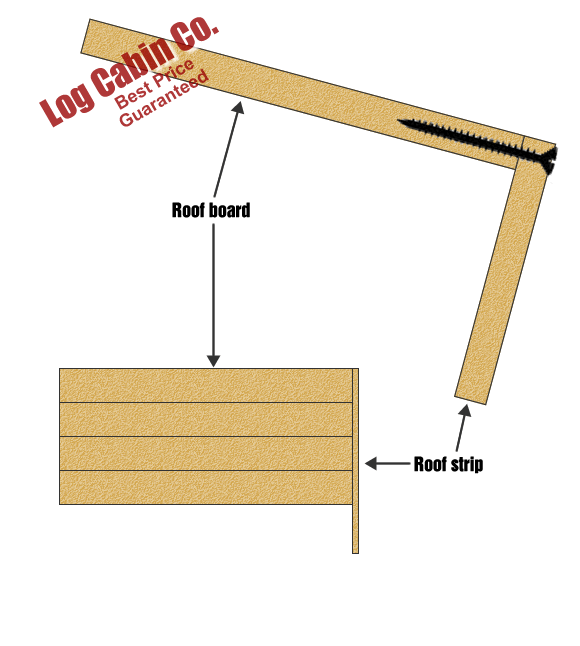
- Fit the roof strips.
These are the boards that run down the side of the roof, they may be in 2 parts depending on the size of your cabin. Use either screws or nail gun ribbed nails to fit the roof strips onto the ends of the roof boards :

- Fit Felt Shingles As per our guide here
- Fit the Fascia Board These boards run up the gable edge and are screwed / nailed to the ends of the roof joists and if necessary into the roof boards themselves. Try and position them at the same level as the shingles.
- Fit the fascia board strip This is an important one to get right because it protects the ends of the shingles from rain and wind and prevents ingress of either. Screwing of nailing it down onto the fascia board forms a seal as per the diagram above.
