Fitting Bitumen Felt Shingles
Compared to standard roofing felt, felt shingles provide a better quality, longer lasting alternative to shed felt and also are far more pleasing on the eye. We would recommend you seriously consider using these as a means of weather proofing your cabin. Assuming the roof pitch is at least 10degrees. The felt shingles manufaxcturer recomend using an underlay on any pitch less than 14degrees
We currently offer four colour options, green, grey, black and red :
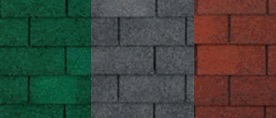
Please note : – Sometimes a small deviation in color of the tiles will be evident in different packs and sometimes even the same pack. This is not a defect of the material and is actually designed to enhance the decorative beauty of the completed felt shingle roof. In order to reduce colour difference during installation of the tiles, it is recommended to mix tiles from packs at random in order to create a mixed colour effect.
How much will each pack cover ?
- Standard shingles pack of tiles contains sufficient to cover 3 m² of (including overlapping).
- Each pack of ridge/starter tiles contains sufficient to cover 12 linear metres when used as a ridge (overlapped) or 20 linear metres when used as a starter row.
- Remove the cellophane strip from the under side of the tile prior to installation.
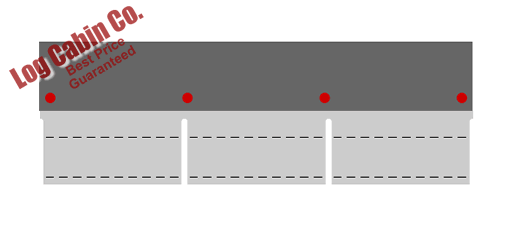
- Every strip should be nailed to the roof boards with a minimum of 5 wide headed galvanized roof nails. The number of nails depends on the pitch or slope of your roof.
- It is very important not to over hit the nails. They should be nailed in such a way that the head of the nail becomes flush with the tile and not below the surface.
- The head of the nail should not puncture the surface of the shingle tile.
- The nails are put 2 – 3 cm from the edge of the tile. The picture below indicates the number of nails needed and where they should be applied. The picture shows the topside of the tile, and the dotted line indicates the adhesive layer on the underside exposed only when the cellophane has been peeled of.
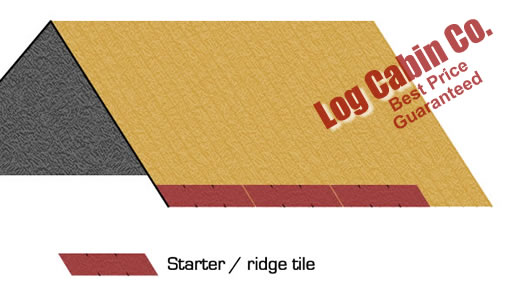
- Multi-purpose ridge/starter tiles are used for the initial row of tiles along both the eaves of the roof.
- First Row of Starter / Ridge Tiles
- Once the first row is position, cut a shingle strip in half and lay the cut edge against the eave. This will ensure the joins on the previous row are properly covered.
Lay the first row of shingles starting with a half tile. Second row of shingles starts with a full tile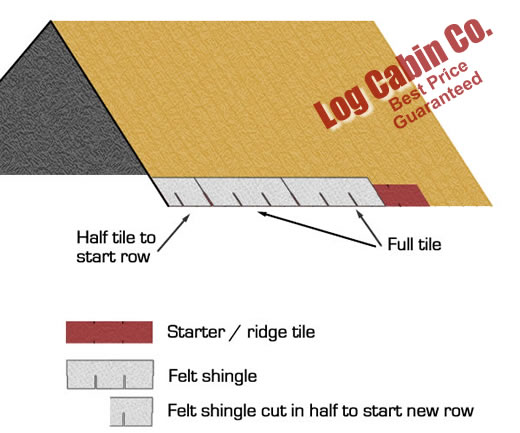
- Complete the first row, trimming any excess at the furthest end. Start the second row with a full tile.
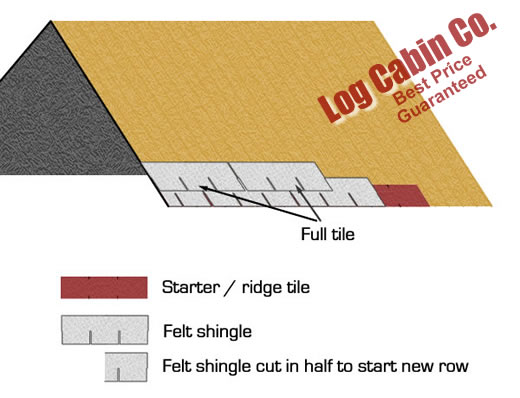
- Continue in the same manner working your way up the roof.
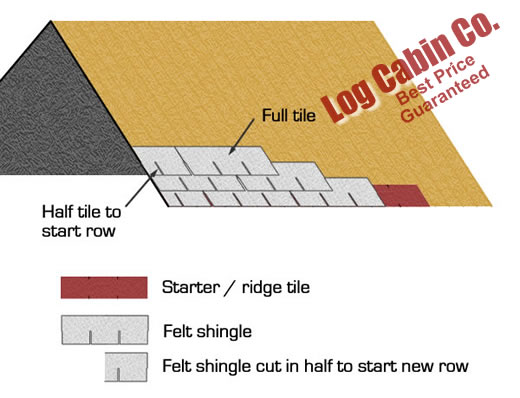
- Continue all the way to the ridge, if necessary taking the last row of shingles over the top of the ridge line.
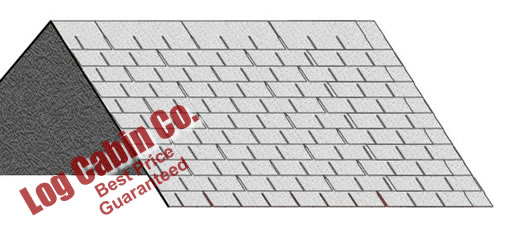
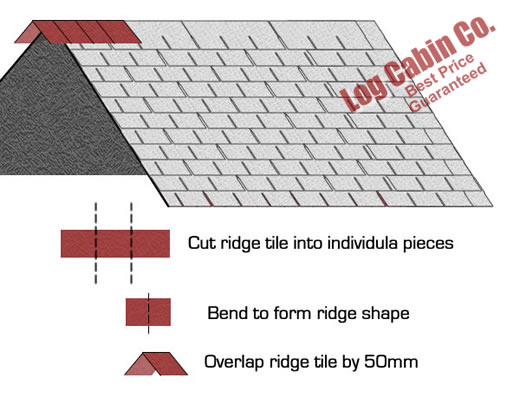
- Finally lay the ridge tiles. Prepare the tiles by seperating the tiles into their individual pieces. Each tile creates three ridge tiles. Bend the tile across the middle and lay it centrally across the ridge line. Lay the second and subsequent tiles parallel and overlapping the previous tile by approximately 50mm. Bare in mind the direction of the prevailing wind to avoid the tiles lifting in strong winds.
