

How to waterproof a cabin roof: a practical guide
TL;DR:
- Proper waterproofing a cabin roof creates a durable barrier that prevents water damage and costly repairs. It involves thorough surface preparation, selecting suitable materials, and applying two coats with reinforcement at seams and penetrations. Avoid common errors like rushing preparation or neglecting ventilation to ensure long-lasting protection.
Waterproofing a cabin roof means creating a continuous, durable barrier that stops water getting into the timber structure beneath. Without it, moisture works its way through even small gaps, causing rot, swelling, and repairs that can cost well over £2,000 a year to put right. The good news is that knowing how to waterproof a cabin roof is straightforward when you follow the right steps. This guide covers the best waterproofing methods for roofs, the materials you need, and the mistakes that catch most people out.
What tools and materials do you need to waterproof a cabin roof?
The right materials make the difference between a repair that lasts a season and one that lasts a decade. The three main waterproofing systems for timber roofs are EPDM rubber membranes, bituminous felt, and liquid-applied coatings. Each suits different roof shapes and budgets.
Common materials you will need:
- EPDM rubber membrane (ideal for flat or low-pitch roofs)
- Bituminous felt or modified bitumen sheets
- Liquid waterproofing coating (polyurethane or acrylic based)
- Polyester reinforcing fabric
- Timber primer suited to wood substrates
- Flexible roofing cement for temporary repairs
- Flashing tape and metal flashing strips
Tools you will need:
- Paint rollers and brushes
- Putty knife and scraper
- Utility knife
- Pressure washer
- Moisture meter
- Measuring tape and chalk line
| Material | Best use | Key benefit |
|---|---|---|
| EPDM rubber membrane | Flat and low-pitch roofs | Long lifespan, flexible in cold weather |
| Bituminous felt | Apex and pitched roofs | Low cost, widely available |
| Liquid coating | Complex shapes and repairs | Seamless, no joins to fail |
| Polyester fabric | Seams and penetrations | Adds strength at stress points |
Pro Tip: Flexible roofing cement in a metal can is your best friend for temporary fixes. It lasts 6–12 months and buys you time to plan a full repair. Avoid duct tape and expanding foam entirely. They complicate any professional fix that follows.
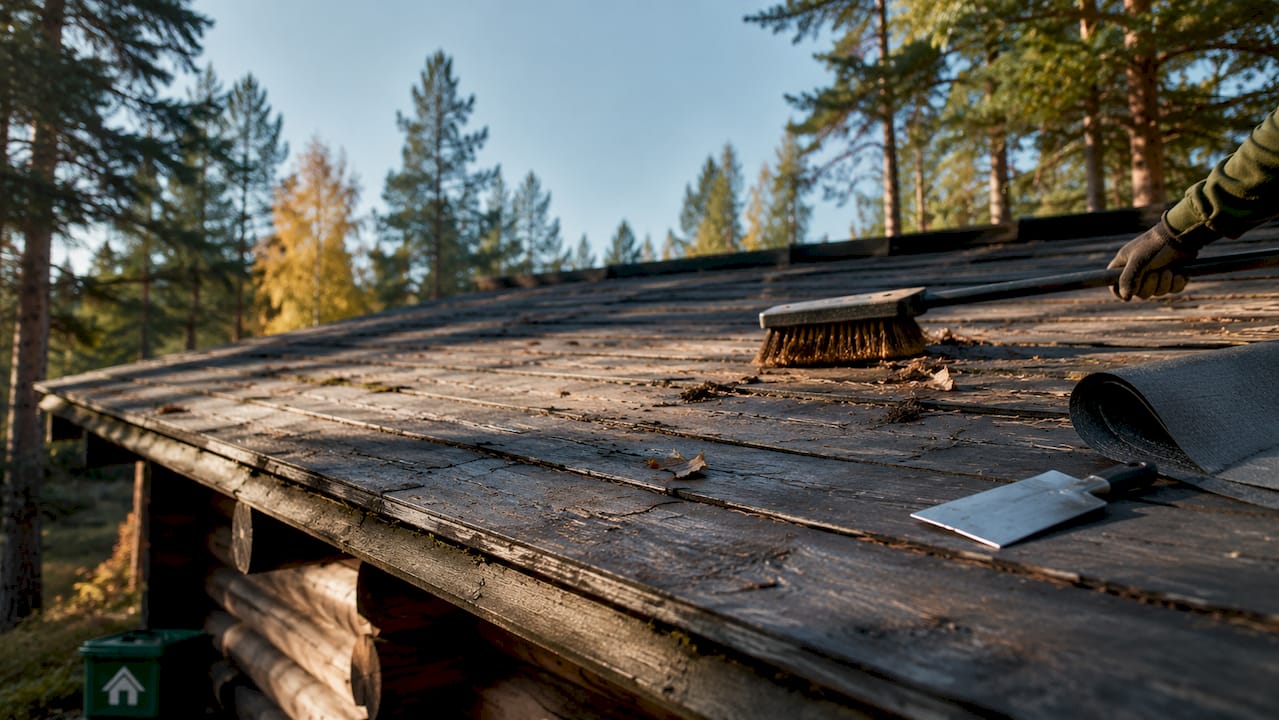
How do you prepare a cabin roof surface for waterproofing?
Surface preparation is the step most people rush, and it is the reason most waterproofing jobs fail early. A coating applied to a dirty, damp, or cracked surface will peel away within months. Get this right and everything else becomes much easier.
- Clear the roof completely. Remove any debris, leaves, moss, and loose material. A stiff brush works for light dirt.
- Pressure wash the surface. Pressure washing at 2,500 PSI removes ingrained dirt and old flaking coatings. Let the surface dry fully before moving on.
- Check moisture levels. Use a moisture meter on the timber decking. The reading should be below 18% before you apply any coating. Applying over damp timber traps moisture and causes rot from underneath.
- Repair cracks and damaged areas. Fill cracks with a flexible filler or roofing cement. Replace any soft, spongy, or rotten timber boards before sealing over them.
- Remove loose or flaking old coatings. Use a scraper or putty knife to lift anything that is not firmly bonded. A new coating will only be as good as what it sticks to.
- Sand edges and transitions smooth. Any sharp edges or raised fixings can puncture a membrane. Sand them down or countersink screws before laying any sheet material.
Pro Tip: Pay extra attention to seams and where the roof meets walls or upstands. Reinforcing fabric at 90-degree angles acts like rebar in concrete. It stops the membrane cracking at the points that flex most.
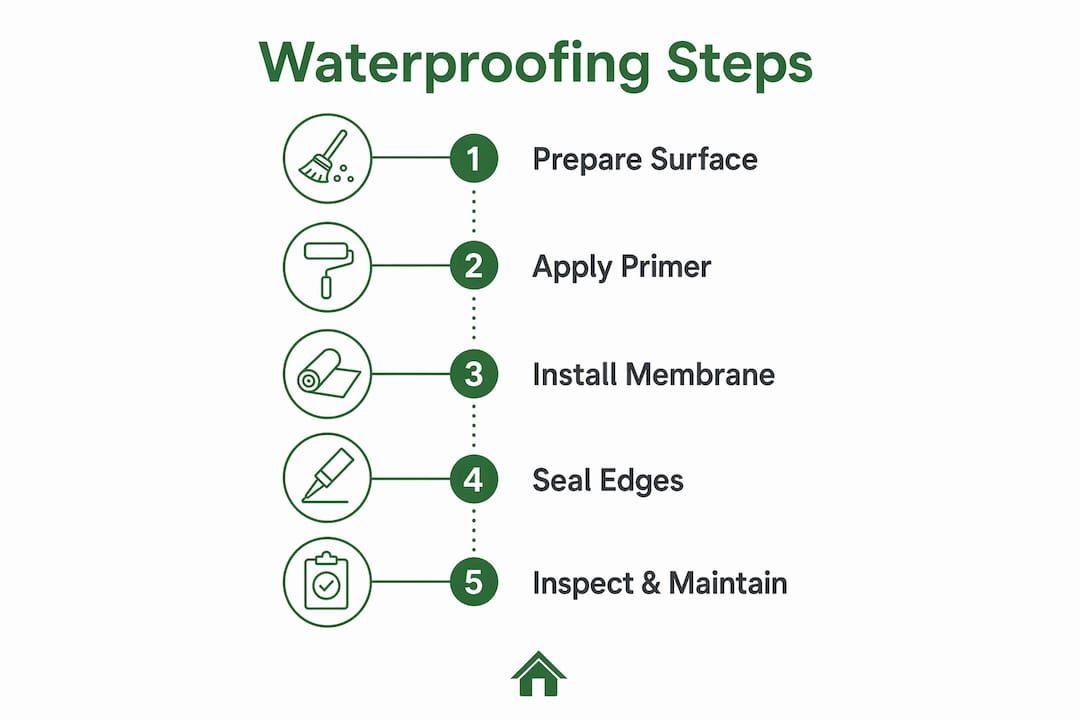
What are the step-by-step methods to apply waterproofing membranes or coatings?
!
Waterproofing success depends on defeating three primary enemies: poor drainage, failed seams, and unsealed penetrations. The application method you choose should address all three. Here are the main approaches, in the correct sequence.
- Apply the primer first. Primer matched to timber ensures the waterproofing membrane bonds firmly. Brush or roll it on evenly and allow it to tack off fully before the next step. Do not skip this. A membrane applied without primer will lift at the edges within a year.
- Cut your membrane or mix your liquid coating. For sheet membranes, cut pieces slightly oversized so they lap up walls and over edges. For liquid coatings, mix according to the manufacturer’s ratio.
- Apply the first coat or lay the first sheet. Roll liquid coatings in one direction across the full surface. For sheet membranes, bond from the centre outward to avoid air pockets.
- Apply reinforcing fabric at all seams and penetrations. Embed the polyester fabric into the wet first coat before it cures. This is the most important step for long-term performance.
- Apply the second coat in the opposite direction. Two thinner coats applied crosswise produce far fewer pinholes than one thick coat. This is the professional standard, not optional.
- Check wet film thickness as you go. Use a wet film thickness gauge to confirm you are hitting the manufacturer’s specified depth. This is called WFT measurement and it determines whether the finished membrane meets its warranty thickness once dry.
| Method | Application tool | Best for | Key watch-out |
|---|---|---|---|
| Liquid membrane | Roller or brush | Complex shapes, repairs | Must apply two crosswise coats |
| EPDM rubber sheet | Roller and adhesive | Flat roofs | Seams need careful bonding |
| Bituminous felt | Torch or adhesive | Pitched roofs | Laps must overlap correctly |
Understanding roof pitch and design matters here too. A steeper pitch sheds water faster and reduces the load on your waterproofing system.
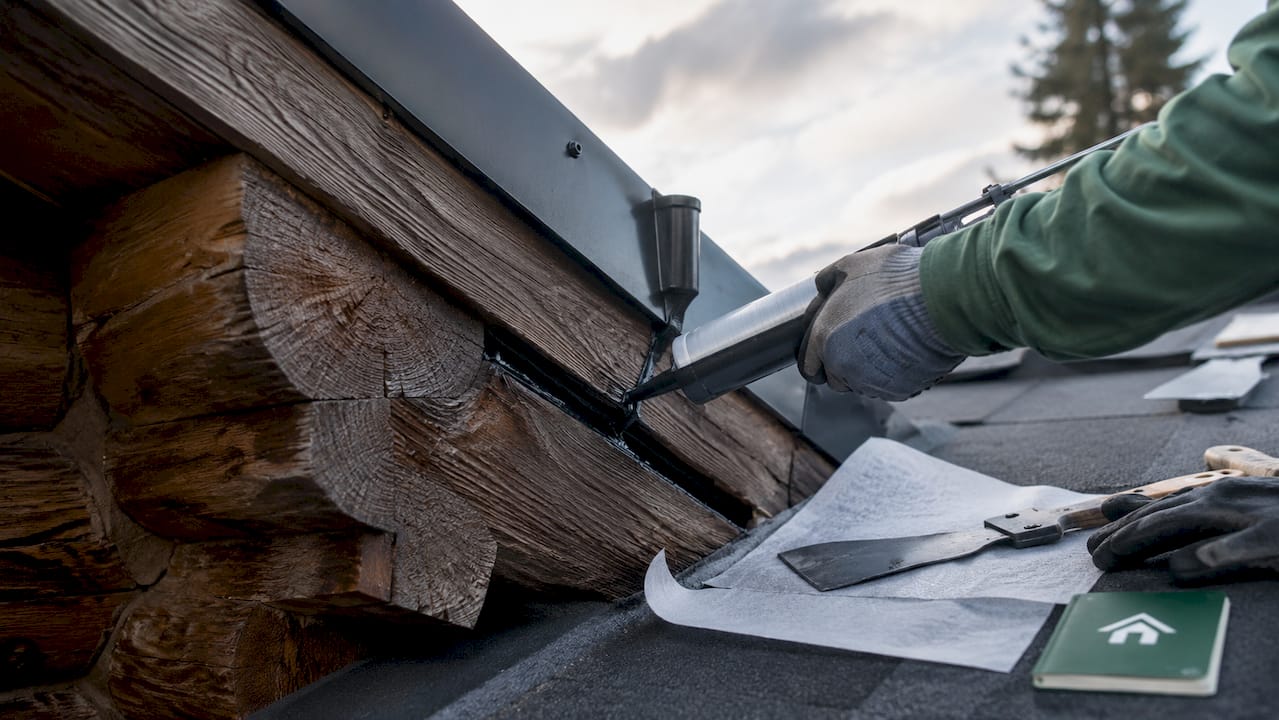
How do you identify and seal roof penetrations and edges effectively?
Penetrations and edges are where the vast majority of leaks begin. A membrane can be perfect across the flat field of a roof and still fail at a pipe, vent, or wall junction. These transition points need dedicated attention.
- Chimneys and flue pipes: Fit metal flashing that overlaps under the roofing material above and over the material below. Proper flashing uses stainless steel or high-gauge galvanised metal to resist corrosion. Seal the top edge of the flashing with a compatible sealant, not just mastic.
- Vents and outlets: Collar each vent with a pre-formed rubber boot or cut the membrane to fit tightly. Embed reinforcing fabric around the collar and apply two coats of liquid membrane over the top.
- Gutters and downspouts: Keep gutters clear at all times. Blocked gutters cause water to back up under the roof edge, which is one of the most common and avoidable causes of timber rot.
- Ridge tiles and roof edges: Seal ridge tiles with a flexible, UV-stable sealant. At roof edges, turn the membrane down over the fascia board by at least 50mm and bond it firmly.
- Wall junctions and upstands: Apply reinforcing fabric into the internal angle before coating. Bring the membrane at least 150mm up any vertical surface it meets.
Inspect all sealed areas once a year, ideally in autumn before the worst weather arrives. Sealants shrink slightly over time and may need a fresh bead every few years. This is a quick job that prevents expensive repairs later. For a broader look at how timber buildings handle the elements, the guide on how log cabins resist weather is worth reading alongside this one.
What common mistakes should you avoid when waterproofing a cabin roof?
Most waterproofing failures come down to a handful of repeated errors. Knowing what they are saves you time and money.
- Skipping surface preparation. Applying any coating to a dirty or damp surface is the single biggest cause of early failure. Clean, dry, and repair before you open a tin.
- Using the wrong materials. Duct tape and expanding foam are not roofing products. They degrade quickly outdoors and make professional repairs harder. Silicone coatings are another trap. They resist ponding water but become dangerously slippery when wet and are very difficult to coat over once cured.
- Applying coatings in bad weather. Most liquid membranes need temperatures above 5°C and a dry surface to cure correctly. Applying in rain or frost produces a coating that never fully bonds.
- Ignoring ventilation. Unvented roofs risk ice dam formation. An ice dam forms when heat escapes through the roof, melts snow, and the meltwater refreezes at the cold eaves. The resulting water backs up under the membrane and causes leaks even on a well-waterproofed roof.
- Not choosing the right product for the conditions. Not all waterproof coatings suit all roofs. A product rated for a pitched roof may fail on a flat surface where water ponds. Always check UV exposure and ponding water tolerance before buying.
Pro Tip: Avoid silicone-based coatings on cabin roofs unless you are certain you will never need to apply another product over the top. Once silicone is down, most other coatings will not bond to it.
Key takeaways
Effective cabin roof waterproofing requires thorough surface preparation, the right materials for your roof type, crosswise double-coat application, and careful sealing of every penetration and edge.
| Point | Details |
|---|---|
| Preparation is non-negotiable | Clean, dry, and repair the surface before applying any coating or membrane. |
| Match materials to your roof | EPDM suits flat roofs; bituminous felt suits pitched roofs; liquid coatings suit complex shapes. |
| Apply two crosswise coats | Two thinner coats in perpendicular directions reduce pinholes and improve membrane integrity. |
| Seal every penetration | Chimneys, vents, and edges are the most common leak sources and need reinforcing fabric and flashing. |
| Ventilation prevents hidden damage | Adequate roof ventilation stops ice dams forming and protects the membrane from underneath. |
What I have learned from years of cabin roof projects
Cabin roofs are not complicated, but they are unforgiving. The jobs I have seen go wrong almost always come down to one thing: someone was in a hurry. They skipped the pressure wash, applied a coating on a damp afternoon in october, or used a tube of silicone because it was already in the garage. The roof looked fine for six months. Then the leaks started.
The lesson I keep coming back to is that ventilation is the silent factor most people forget entirely. You can have a perfect membrane and still get water damage if the roof space is not breathing properly. I have seen ice dams cause leaks in cabins with brand-new waterproofing, simply because the ventilation was never checked. Before you assume your membrane has failed, check the airflow first.
Quality materials are worth the extra spend. A decent EPDM membrane or a properly specified liquid system will outlast three rounds of budget felt. The cost difference over ten years is not even close. And if you are planning a new cabin rather than repairing an existing one, apex roof cabins are worth a look. The steeper pitch sheds water naturally and reduces the waterproofing burden from day one.
Schedule a proper inspection every autumn. Walk the roof, check the sealant at every penetration, clear the gutters, and look for any areas where the membrane has lifted or cracked. Catching a small problem in september costs almost nothing. Catching it in february, after a winter of rain has worked its way through, costs a great deal more.
— Martin
Quality garden log cabins built with weather protection in mind
If you are thinking about a new cabin rather than patching an old one, the roof design you start with makes everything easier. Logcabinkits builds garden log cabins with roof pitches and timber specifications chosen to stand up to the British climate.

The standard and bespoke ranges include options with apex roofs that shed water efficiently, reducing the long-term maintenance load on any waterproofing system you apply. Whether you want a straightforward garden room or a fully custom build, the team at Logcabinkits can help you choose a design that works with the weather rather than against it. Browse the full range and find a cabin that suits your space and your plans.
FAQ
What is the best waterproofing method for a log cabin roof?
EPDM rubber membrane is the most durable option for flat or low-pitch cabin roofs, while bituminous felt suits pitched roofs well. Liquid-applied coatings work best for complex shapes or repairs where sheet membranes are difficult to fit neatly.
How often should you reseal a cabin roof?
Inspect and touch up sealant at penetrations and edges every one to two years. A full membrane replacement is typically needed every 10–20 years depending on the product used and how well the roof is maintained.
Can you waterproof a cabin roof yourself?
Yes. Surface preparation, liquid coatings, and EPDM membranes are all within reach for a confident DIY owner. The key is following the correct sequence: clean, repair, prime, apply fabric reinforcement, then coat in two crosswise passes.
Why is my cabin roof still leaking after waterproofing?
The most common causes are inadequate surface preparation before coating, unsealed penetrations, or an ice dam caused by poor roof ventilation. Check the ventilation before assuming the membrane has failed.
Does roof pitch affect how you waterproof a cabin?
Yes. A steeper pitch sheds water faster and reduces ponding, which means you have more product choices available. Flat or very low-pitch roofs need products specifically rated for standing water tolerance.
Recommended
- Garden Cabin Roofing: Options, Steps, And Vital Tips
- blog step by step cabin insulation your complete diy guide | Specialist Garden Cabin Supplier
- blog cabin roof pitch why it matters for your garden log cabin | Specialist Garden Cabin Supplier
- blog roof design in cabins why it matters more than you think | Specialist Garden Cabin Supplier