
How to maximise shed storage for a tidy garden
TL;DR:
- Many UK homeowners struggle with shed clutter, making it hard to find and protect tools.
- A systematic approach involving clearing, categorising, and vertical storage transforms sheds into practical, accessible spaces.
If your shed has become a place where things go to be forgotten, you’re not alone. Countless UK homeowners open their shed door, stare at the chaos inside, and close it again. Tools go missing, seasonal items pile up, and what should be a useful space turns into a source of daily frustration. The good news is that getting on top of your shed storage doesn’t require a full weekend or a huge budget. With the right preparation and a clear method, you can turn even the most cluttered shed into a genuinely organised, functional space that saves you time every single day.
Table of Contents
- What you need before you start
- Step-by-step: How to maximise your shed storage
- Smart storage solutions for every shed
- Troubleshooting common shed storage mistakes
- How to keep your shed organised all year round
- The overlooked secret to shed storage: Mindset over materials
- Upgrade your shed and storage with our garden log cabins
- Frequently asked questions
Key Takeaways
| Point | Details |
|---|---|
| Preparation is key | Gather supplies and create a plan before you start reorganising your shed. |
| Use all available space | Install vertical shelves, ceiling hooks, and make use of labelled containers for complete organisation. |
| Organise by frequency | Store your most-used items nearest the door for easy access. |
| Avoid common mistakes | Label everything and keep pathways clear to avoid future clutter. |
| Maintain regularly | Simple routine checks will keep your shed tidy throughout the year. |
What you need before you start
Before transforming your storage, you’ll need a few essentials ready to keep the process efficient and stress-free.
Preparation is where most people go wrong. They dive straight into moving things around, only to run out of space, lose motivation, or create a bigger mess than they started with. Taking thirty minutes to gather the right supplies makes a real difference to how smoothly the whole thing goes.
Here’s what to have ready before you begin:
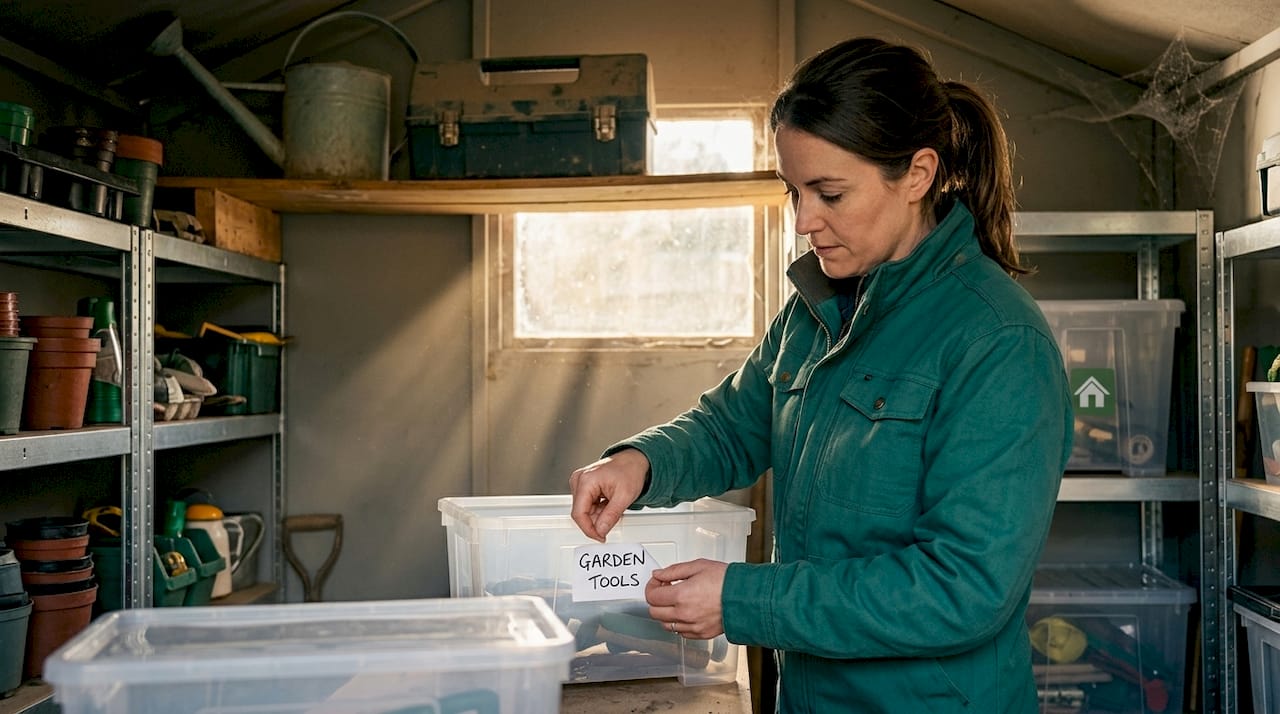
- Clear plastic storage boxes in a range of sizes
- Labels or a label maker for marking contents clearly
- Cleaning cloths, a brush, and a bucket for wiping down shelves
- Protective gloves for handling older or sharp items
- A marker pen for quick labelling
- Three sorting areas (bags or boxes): keep, donate, and toss
- Basic shelving if your shed doesn’t already have any
| Item | Purpose |
|---|---|
| Clear plastic boxes | Visible storage for small or seasonal items |
| Labels | Faster retrieval and better organisation |
| Cleaning supplies | Freshens the space as you work |
| Gloves | Protection when handling rusty or dirty tools |
| Sorting bags or boxes | Structured decluttering without confusion |
| Shelving unit | Maximises vertical space and keeps floors clear |
As part of a thorough shed organisation workflow, Homebuilding recommends starting by emptying the shed completely, doing a mental inventory, and returning items with the most-used ones closest to the door. Following a clear garden storage workflow before you begin also helps you avoid mid-task delays and confusion.
It’s also worth setting aside a full half-day so you’re not rushing. Create your three sorting zones outside the shed if the weather allows, and follow practical emptying and inventory tips to keep the process moving. Sorting as you empty is far more efficient than sorting everything at the end.
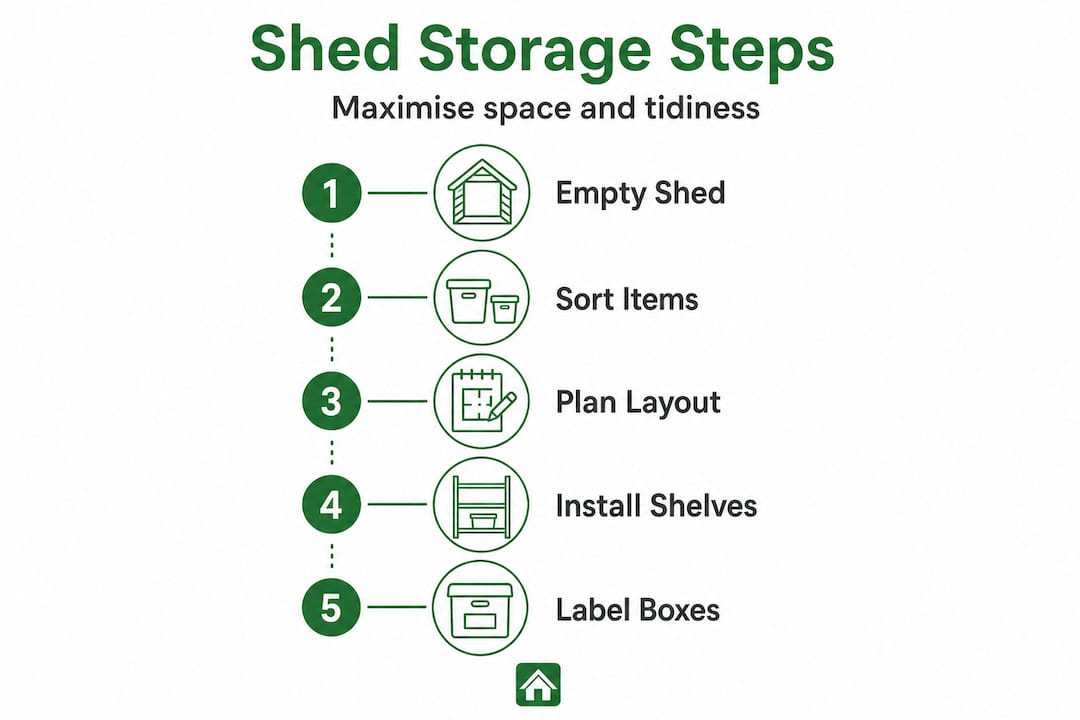
Step-by-step: How to maximise your shed storage
Once you’ve set up your workspace and gathered supplies, you’re ready to tackle the core process. Here’s exactly how to do it.
- Empty the shed completely. Everything comes out. This is the only way to see what you’re working with and clean surfaces properly.
- Do a full inventory. Lay items out and take stock. You’ll almost certainly find things you’d forgotten about or no longer need.
- Sort by frequency of use. Separate items you use weekly, monthly, and seasonally. This shapes where everything goes back in.
- Group similar items together. Garden chemicals, hand tools, power tools, and seasonal items should each have their own zone.
- Clean as you go. Wipe down shelves, sweep the floor, and check for damp or pest issues before putting anything back.
- Return items strategically. Most-used tools go nearest the door. Seasonal items go to the back or overhead storage. Bulky items stay at floor level.
Here’s a quick comparison of the two most common storage approaches:
| Approach | Pros | Cons |
|---|---|---|
| Store by frequency of use | Fast access to everyday tools | Similar items may end up scattered |
| Group by category | Tidy and logical layout | Less-used items can block frequent ones |
The best approach is actually a blend of both. Group similar items, but within those groups, prioritise the ones you use most often at the front. For garden storage solutions that combine both methods, think in zones: a “grab and go” zone near the door, a “seasonal” zone at the back, and a “rarely used” zone overhead.
Pro Tip: Keep a clear walkway down the middle of your shed at all times. It sounds obvious, but even a 60cm path makes the space feel twice as usable and reduces the risk of trips and falls.
A well-planned shed doesn’t just save you time. It reduces the risk of injury, protects your tools from damage, and makes you far more likely to tackle that next garden project without putting it off.
Take inspiration from these home organisation ideas when thinking about how your shed layout can serve your lifestyle, not just your storage needs.
Smart storage solutions for every shed
With surfaces clear and a plan in place, you can focus on storage solutions that work for every area and use case in your shed.
The biggest missed opportunity in most sheds is vertical space. Most people store things at floor level and ignore the walls and ceiling entirely. That’s a lot of wasted potential.
Here are the best ways to make use of all available space:
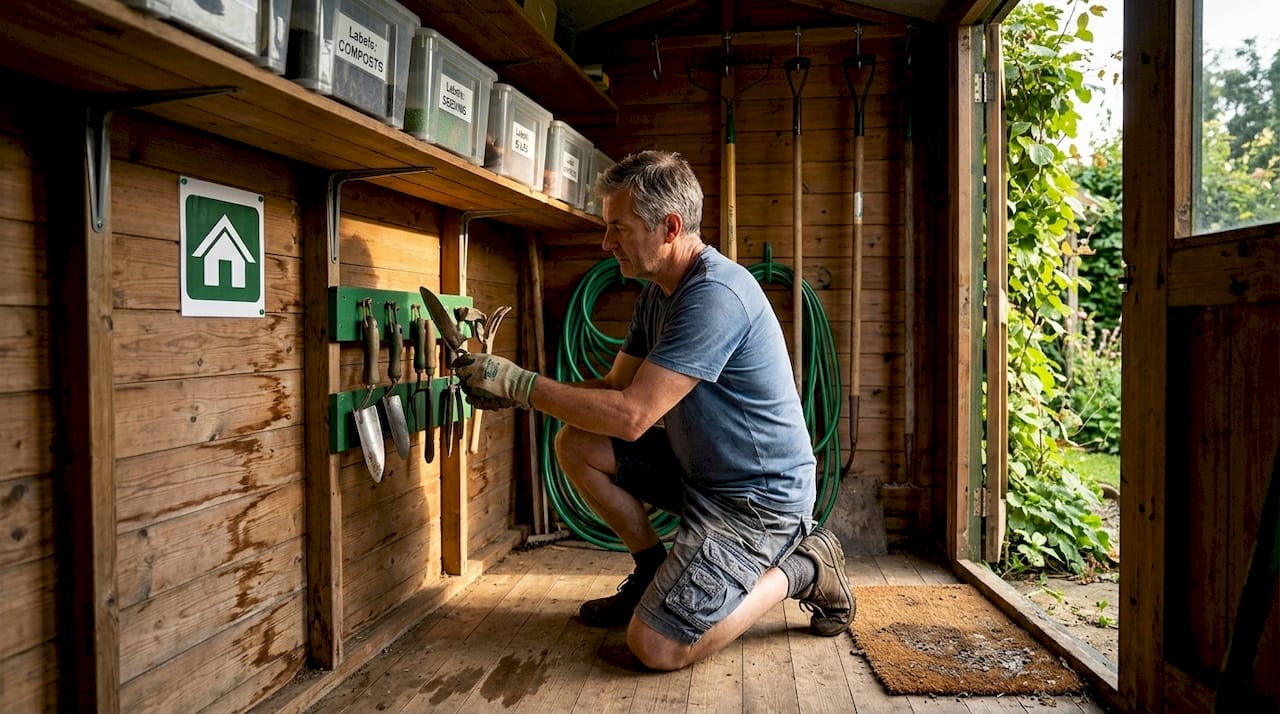
- Vertical shelving units along the longest wall for boxed and bagged items
- Pegboards for hand tools: easy to see, easy to grab, easy to put back
- Wall-mounted rails with hooks for hanging spades, rakes, and brooms
- Shelf risers inside existing shelving to double the number of levels
- Ceiling hooks or overhead racks for ladders, hoses, and long-handled tools
- Multi-tiered storage units for pots, sprays, and smaller gardening accessories
GardenUK notes that you can mount shelving above head height on walls and screw hooks into ceiling joists for long-handled tools, making excellent use of space that would otherwise sit empty.
Here’s a handy at-a-glance guide for awkward items:
| Item | Where to store | Benefit |
|---|---|---|
| Ladders | Ceiling hooks or wall brackets | Frees up floor space entirely |
| Garden hoses | Wall-mounted hose reel or overhead hook | Prevents tangling and damage |
| Long-handled tools | Wall rail or vertical rack | Instantly accessible, no rummaging |
| Garden chemicals | High, locked shelf | Safe from children and pests |
| Seasonal décor | Labelled overhead boxes | Out of the way but easy to locate |
| Small parts and fixings | Clear labelled tubs on shelving | Visible and quick to retrieve |
For your shed storage guide, think about labelling as a non-negotiable step. Shedblog recommends using clear plastic totes with lids that protect from dust, damp, and pests, and labelling each one for faster retrieval. This is especially useful for seasonal items you might only access twice a year.
Pro Tip: Reserve your overhead space for lightweight seasonal items and always use weatherproof boxes for anything containing garden chemicals or fertilisers. Damp and condensation are a real issue in many UK sheds, and sealed containers protect against both.
If you have a compact outdoor area, take a look at these shed solutions for small gardens for layout ideas that make clever use of limited square footage. More storage ideas can also spark creative solutions for unusual shed shapes and sizes.
Troubleshooting common shed storage mistakes
Now that your shed is organised, be aware of a few easy-to-make mistakes and how to fix or avoid them altogether.
Even the most enthusiastic reorganisation can unravel quickly if you fall into these traps:
- Storing heavy or bulky items at height. This is a safety hazard. Heavy tools and large containers should always be at floor or mid-level. Solution: move them down and use overhead space only for lightweight boxes.
- Blocking access to frequently used tools. If you have to move six things to get to your spade, you’ll stop putting it back properly. Solution: keep a clear path and ensure everyday tools are always within arm’s reach.
- Not labelling boxes. It seems like a minor thing until you’re hunting through four identical containers for a bottle of weedkiller. Solution: label everything before it goes in, not after.
- Failing to maintain the system. An organised shed slowly becomes disorganised again if you don’t keep up with it. Solution: build in short, regular check-ins rather than waiting for another full overhaul.
- Keeping things “just in case.” Broken tools, empty containers, and items you haven’t used in three years take up valuable space. Solution: be honest during your sort, and if in doubt, toss it.
Homebuilding’s approach to returning items strategically reinforces that the position of items matters as much as the containers you use. A poorly placed tool is as frustrating as no system at all.
Always keep walkways unobstructed. A clear path through your shed isn’t just practical. It genuinely reduces the risk of accidents, especially when you’re carrying sharp or heavy items.
Maintenance is as important as the initial setup. A tidy shed on day one means nothing if you’re not building habits that keep it that way. Think of upkeep as the real work.
If you’re finding that your current shed simply doesn’t offer enough space no matter how well you organise it, it might be time to think bigger. Exploring options to upgrade your garden storage can help you decide whether a new structure is the right move.
How to keep your shed organised all year round
A well-organised shed only stays tidy if it’s maintained. Here’s how to keep your gains year-round with minimal effort.
The key is building small, regular habits rather than relying on one big annual sort-out. Here’s a simple seasonal routine that works:
- Spring check. Bring out garden tools, pots, and planting supplies. Clear out anything that didn’t survive winter. Restock compost and fertiliser as needed.
- Summer tidy. Mid-season is a good time for a quick tidy-up. Put back any items that have migrated from their zones.
- Autumn sort. Bring in furniture cushions, garden ornaments, and summer tools. Reorganise so winter tools are at the front.
- Winter review. A good time to reassess what you no longer need and prep a donation bag for the new year.
Shedblog’s guidance on using labelled seasonal containers makes these seasonal transitions much smoother. You know exactly what’s in each box, and swapping winter and summer items takes minutes rather than hours.
Pro Tip: Assign one small shelf or box as a “miscellaneous” zone for things that don’t have a home yet. Review it every few months and properly rehome everything in it. This stops random clutter from spreading across the whole shed.
For ongoing shed care and maintenance, treat your shed like any other room in your home. A quick ten-minute tidy after a garden project goes a long way. You can also use project-based checklists, for example a “spring planting” kit and an “autumn clear-up” kit, so you always know where to find what you need for each season’s tasks. These seasonal shed care tips offer useful additional ideas for staying on top of things throughout the year.
The overlooked secret to shed storage: Mindset over materials
Here’s something most shed organisation guides won’t tell you: the tools and containers are the easy part. The hard part is changing how you think about your shed.
Most people treat their shed as a dumping ground. It’s where things go when there’s no other obvious place for them. A spare length of timber, a tin of old paint, a broken sprinkler. None of those things were given a proper home. They were just placed “temporarily” in the shed, and temporary became permanent.
The shift that makes a lasting difference is simple: start treating your shed as an asset. It’s a usable, valuable space. When you view it that way, you’re less likely to shove things in without thought and more likely to maintain the system you’ve worked hard to build.
We’ve seen this firsthand. Customers who invest in a quality garden building and then take the time to think about their organised outdoor storage genuinely use their sheds more. They go in, find what they need, complete the task, and put things back. The shed works for them.
Contrast that with the overhaul approach: spend a full weekend sorting, feel great about it, then gradually slide back into old habits because nothing has actually changed in terms of how you use the space. Fancy pegboards and label makers are wonderful, but they don’t build habits.
Small, regular routines beat one-off overhauls every time. Five minutes putting tools back properly after a gardening session is worth more than a full reorganisation every couple of years. Focus on use, not perfection. Ask yourself not “does this look organised?” but “does this help me use my shed the way I want to?”
That single question will guide every decision, from where to place your spades to whether you actually need that third watering can.
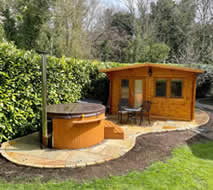
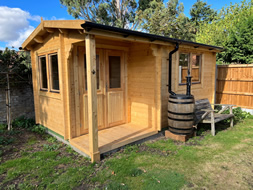
Upgrade your shed and storage with our garden log cabins
Sometimes the honest answer is that no amount of clever storage can compensate for a shed that’s simply too small. If you’re constantly battling for space or your shed is ageing and draughty, it might be time for a proper upgrade.

Our garden log cabins are designed to give you a genuinely functional outdoor space, built to your exact specifications. Whether you need a dedicated workshop, a tidy garden store, or a multi-purpose building that does both, our bespoke log cabins are crafted around how you actually use your garden. Browse our garden building inspiration pages to see what’s possible and get ideas for your own outdoor space. A beautiful, well-designed garden building makes staying organised feel effortless.
Frequently asked questions
What is the first step to maximise shed storage?
Empty the shed completely, sort your items, and only keep what you use, placing essentials near the door. As Homebuilding recommends, a rail-and-layout approach built around planning makes the whole process far more effective.
How do I make use of vertical space in my garden shed?
Install shelves above head height and use ceiling hooks for lightweight or long items. GardenUK describes screwing hooks into ceiling joists as an excellent way to store long-handled tools without taking up wall or floor space.
What’s the best way to store small or seasonal items?
Use clear, sealed containers with labels so items are protected and easy to find. Shedblog recommends clear totes with lids that guard against dust, damp, and pests while making retrieval quick and easy.
How often should I reorganise my shed?
Check and tidy your shed every season to prevent clutter from building up. A seasonal routine of four short check-ins per year is far less effort than one major overhaul.
Are storage solutions expensive to implement?
Many of the best ideas, like shelves and wall hooks, are budget-friendly and can use materials you already have. A pegboard, a few hooks, and some clear boxes can transform a shed for very little outlay.