
More than half of UK homeowners say building a garden shed is their most rewarding outdoor project. Yet, tackling the process on your own can feel confusing given planning rules, foundations, and weatherproofing challenges. Whether you want extra storage or a dedicated workspace, learning the right steps ensures your new shed will stand strong and meet all regulations from day one.
Table of Contents
- Step 1: Choose The Ideal Shed Location And Check Planning Rules
- Step 2: Prepare The Foundation And Gather Essential Materials
- Step 3: Assemble The Shed Structure And Secure The Frame
- Step 4: Install The Roof, Doors, And Windows For Weatherproofing
- Step 5: Inspect Your Shed And Complete Finishing Touches
Quick Summary
| Key Point | Explanation |
|---|---|
| 1. Choose the right shed location | Assess garden layout, ensuring space has good sunlight and drainage before installation. |
| 2. Understand planning permission rules | Verify height, area coverage, distance from boundaries, and usage regulations to avoid legal issues. |
| 3. Build a solid foundation | Use gravel, concrete blocks, or slabs, ensuring it extends beyond the shed footprint for stability. |
| 4. Assemble frame with precision | Securely connect frame to foundation, checking for levelness and using proper materials for durability. |
| 5. Weatherproof roof and openings | Install roofing felt and seals, using moisture-resistant materials to protect against weather elements. |
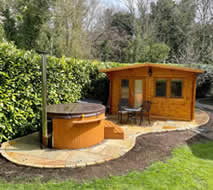
Step 1: Choose the ideal shed location and check planning rules
Picking the perfect spot for your garden shed requires careful planning and understanding of local regulations. Your location choice impacts not just aesthetics but also legal compliance and the shed’s functionality.
According to Homebuilding, UK homeowners must consider several key factors when selecting a shed location. First, assess your garden’s layout and available space. Look for a level area that receives adequate sunlight and has good drainage. Avoid low lying areas prone to water accumulation or spots near tree roots that could compromise your shed’s foundation.
Planning permission rules are crucial to understand before installation. As Saga explains, most garden sheds are permitted development. However, specific restrictions apply. Your shed must typically:
- Not exceed 2.5 metres in height
- Occupy less than 50% of your garden’s total area
- Be positioned at least 2 metres from any property boundary
- Not be used as a permanent dwelling
If your planned shed falls outside these parameters, you will need to submit a formal planning application to your local council. Pro tip: Always check with your local planning authority for the most up-to-date regulations, as rules can vary between different local jurisdictions.
In the next step, we will explore preparing the ground and selecting the right foundation for your garden shed.
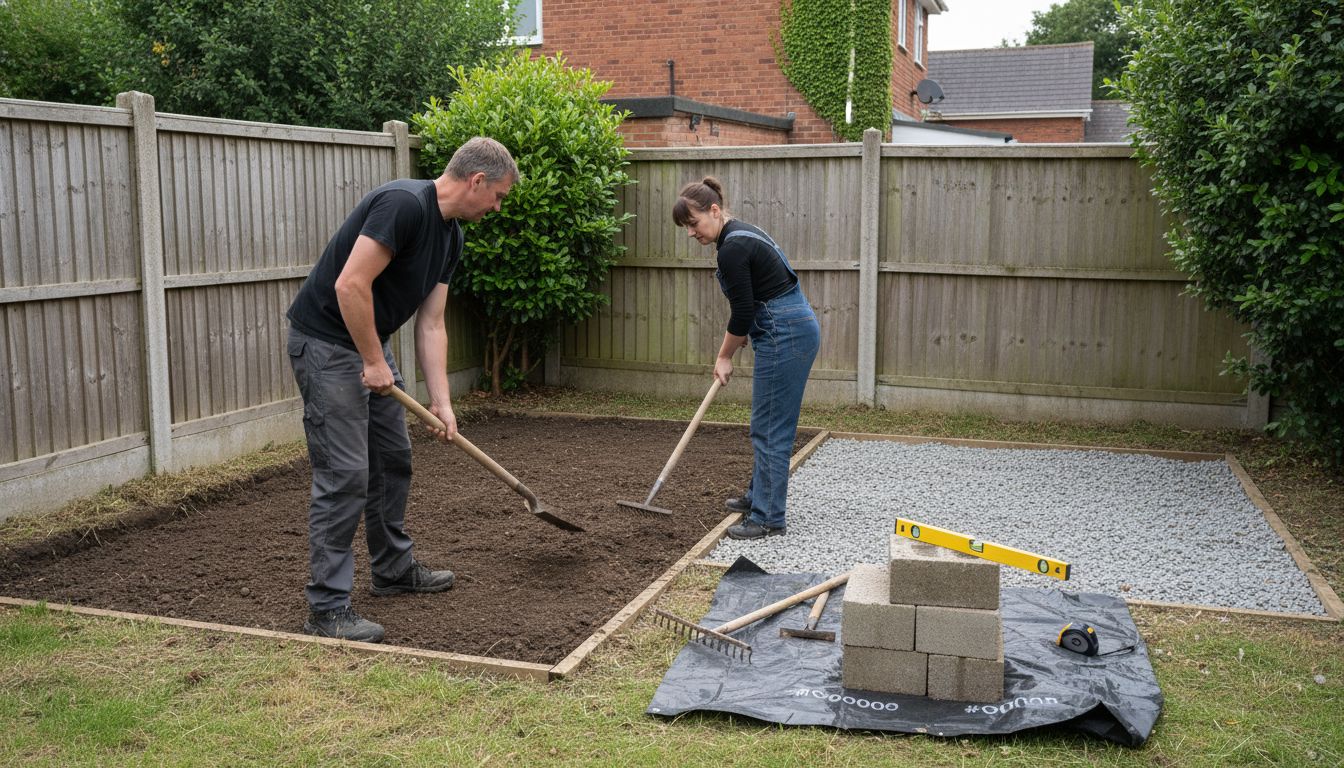
Step 2: Prepare the foundation and gather essential materials
Building a solid foundation is critical to the longevity and stability of your garden shed. This step will ensure your structure remains level, dry, and protected from ground moisture for years to come.
According to Materials Market, preparing a proper foundation involves several key steps. You will need to gather materials such as gravel, concrete blocks, wooden bearers, or a concrete slab depending on your specific requirements. Start by clearing and levelling the ground where your shed will sit. Remove any grass, weeds, and debris and ensure the area is completely flat.
Irish Cement recommends creating a stable base that provides excellent drainage. For most garden sheds, you have three primary foundation options:
- Concrete slab foundation
- Gravel and wooden bearer base
- Concrete block foundation
Whether you choose a concrete or gravel base, ensure the foundation extends slightly beyond the shed’s footprint. This provides extra stability and prevents water from pooling directly against the shed walls. Remember to create a slight slope away from the foundation to direct water runoff.
![]()
The materials you will need include:
- Tape measure
- Spirit level
- Shovel
- Rake
- Gravel or concrete mix
- Wooden bearers or concrete blocks
- Tamping tool
Pro tip: Always allow adequate time for your foundation to settle and dry completely before assembling your shed.
 Rushing this stage can lead to structural issues down the line.
With your foundation prepared, you are now ready to move on to assembling the shed base and floor structure.
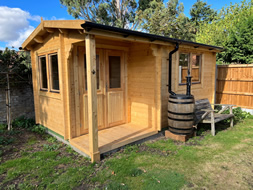
Step 3: Assemble the shed structure and secure the frame
Assembling your shed frame is a critical stage that determines the overall structural integrity and durability of your garden building. This step requires precision and careful attention to detail to ensure a stable and long lasting structure.
According to Materials Market, the frame assembly process begins with laying out your floor joists and securing them to the foundation. Start by checking that each timber piece is straight and free from significant warping. Use galvanized steel brackets to connect floor joists, ensuring they are perfectly square and level. Make your shed the center piece of your garden is easier when you begin with a solid foundation.
Key steps in frame assembly include:
- Align floor joists precisely
- Use carpenter’s square for accurate right angles
- Secure joints with appropriate exterior grade screws
- Check levelness frequently during construction
- Brace diagonal corners for additional stability
As recommended by Irish Cement, anchoring your frame securely to the foundation prevents future movement and potential structural issues. Use heavy duty anchor bolts or concrete fixing bolts to connect the wooden frame directly to your prepared base.
Pro tip: Always wear protective gloves and safety glasses during frame construction. Work methodically and double check measurements before making permanent connections.
With your frame assembled and secured, you are now ready to move on to installing wall panels and creating the structural shell of your garden shed.
Step 4: Install the roof, doors, and windows for weatherproofing
Weatherproofing your garden shed is the final critical step in creating a durable and functional outdoor structure. This stage protects your shed from moisture, wind, and temperature variations while ensuring your stored items remain safe and dry.
According to Materials Market, the roof installation requires careful attention to detail. Begin by laying roof trusses or rafters, ensuring they are symmetrically aligned and securely fastened to the wall frames. Use waterproof roofing felt as an initial protective layer, overlapping sheets by at least 100mm to prevent water infiltration. How To Keep Your Log Cabin Safe And Secure principles apply equally to shed construction when considering weatherproofing techniques.
Key considerations for door and window installation include:
- Choose exterior grade materials resistant to moisture
- Install weatherstripping around all openings
- Use silicone sealant to close potential gap areas
- Ensure proper alignment for smooth operation
- Select double glazed windows for better insulation
As recommended by Irish Cement, maintaining structural integrity means creating tight seals around all penetration points. Apply exterior grade caulk around window and door frames to prevent water ingress and potential future damage.
Pro tip: Allow slight expansion gaps around windows and doors to accommodate natural timber movement with temperature and humidity changes.
With your roof, doors, and windows installed, your garden shed is now ready for final finishing touches and interior organization.
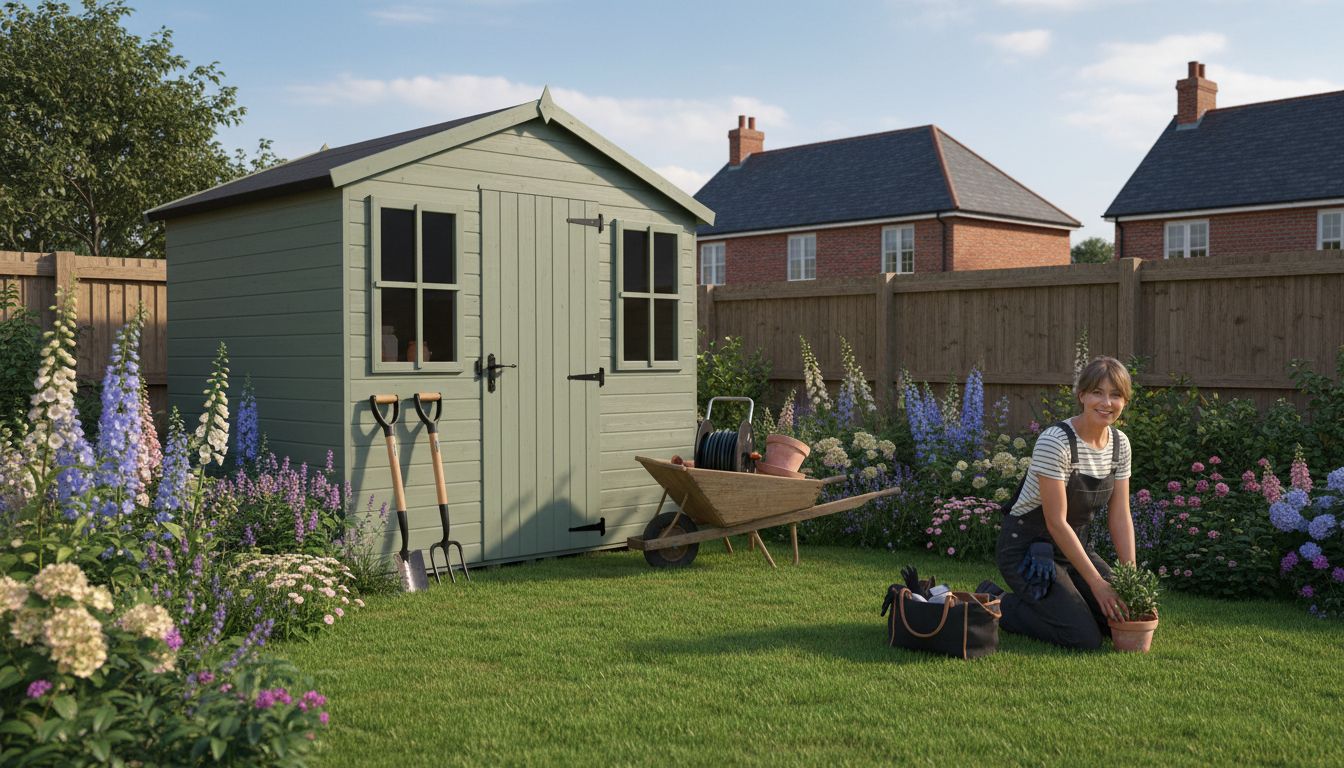
Step 5: Inspect your shed and complete finishing touches
With the structural elements of your garden shed now complete, the final stage involves careful inspection and adding those finishing touches that transform a basic structure into a functional and attractive garden feature. This crucial step ensures your shed will stand up to British weather and serve you well for years to come.
According to Materials Market, a comprehensive final inspection should cover multiple aspects of your shed. Start by checking all structural joints and connections, ensuring they are tight and secure. Look for any potential gaps or misalignments that could compromise weatherproofing. Getting Your Garden Ready For Autumn becomes easier when you have a well constructed and maintained garden shed.
Key inspection and finishing steps include:
- Verify all screws and bolts are fully tightened
- Check for any uneven surfaces or protruding nails
- Apply wood preservative to protect against moisture
- Sand down any rough edges or splinters
- Add exterior paint or wood stain for additional protection
As recommended by Irish Cement, paying attention to small details during the final stages can significantly extend your shed’s lifespan. Focus on creating smooth, sealed surfaces that will resist water penetration and potential wood rot.
Pro tip: Apply two coats of exterior wood treatment, allowing adequate drying time between applications. This creates a more robust protective layer against moisture and UV damage.
With your inspection complete and finishing touches applied, your garden shed is now ready to provide reliable storage and become a functional feature of your outdoor space.
Discover the Perfect Garden Shed Solution for Your UK Garden
Building a garden shed can feel overwhelming with so many steps from choosing the right location to creating a solid foundation and weatherproofing your structure. Many gardeners struggle with ensuring their shed is not only functional but also complies with local planning rules and withstands British weather. If you want to avoid common pitfalls like unstable foundations, poor weatherproofing, or complex frame assembly, there is a simpler way to bring your garden shed vision to life.

Explore bespoke, custom garden buildings designed to suit your outdoor space perfectly at Log Cabin Kits. Our expert-crafted kits eliminate guesswork by providing all the materials and guidance needed to assemble a sturdy, weatherproof garden shed that fits your exact requirements. Take control today and enjoy a hassle-free build with reliable support from start to finish. Visit our website to browse designs and get started on creating your dream garden shed now.
Frequently Asked Questions
What factors should I consider when choosing a location for my garden shed?
Choosing the ideal location for your garden shed involves considering factors such as sunlight, drainage, and available space. Assess your garden layout and select a level area away from tree roots and low-lying spots that could collect water.
Do I need planning permission to build a garden shed?
Most garden sheds in the UK are considered permitted development, meaning you usually won’t need planning permission. However, ensure your shed meets key criteria like height, area coverage, and proximity to property boundaries before proceeding with your build.
What type of foundation is best for my garden shed?
A solid foundation is essential for your shed’s stability and longevity. You can choose between a concrete slab, a gravel base with wooden bearers, or a concrete block foundation, depending on your shed’s size and the moisture levels in your garden.
How can I ensure my garden shed is weatherproof?
To weatherproof your garden shed, install a waterproof roofing material and ensure all doors and windows are sealed with weatherstripping and silicone caulk. This will help protect your shed and its contents from moisture damage and temperature fluctuations.
What are some important final checks before using my shed?
Before using your shed, conduct a thorough inspection of all joints, ensuring screws and bolts are tightened, and look for any gaps or misalignments. Applying wood preservative and sanding rough edges will also enhance protection against wear and moisture.
How long should I wait before assembling my shed after laying the foundation?
Allow adequate time for your foundation to settle and dry completely, which may take a few days depending on the materials you used. Waiting ensures a stable and level base, which is crucial for the durability of your shed.