
Cabin wall profile explained: your 2026 guide
TL;DR:
- A cabin wall profile is the cross-sectional shape of the boards that form a cabin’s walls, affecting interlocking, water runoff, and appearance. Choosing the right profile depends on climate, material, and desired aesthetics, with interlocking profiles like Swedish cope offering better weather resistance. Proper installation and maintenance ensure durability, while the profile influences both structural performance and the cabin’s interior atmosphere.
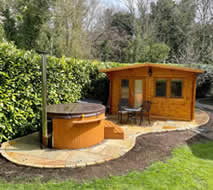
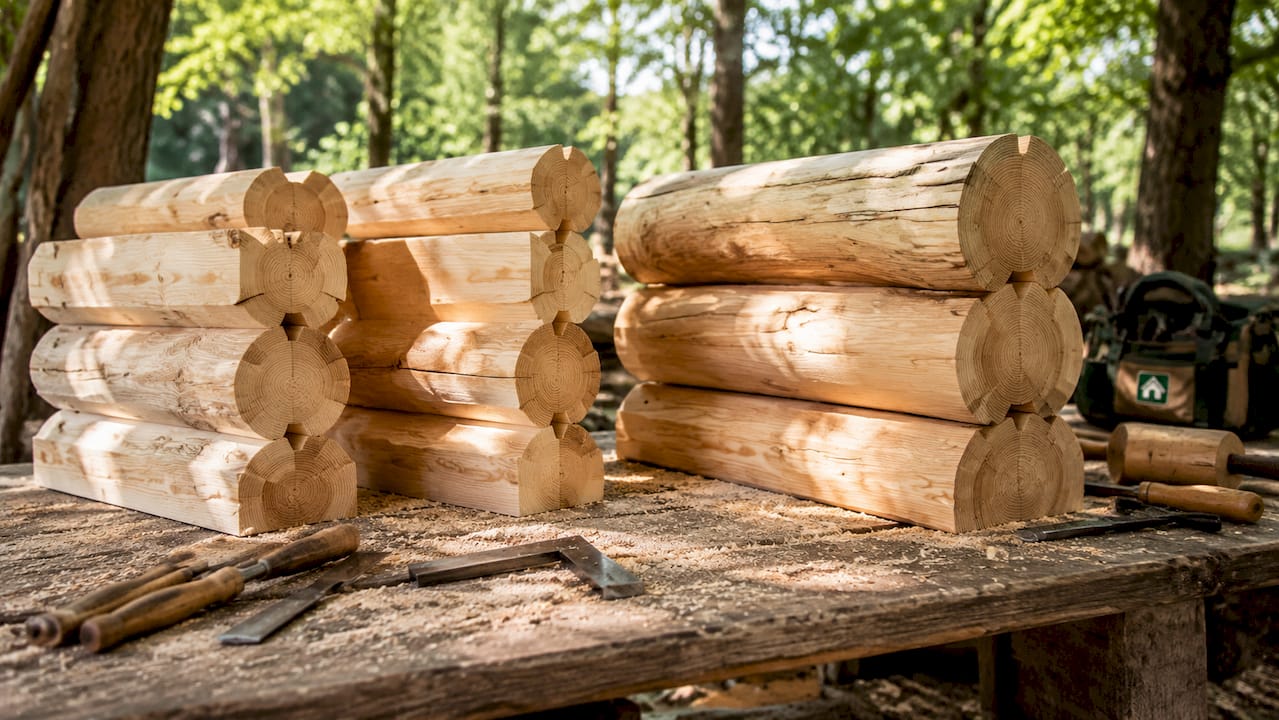
A cabin wall profile is defined as the cross-sectional shape of a log or siding board that forms the outer and inner walls of a cabin. That shape determines how boards interlock, how water runs off the surface, and how the finished wall looks from inside and out. Common profiles include D-log, half-round, Swedish cope, and square plank, each with different widths and thicknesses suited to different builds. Choosing the right cabin wall profile for your garden log cabin is one of the most important decisions you will make, and it is far simpler than it sounds.
What is a cabin wall profile and why does it matter?
A cabin wall profile is the specific shape you see when you cut through a log or board sideways. Think of it as the silhouette of your wall timber. That silhouette controls how boards stack on top of each other, how tightly they seal against wind and rain, and whether your cabin looks rustic or contemporary.
The profile also affects structural performance. A tightly interlocking profile holds the wall together more firmly than a flat board simply butted against its neighbour. For a garden log cabin in the UK, where rain is a constant companion, that interlocking quality matters a great deal.
D-log widths typically run from 6 to 8 inches, with premium options reaching 10 to 12 inches. That range gives you flexibility whether you are building a compact garden room or a full-sized multi-room cabin. The profile you choose sets the tone for everything else: insulation, finishing, and the overall feel of the space.
What are the common types of cabin wall profiles?
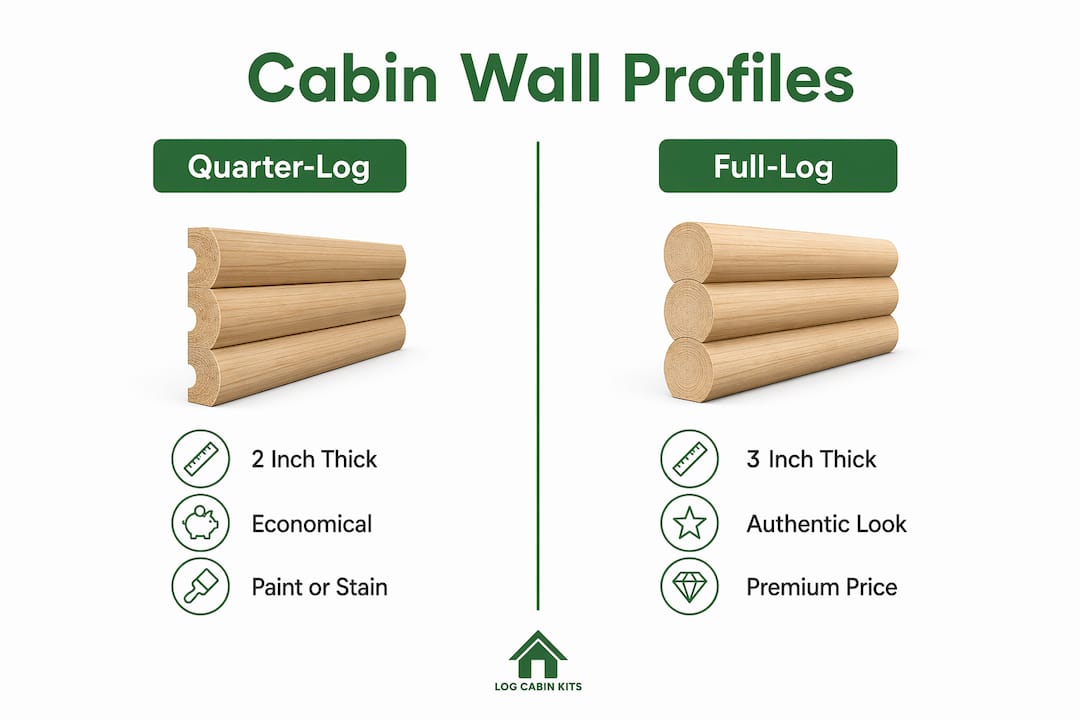
Quarter-log profiles are generally 2 inches thick and sized at 2x6 or 2x8. They are the most economical option and the easiest to install, making them popular for garden cabins and summer houses where budget matters. The trade-off is a slightly flatter appearance compared to fuller profiles.
Premier or full-log profiles run around 3 inches thick, up to 3x10 in size. They deliver the deepest, most authentic timber look. If you want your cabin to feel genuinely substantial, a premier log profile is the one to choose.
Here is a quick comparison of the most common profile types:
| Profile type | Typical thickness | Visual style | Best suited for |
|---|---|---|---|
| D-log | 6–8 inches wide | Rounded exterior, flat interior | Classic log cabin look |
| Half-round | 4–6 inches wide | Curved both sides | Rustic, traditional builds |
| Swedish cope | Varies | Curved underside groove | Wet or high-rainfall climates |
| Square plank | 28mm–90mm | Flat, clean lines | Modern or contemporary cabins |
| Quarter-log | 2 inches thick | Subtle log texture | Budget-friendly garden rooms |
| Premier log | 3 inches thick | Deep, full log texture | Authentic, statement builds |
A few things to keep in mind when comparing profiles:
- D-log gives you a flat interior wall, which makes fitting insulation and lining boards much easier.
- Swedish cope profiles have a curved groove cut into the underside of each board, which locks tightly onto the board below and sheds water naturally.
- Square plank profiles, like those used in 44mm log cabin kits, suit a cleaner, more modern aesthetic and work well for garden offices or studios.
- Half-round profiles are the most traditional choice and suit heritage or countryside settings.
Balancing cost with appearance is a personal choice. Quarter-log profiles look great painted or stained and cost considerably less than premier options. Premier logs, however, add genuine depth and character that no amount of paint can replicate.
How do materials and climate affect your profile choice?
The timber species and construction method behind your profile matter as much as the shape itself. Solid softwoods like Nordic spruce and pine are the most common choices for garden log cabins in the UK. They are light, workable, and take stain well. Glued laminated timber, known as glulam, adds dimensional stability and reduces the risk of warping over time. Logcabinkits offers 90mm glulam log cabins for buyers who want maximum durability and a thick, impressive wall.
Climate is the factor most people overlook when selecting a profile. The UK’s wet winters and freeze-thaw cycles put real pressure on cabin walls. Interlocking profiles such as the Swedish cope resist wind-driven rain and moisture far better than simple butt joints. In a wet climate, a butt-jointed profile is a long-term maintenance problem waiting to happen.
Key material and climate considerations:
- Solid timber requires re-sealing every 2–3 years in areas with heavy rainfall or significant freeze-thaw cycles to prevent rot and structural degradation.
- Glulam timber is more stable than solid logs and less prone to cracking or twisting as humidity changes.
- Simulated log siding replicates the look of solid timber with less weight and simpler installation. It suits outbuildings where structural engineering requirements are lower.
- Interlocking profiles are strongly recommended for any cabin exposed to prevailing winds or regular heavy rain.
Pro Tip: If your garden faces south-west in the UK, that elevation takes the most weather. Choose your deepest interlocking profile for that wall, even if you use a simpler profile on the sheltered sides.
What design considerations should you keep in mind?
Different log profiles create distinct interior atmospheres. Rustic rounded logs add warmth and texture, while flatter shiplap or square plank profiles make smaller rooms feel more open and airy. If your cabin doubles as a garden office or studio, a flatter profile keeps the interior feeling light and uncluttered.
Mixing profiles is a technique worth considering. Design experts recommend using contrasting wall profiles in open-plan cabins to define functional zones without building internal walls. A textured log profile on one feature wall paired with smooth plank boarding on the others creates visual interest without adding complexity.
Practical design points to consider:
- Corner trims and saddle notch corners must match your chosen profile. Corner systems and trims are available in sizes corresponding to quarter, half, and premier log profiles, so always specify your profile when ordering.
- Window and door surrounds look best when they echo the profile depth. A deep premier log wall with thin flat trims looks mismatched.
- Staining and sealing are both decorative and protective. Dark stains suit rustic profiles; lighter or grey tones work well with contemporary square plank designs.
- Interior lining boards in a D-log cabin can be painted white or left natural, giving you a very different feel from the same exterior shell.
Choosing the right profile has real comfort implications too. Walls influence visual warmth, insulation performance, and how coherent the overall style feels. A thicker profile naturally provides better thermal mass, which helps keep the cabin warmer in winter and cooler in summer.
How do you install and maintain cabin wall profiles properly?
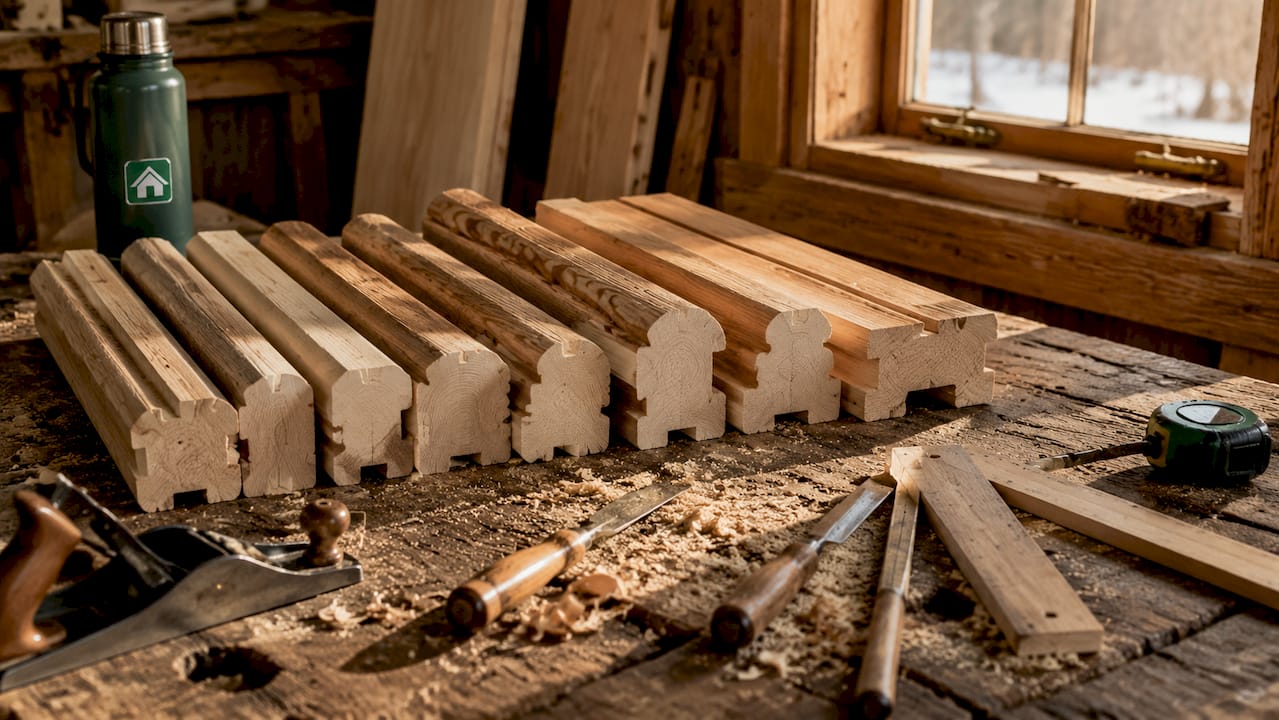
Good installation starts before you pick up a single board. Follow these steps to get the best result:
- Acclimatise your timber first. Lay boards flat in the ambient humidity of your site for at least 48 hours before installation. Skipping this step is the single most common cause of warped or misaligned walls after the cabin goes up.
- Prepare a level base. Your cabin wall profile can only perform as well as the foundation beneath it. A level, treated timber or concrete base prevents the bottom course from sitting in standing water.
- Start from the bottom course and work up. Each board should lock cleanly into the one below. Check for level every three or four courses.
- Seal all joints as you go. Do not leave joint sealing until the end. Apply a flexible, weather-resistant sealant to each horizontal joint during installation, particularly on the exposed elevations.
- Finish corners carefully. Poor corner finishing is the most visible sign of a rushed installation. Use the correct corner system for your profile and take your time.
- Apply your first coat of stain or preservative immediately after installation. Fresh timber absorbs the first coat deeply, giving you the best long-term protection.
- Re-seal or re-stain every 2–3 years. Standard maintenance intervals recommend this schedule for exposed outdoor cabins, particularly in high-rainfall areas. Keeping to this timetable prevents rot and keeps the cabin looking its best.
Pro Tip: If you are a confident DIYer, fitting a garden log cabin kit is very achievable. The installation guide from Logcabinkits walks you through every stage, from base preparation to roof finishing. For larger or more complex bespoke builds, getting a professional to handle the first course and corner setting saves a lot of headaches later.
Key takeaways
The cabin wall profile you choose shapes everything from structural performance and weather resistance to interior atmosphere and long-term maintenance requirements.
| Point | Details |
|---|---|
| Profile defines shape and performance | The cross-sectional shape of your boards controls interlocking, water run-off, and aesthetics. |
| Interlocking profiles resist moisture best | Swedish cope and similar designs outperform butt joints in wet UK climates. |
| Timber thickness affects insulation and look | Thicker profiles like 68mm or 90mm provide better thermal mass and a more authentic appearance. |
| Acclimatise timber before fitting | Laying boards flat for 48 hours prevents warping and misalignment after installation. |
| Maintenance every 2–3 years is non-negotiable | Re-sealing or re-staining on schedule prevents rot and keeps the cabin looking sharp. |
Why profile choice is more personal than people think
I have spoken with a lot of people who treat the cabin wall profile as an afterthought. They spend weeks choosing the roof style and the floor plan, then pick a profile in about five minutes because it looks fine in a photo. That approach almost always leads to regret.
The profile is the thing you will look at every single day. It is also the thing doing the most structural work in keeping weather out. Getting those two jobs right at the same time takes a bit of thought.
One misconception I come across regularly is the idea that simulated log siding is somehow cheating. It is not. Simulated log profiles provide genuine visual authenticity with simpler installation and less structural demand. For a garden guest room or hobby space, that is a perfectly sensible choice.
What I would push back on is choosing a profile purely for looks without thinking about your specific site. A beautiful half-round profile on a north-facing wall that gets no sun and stays damp will need far more maintenance than the same profile on a sheltered, south-facing elevation. Think about where your cabin sits before you decide on the shape of its walls.
The other thing worth saying is that thicker is not always better. A 28mm log cabin profile is perfectly adequate for a seasonal garden room. Spending more on a 90mm glulam wall for a building you use three months a year is not a great use of money. Match the profile to how you will actually use the space.
— Martin
Logcabinkits can help you find the right cabin wall profile
Choosing a cabin wall profile is much easier when you can see the options side by side and talk through what suits your garden and your plans.

Logcabinkits offers a wide range of garden log cabins built from quality Nordic timber, with wall profiles ranging from 28mm through to 90mm glulam. If the standard range does not quite fit your vision, the bespoke cabin design service lets you specify profile thickness, dimensions, and finishing options to suit your exact needs. Free UK delivery is included on all orders. Have a browse, and if you have questions about which profile works best for your site, the team is always happy to help.
FAQ
What is a cabin wall profile?
A cabin wall profile is the cross-sectional shape of a log or siding board used to construct cabin walls. It determines how boards interlock, how water is shed, and how the wall looks from inside and out.
Which cabin wall profile is best for wet UK climates?
Interlocking profiles such as the Swedish cope are best for wet climates. Their curved underside groove locks tightly onto the board below and sheds wind-driven rain far more effectively than simple butt-jointed boards.
How thick should cabin wall profiles be?
Thickness depends on how you plan to use the cabin. A 28mm or 34mm profile suits a seasonal garden room, while a 44mm or 68mm profile offers better insulation for year-round use. A 90mm glulam profile provides the highest thermal performance.
How often do cabin walls need re-sealing?
Re-sealing every 2–3 years is the standard recommendation for exposed outdoor cabins in the UK, particularly in areas with high rainfall or freeze-thaw conditions.
Can I mix different cabin wall profiles in one build?
Yes, and design experts actively recommend it for open-plan cabins. Using a textured profile on a feature wall and a flatter profile elsewhere helps define zones and adds visual interest without structural complications.