
How to add a veranda to your log cabin: a step-by-step guide
TL;DR:
- Adding a veranda to a log cabin creates a sheltered outdoor space that enhances the building’s appearance and functionality. Proper planning, movement-tolerant fixings, and accurate foundation work are essential for ensuring long-term stability and protection against water damage. Finishing with matching timber treatments and careful detailing makes the veranda look like a natural extension of the cabin.
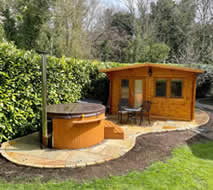
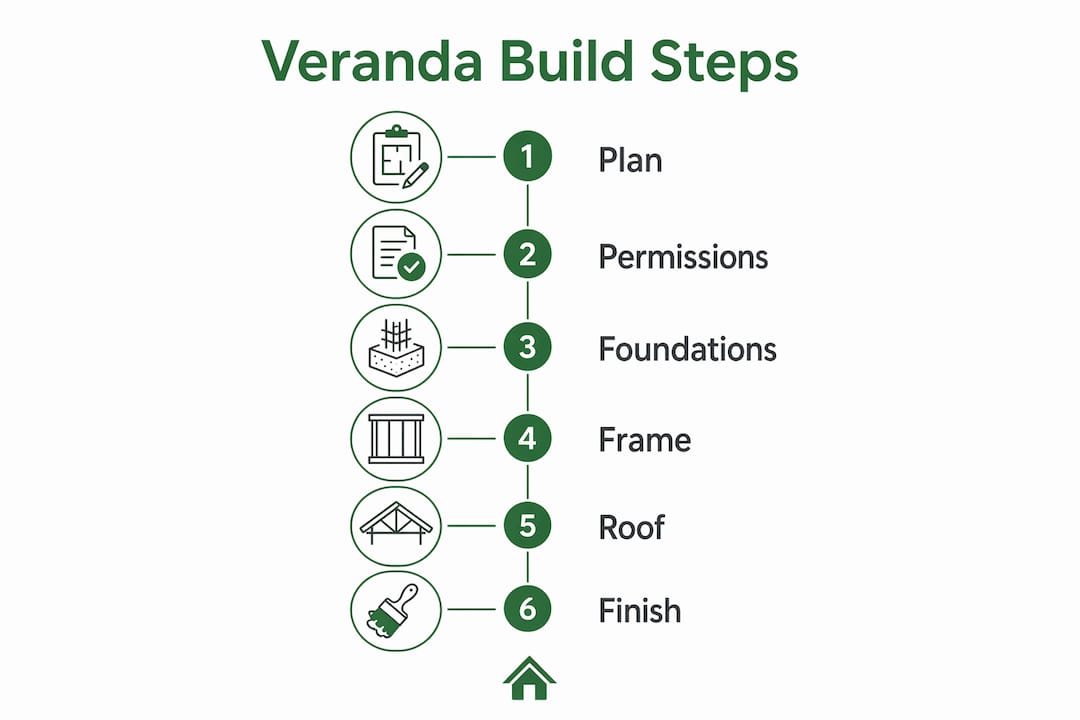
Adding a veranda to a log cabin means constructing a covered, open-sided structure attached directly to the cabin wall, giving you a sheltered outdoor space that works in all weathers. Done well, it lifts the look of the whole building and gives you somewhere genuinely useful to sit, eat, or store muddy boots. This guide walks you through how to add a veranda to a log cabin, from checking permissions and laying foundations to fixing the roof and finishing the timber. You’ll need pressure-treated timber, corrosion-resistant fixings, a spirit level, and a circular saw. Get these basics right and the rest follows naturally.
What preparations and permissions do you need before adding a veranda?
Planning is the part most DIY builders rush, and it’s the part that causes the most problems later. Before you buy a single length of timber, check your local planning authority’s rules. In England, many attached verandas fall under permitted development rights, but height, size, and proximity to boundaries all affect whether you need formal permission. If your cabin sits in a conservation area or is listed, the rules are stricter.
Once permissions are confirmed, assess the cabin wall where the ledger beam will attach. Log cabin walls expand and contract seasonally with moisture changes, so the wall must be structurally sound before you fix anything heavy to it. Press firmly on the logs and look for soft spots, rot, or gaps between courses.
Size matters too. A veranda that is too wide for the cabin looks wrong and puts unnecessary load on the structure. As a general rule, keep the veranda width no greater than the cabin’s front face, and plan the depth to suit how you’ll use it. A 1.5-metre depth suits a seating area; 2.5 metres gives you room for a table and chairs.
Your pre-build checklist:
- Planning permission confirmed or permitted development verified
- Cabin wall inspected for rot, gaps, and structural soundness
- Veranda dimensions drawn to scale and proportional to the cabin
- Ground cleared, levelled, and drainage direction confirmed
- Materials ordered: pressure-treated timber, galvanised fixings, concrete, roofing sheets
- Tools ready: circular saw, drill, spirit level, string lines, post hole digger
Pro Tip: Mark out the full veranda footprint with string lines and pegs before ordering timber. Seeing the actual size on the ground often reveals that you’ve planned it too small or too large.
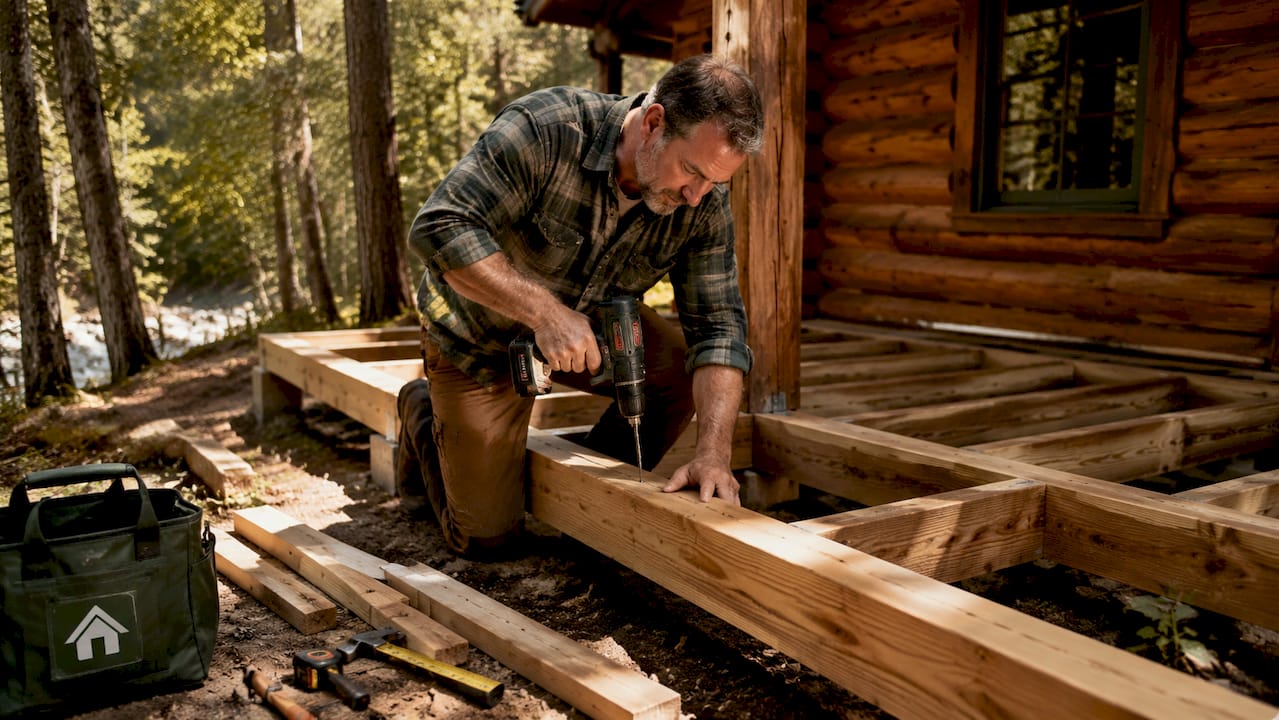
How do you build stable foundations and set veranda posts?
The foundation is what keeps your veranda standing straight for decades. Get it wrong and you’ll have leaning posts and a twisted roof within a few years. Concrete pad footings are the most reliable option for most garden settings. They set posts into the ground with a solid concrete base and ensure proper height and plumb alignment before the concrete cures.
Follow this sequence for solid foundations and posts:
- Mark post positions using your string lines. Double-check diagonal measurements to confirm the layout is square.
- Dig post holes to a minimum depth of 450mm, or deeper in soft or clay-heavy ground. Wider holes give concrete more bearing area.
- Pour a concrete base layer into each hole and allow it to partially set before placing the post anchor or post base plate.
- Set post anchors or bases into the wet concrete, checking they are perfectly level with each other using a long spirit level and string line.
- Allow concrete to cure fully before fitting posts. Rushing this step is one of the most common mistakes on DIY builds. Concrete needs at least 48 hours, and longer in cold weather.
- Fix posts to anchors using the manufacturer’s specified fixings. Use corrosion-resistant fixings such as galvanised or stainless steel throughout.
- Brace posts temporarily with diagonal timber braces screwed to stakes in the ground. Keep these in place until the full frame is fixed.
- Check plumb on all four faces of each post using a spirit level. A post that is even slightly off will cause problems at roof level.
Failing to slope the concrete surface away from post bases is the most common cause of premature timber rot. Water must drain away from the post, not pool around it.
Pro Tip: Mix a slightly stiffer concrete than you think you need for post footings. Wet, sloppy concrete shrinks more as it cures, which can leave small gaps around post bases where water collects.
How do you attach the veranda frame and roof to your log cabin?
The frame connects the free-standing posts to the cabin wall, and the roof sits on top of that frame. Build in this order: wall plate, beams, rafters, then roofing. Skipping steps leads to leaning posts, twisted rooflines, and leaks.
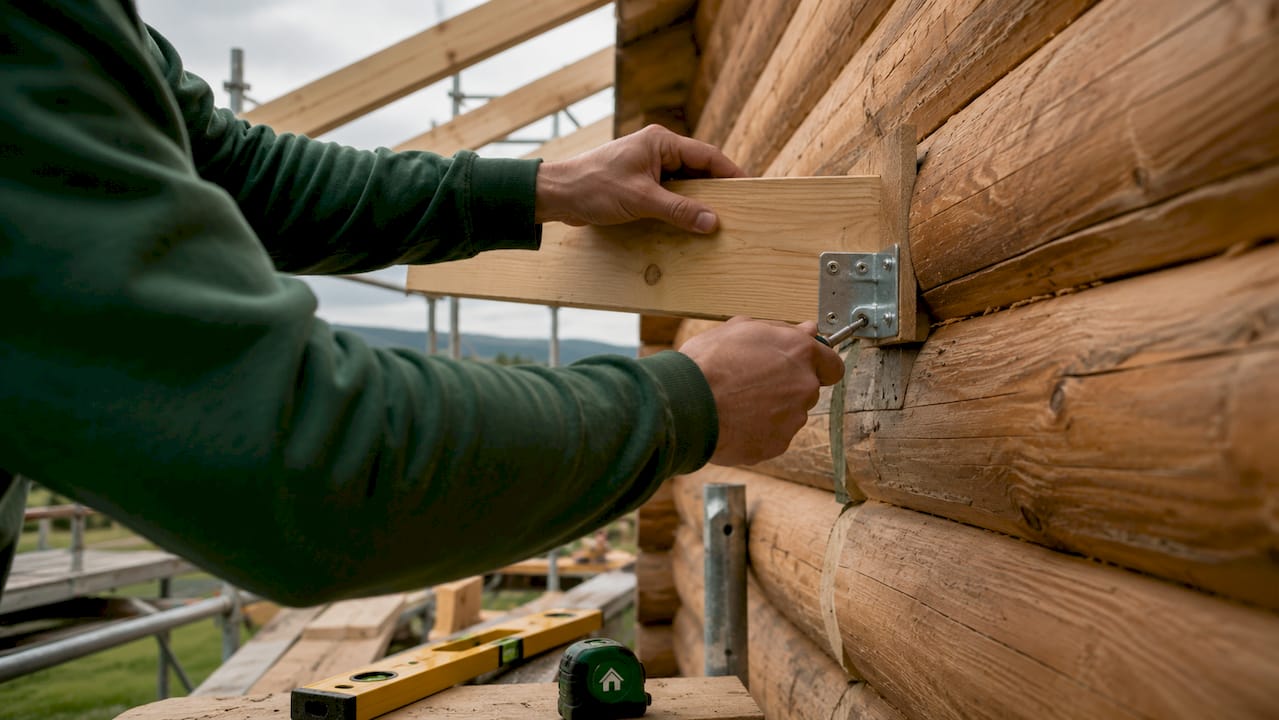
Fixing the ledger beam
The ledger beam runs along the cabin wall and carries the inner ends of the rafters. Log cabin walls move seasonally, so standard rigid fixings will crack the logs over time. Use specialised mounting brackets that allow a small degree of movement. Fix into solid log courses, not into gaps between logs, and use a drill bit rated for timber to avoid splitting.
Roof pitch and drainage
| Roof span | Minimum slope required |
|---|---|
| Up to 4,000mm | 1 degree |
| Over 4,000mm | 1.5 degrees |
The minimum slope of 1 degree applies to all attached verandas. A flat roof with no fall will pool water and fail within a few seasons. Build the slope into your post heights at the planning stage so the frame naturally pitches away from the cabin.
Roofing materials and waterproofing
Polycarbonate roofing sheets are the most practical choice for a DIY veranda. They are lightweight, easy to cut with a circular saw, and let natural light through. Fix them with the correct roofing screws and pre-drill to avoid cracking.
The back channel is the most critical waterproofing detail on the whole build. It sits at the junction between the veranda roof and the cabin wall. The back channel creates a watertight seal at this junction, and must be bedded in professional-grade silicone along its full length. Any gap here will let water run down behind the roofing and into the cabin wall.
Key roofing checklist:
- Ledger beam fixed with movement-tolerant brackets
- Roof pitch confirmed before rafters are cut
- Rafters spaced evenly and fixed with galvanised joist hangers
- Back channel fitted and fully sealed with silicone
- Polycarbonate sheets fixed with pre-drilled holes and UV-rated screws
- Gutters and downpipes fitted to carry stormwater away from the structure
Finishing touches: weatherproofing, timber treatment, and style
A well-built veranda that looks like it was bolted on as an afterthought is a missed opportunity. The finishing stage is where you make it look like it was always part of the cabin.
Matching wood stain tones and post styles to the original cabin is the single most effective way to achieve a cohesive result. Designers consistently recommend avoiding contrasting modern materials, which make verandas look like additions rather than features. Choose a stain that matches the cabin’s existing treatment, apply two coats to all cut ends, and reapply every two to three years.
Finishing checklist:
- Apply a timber preservative to all structural timber before assembly, paying attention to cut ends
- Stain or paint posts, beams, and fascia boards to match the cabin
- Fit balustrades or railings in a style that suits the cabin, whether that is turned spindles for a traditional look or simple horizontal rails for something cleaner
- Install outdoor lighting, either wall-mounted lanterns on the cabin face or pendant lights from the rafters
- Add guttering along the outer fascia and run downpipes to a soakaway or water butt
For ideas on how a well-designed outdoor living space can work alongside a cabin, it’s worth thinking about furniture placement and shade from the start. A veranda that faces south or west will need some form of shade in summer, whether that is a retractable blind or climbing plants on a trellis fixed to the posts.
Pro Tip: Treat the underside of all rafters and the top face of the ledger beam with preservative before the roof goes on. Once the roofing sheets are fixed, these surfaces are impossible to reach and will be the first to show rot if left untreated.
Common veranda problems and how to avoid them
Most veranda failures come down to a handful of repeated mistakes. Knowing them in advance saves you a lot of time and money.
- Water pooling at post bases. This is the most common cause of early timber rot. Slope the ground and concrete away from every post base, and check that surface water drains away from the structure after heavy rain.
- Rigid fixings on a log cabin wall. Log walls move with the seasons. Rigid bolts will crack logs and open gaps. Always use movement-tolerant brackets at the ledger beam.
- Posts set out of plumb. A post that leans even slightly will transfer that lean to every beam and rafter above it. Check plumb before the concrete sets, not after.
- Rushing concrete curing. Loading a post before the concrete has fully cured shifts it out of position. Wait the full curing time, even if the weather is good.
- Missing back channel sealant. A dry-fitted back channel with no silicone will leak within one wet season. Seal it fully on installation.
“If you’re unsure whether a structural element is correct, stop and get a second opinion before continuing. A professional builder can check your work at any stage, and catching a problem early costs far less than fixing it after the roof is on.”
Knowing when to call in a professional is part of good DIY practice. Foundation work, ledger beam fixing to a log wall, and roofing waterproofing are the three stages where a professional check adds the most value. For everything else, a confident DIY builder with the right tools can manage the full build. The Logcabinkits installation guide covers related structural principles that apply equally well to veranda additions.
Key takeaways
Adding a veranda to a log cabin requires solid foundations, movement-tolerant fixings at the ledger beam, a correctly pitched roof, and timber treatment that matches the cabin’s existing finish.
| Point | Details |
|---|---|
| Plan before you build | Check planning permissions and assess the cabin wall before ordering any materials. |
| Foundations determine longevity | Slope concrete away from post bases to prevent water pooling and timber rot. |
| Allow for log wall movement | Use movement-tolerant brackets at the ledger beam to prevent cracking as the cabin settles. |
| Roof pitch is non-negotiable | A minimum slope of 1 degree is required for drainage; increase to 1.5 degrees for spans over 4,000mm. |
| Match the finish to the cabin | Use the same stain tone and post style as the cabin to avoid a patched-on appearance. |
What I’ve learned from watching veranda builds go wrong
I’ve seen a lot of veranda projects over the years, and the ones that fail almost always fail at the same two points: drainage and fixings. Builders spend weeks getting the frame perfect, then rush the back channel seal or forget to slope the concrete at the base of the posts. Six months later, the timber is already showing signs of rot.
The other thing I’d say is that matching the finish matters more than most people expect. A veranda built from beautiful pressure-treated timber, stained in a completely different tone to the cabin, looks wrong. It draws the eye for the wrong reasons. Spend an afternoon testing stain samples against the cabin wall before you commit to a colour. It’s a small thing that makes a big difference to the finished result.
For DIY builders, my honest advice is this: do the foundations yourself, do the framing yourself, but get a professional to check the ledger beam fixing and the back channel before the roofing goes on. Those two details are where water gets in, and water is what destroys timber structures. Everything else is manageable with patience, the right tools, and a good spirit level.
— Martin
Planning a veranda? Start with the right cabin

A veranda works best when it’s planned alongside the cabin rather than added as an afterthought. At Logcabinkits, the garden log cabin range includes designs that lend themselves naturally to veranda additions, with solid wall construction and proportions that suit an attached covered structure. If you want something built around your specific plans, the bespoke cabin design service lets you specify dimensions, wall thickness, and door and window positions from the start. That means the veranda and the cabin work together from day one, rather than requiring awkward adjustments later. Have a look at the range and see what fits your space.
FAQ
Do I need planning permission to add a veranda to a log cabin?
Most attached verandas in England fall under permitted development rights, but size, height, and proximity to boundaries all affect eligibility. Always check with your local planning authority before starting work.
What is the minimum roof pitch for a veranda?
The minimum slope is 1 degree for spans up to 4,000mm, and 1.5 degrees for spans over 4,000mm. A roof with insufficient pitch will pool water and deteriorate quickly.
Can I fix a ledger beam directly to a log cabin wall?
You can, but rigid fixings will crack the logs as the wall moves seasonally. Use movement-tolerant mounting brackets designed for log wall construction to prevent structural damage.
What timber should I use for a veranda?
Pressure-treated timber is the standard choice for posts, beams, and rafters. Pair it with galvanised or stainless steel fixings to prevent corrosion and extend the life of the structure.
How do I make my veranda look like part of the original cabin?
Match the stain colour and post style to the existing cabin as closely as possible. Using contrasting materials or finishes makes the veranda look like a separate addition rather than a planned feature.
Recommended
- blog step by step cabin insulation your complete diy guide | Specialist Garden Cabin Supplier
- blog garden cabin landscaping workflow your step by step guide | Specialist Garden Cabin Supplier
- How to Build a Log Cabin - DIY Installation Pointers
- blog cabin build timelines explained your planning guide | Specialist Garden Cabin Supplier