

Blog

Your garden cabin is a cherished retreat, but without proper care, it can quickly lose its charm and structural integrity. Many owners underestimate the importance of regular maintenance, leading to costly repairs and diminished aesthetics. This comprehensive guide walks you through essential maintenance tasks, from preparing your cabin correctly to conducting routine inspections. You’ll discover how proper ventilation, timely treatments and strategic drainage can prevent damage whilst preserving your cabin’s natural beauty for years to come.
Table of Contents
- Key takeaways
- Preparing your garden cabin for maintenance
- Applying treatments and protecting your cabin wood
- Managing ventilation, condensation and drainage issues
- Routine inspection and ongoing maintenance tips
- Explore bespoke garden cabins and expert maintenance products
- How often should I treat my garden cabin wood?
- What are the best ways to prevent condensation inside my cabin?
- How can I check if my cabin wood moisture is safe for treatment?
- What should I do if I discover rot in my cabin wood?
Key Takeaways
| Point | Details |
|---|---|
| Ventilation and base clearance | Maintain at least 150 millimetres clearance around the base and ensure adequate ventilation to prevent damp and hidden rot. |
| Moisture below twenty per cent | Use a digital moisture meter to confirm wood moisture is below twenty per cent before applying any protective finish. |
| Breathable finishes | Choose breathable microporous finishes that permit moisture vapour to escape while protecting the wood according to climate and exposure. |
| Regular maintenance scheduling | Set reminders for moisture checks, treatment applications and seasonal inspections to prevent missed tasks. |
Preparing your garden cabin for maintenance
Before you apply any treatment or begin maintenance work, your cabin needs proper preparation. Rushing this stage causes more harm than good, trapping moisture and creating conditions for rot. The wood must reach the right moisture content before treatments can bond effectively.
Check your cabin’s wood moisture using a digital moisture meter, available from most hardware stores. The reading should sit below 20% before you apply any protective finish. Treating wood above this threshold traps water inside, causing rot or peeling, so patience pays dividends. Most newly installed cabins need one to three weeks of settling time before they’re ready for treatment.
Gather your maintenance toolkit before starting. You’ll need breathable wood treatments suitable for exterior use, quality brushes or sprayers, cleaning supplies, a moisture meter and ventilation aids like additional vents or dehumidifiers. Don’t forget protective equipment including gloves, safety glasses and dust masks for sanding work.
Clear the area surrounding your cabin’s base. Overgrown vegetation, soil buildup and debris restrict airflow underneath the structure, creating damp conditions that encourage rot. Maintain at least 150mm clearance around the perimeter, allowing air to circulate freely beneath the cabin floor. This simple step prevents hidden moisture damage that often goes unnoticed until serious structural problems develop.
Pro Tip: Mark your calendar for maintenance tasks immediately after installation. Setting reminders for moisture checks, treatment applications and seasonal inspections ensures nothing gets forgotten during busy periods.
Essential preparation checklist
- Verify wood moisture content is below 20% using a digital meter
- Allow 1-3 weeks settling time after installation before first treatment
- Clean all surfaces thoroughly, removing dirt, algae and old flaking finishes
- Check weather forecasts and plan treatments during dry periods
- Ensure adequate ventilation throughout the cabin interior
- Remove vegetation and debris from around the base perimeter
- Inspect for existing damage requiring repair before treatment
| Preparation stage | Timing | Tools needed | Common mistakes to avoid |
|---|---|---|---|
| Moisture testing | Week 1-3 post-installation | Digital moisture meter | Testing only surface, not deeper wood |
| Surface cleaning | Before each treatment | Soft brush, mild detergent, hose | Using pressure washers that damage wood grain |
| Base clearance | Quarterly minimum | Garden tools, rake | Allowing vegetation contact with cabin walls |
| Weather planning | 48 hours dry forecast | Weather app | Applying treatments before rain |
Understanding your cabin’s construction helps identify vulnerable areas. Weatherproofing requires attention to joints, corners and areas where water naturally collects. Pay special attention to door thresholds, window frames and roof edges where moisture penetration commonly occurs.
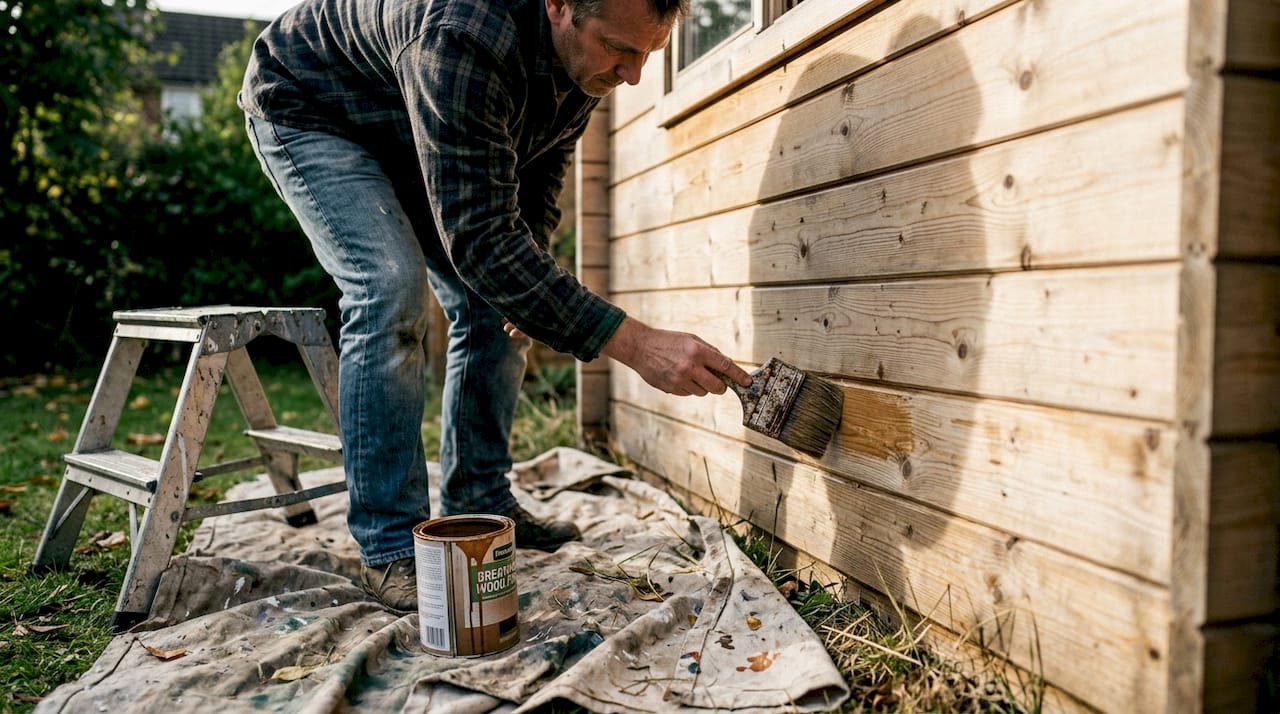
Applying treatments and protecting your cabin wood
Choosing the right protective finish makes the difference between a cabin that weathers beautifully and one that deteriorates rapidly. The UK’s wet climate demands treatments that work with wood’s natural properties rather than fighting against them.
Breathable, microporous finishes are essential. Unlike traditional paints that seal wood completely, microporous treatments prevent moisture trapping whilst allowing water vapour to escape. Oil-based products traditionally perform better in wet conditions, though water-based hybrid formulations have improved significantly. Consider your cabin’s exposure, local climate and personal preferences when selecting products.
Pro Tip: Test your chosen treatment on an inconspicuous area first. Wood species react differently to finishes, and a small test patch reveals how the colour develops and whether the product bonds properly.
Step-by-step treatment application
- Sand any rough areas lightly using 120-grit sandpaper, working with the wood grain
- Remove all sanding dust with a tack cloth or soft brush
- Apply the first coat thinly and evenly, avoiding puddles or drips
- Allow proper drying time as specified by the manufacturer, typically 24-48 hours
- Lightly sand between coats if recommended by the product instructions
- Apply second and third coats, building up protection gradually
- Pay extra attention to end grains, joints and horizontal surfaces where water collects
- Inspect coverage carefully, ensuring no bare patches remain
| Treatment type | Best conditions | Advantages | Limitations | Typical recoat interval |
|---|---|---|---|---|
| Oil-based microporous | Exposed locations, high rainfall | Superior weather resistance, deep penetration | Longer drying times, stronger odour | 2-3 years |
| Water-based hybrid | Sheltered areas, eco-conscious owners | Quick drying, low odour, easy cleanup | May require more frequent recoating | 1-2 years |
| Natural oils | Interior or well-sheltered cabins | Enhances grain, simple maintenance | Limited weather protection | Annual |
| Coloured stains | Full sun exposure | UV protection, aesthetic variety | Can fade unevenly, harder to change colour | 2-4 years |
Application technique affects longevity as much as product choice. Work systematically from top to bottom, treating the roof first, then walls and finally the base. This prevents drips from ruining freshly treated lower sections. Use brushes for detailed work around windows and doors, whilst rollers or sprayers cover large wall sections efficiently.
Timing matters enormously. Apply treatments during mild, dry weather with temperatures between 10-20°C. Avoid working in direct sunlight, which causes finishes to dry too quickly and prevents proper absorption. Early morning or late afternoon provides ideal conditions, with lower temperatures and reduced UV intensity.
Expert opinions on treatment frequency vary. Some manufacturers recommend annual recoating, whilst others suggest two to five year intervals depending on exposure and product guarantees. Understanding different protection levels helps you choose appropriate products for your specific situation. Inspect your cabin regularly rather than following rigid schedules, reapplying treatment when you notice fading, water absorption or surface degradation.
Managing ventilation, condensation and drainage issues
Moisture is your garden cabin’s greatest enemy, attacking from both inside and outside. Effective moisture management requires a multi-layered approach addressing ventilation, condensation control and drainage simultaneously.
Preventing condensation demands good ventilation through vents, open windows and humidity management, especially when using appliances that generate moisture. Single-glazed windows are particularly prone to condensation, requiring regular wiping to prevent water damage to frames and sills. Even brief periods of high humidity can create conditions for mould growth and wood decay.
Install adjustable vents near the floor and ceiling to create natural air circulation. Warm, moist air rises and escapes through upper vents whilst cooler, drier air enters below. This passive ventilation works continuously without electricity, though you can supplement it with battery-powered fans during particularly humid periods.
Condensation prevention strategies
- Open windows for at least 30 minutes daily, even during winter
- Install trickle vents in window frames for continuous background ventilation
- Use a dehumidifier if your cabin houses moisture-generating appliances
- Wipe condensation from windows immediately using absorbent cloths
- Avoid drying clothes inside the cabin
- Ensure adequate insulation to reduce temperature differentials
- Position furniture away from walls to allow air circulation
- Store items in breathable containers rather than sealed plastic boxes
Drainage around your cabin’s perimeter deserves equal attention. Water pooling near the base seeps into floor joists and bearers, causing hidden rot that only becomes apparent when structural damage occurs. Inspect the ground level regularly, ensuring it slopes away from the cabin on all sides.
Clear gutters and downpipes quarterly, removing leaves, moss and debris that block water flow. Redirect downpipe discharge at least two metres from the cabin using extensions or splash blocks. Consider installing a French drain around the perimeter if your site has poor natural drainage or sits in a low-lying area.
“Proper ventilation and drainage are the foundation of log cabin longevity. Address these fundamentals before worrying about advanced treatments or repairs. Most moisture problems stem from inadequate airflow and poor water management rather than product failures.”
Monitor humidity levels inside your cabin using a hygrometer. Ideal indoor humidity sits between 40-60%. Readings consistently above 70% indicate ventilation problems requiring immediate attention. Controlling condensation prevents the cascade of problems that follow moisture accumulation, from surface mould to deep structural rot.
Check beneath your cabin annually if accessible. Look for signs of moisture damage including discoloured wood, soft spots or fungal growth on floor joists. Address problems immediately rather than waiting for them to worsen. Small interventions now prevent major structural repairs later.
Routine inspection and ongoing maintenance tips
Regular inspections catch problems whilst they’re still manageable. Quarterly checks take less than an hour but dramatically extend your cabin’s lifespan by identifying issues before they escalate into expensive repairs.
Focus on ventilation, drainage and regular checks to prevent costly repairs that could have been avoided with simple preventive maintenance. Create a systematic inspection routine covering all critical areas, recording your findings to track changes over time.
Comprehensive quarterly inspection routine
- Roof inspection: Check for damaged, loose or missing shingles; inspect flashing around chimneys or vents; look for signs of water penetration in the interior ceiling; clear moss, leaves and debris from valleys and gutters
- Wall examination: Look for cracks, splits or gaps in the wood; check treatment condition for fading, peeling or bare patches; inspect joints and corners where water might penetrate; verify caulking around windows and doors remains intact
- Base and foundation check: Examine bearers and floor joists for moisture damage or rot; ensure clearance around the perimeter remains adequate; verify drainage continues working effectively; look for insect activity or damage
- Interior assessment: Check for condensation, mould or mildew; inspect window and door operation; verify ventilation systems function properly; look for water stains indicating leaks
- Hardware and fixtures: Test door locks, hinges and handles; inspect window catches and seals; check any electrical installations for moisture damage; verify shelving and internal fittings remain secure
Pro Tip: Take dated photographs during each inspection. Visual records help you spot gradual changes that might otherwise go unnoticed, and they’re invaluable when discussing problems with suppliers or contractors.
Seasonal maintenance addresses specific challenges throughout the year. Spring offers ideal conditions for major treatment work after winter weather subsides. Summer focuses on ventilation and managing increased humidity from warm, moist air. Autumn requires gutter clearing and preparation for winter conditions. Winter demands special attention to protect your cabin from freezing temperatures and increased rainfall.
Seasonal maintenance priorities
- Spring: Apply treatments, repair winter damage, deep clean interior and exterior, check roof integrity after storms
- Summer: Maximise ventilation, monitor for insect activity, inspect treatment condition in strong sunlight, maintain surrounding vegetation
- Autumn: Clear gutters thoroughly, check drainage before heavy rains, inspect seals and weatherstripping, prepare heating if applicable
- Winter: Monitor condensation closely, ensure adequate ventilation despite cold weather, check for ice damage, remove snow accumulation from roof
Maintain a simple log recording inspection dates, findings and actions taken. This documentation helps you spot patterns, remember when treatments were last applied and demonstrate proper care if warranty claims become necessary. Digital photos stored with dates provide visual evidence of your cabin’s condition over time.
Address minor issues immediately rather than adding them to a growing list. A small gap in caulking takes minutes to fix but can cause significant water damage if ignored. Tighten loose hinges before they damage door frames. Touch up small areas of worn treatment before bare wood becomes exposed to the elements.
Develop relationships with suppliers and specialists. Having trusted sources for quality treatments, replacement parts and expert advice proves invaluable when problems arise. Many issues that seem complex to homeowners have simple solutions that experienced professionals can identify quickly.
Explore bespoke garden cabins and expert maintenance products
Maintaining your garden cabin becomes simpler when you start with quality construction designed for longevity. If you’re considering a new cabin or upgrading your current structure, exploring bespoke options ensures you get exactly what you need.
Custom-built log cabins offer tailored solutions matching your specific requirements, from dimensions and layout to wood quality and finish specifications. Working with specialists who understand UK conditions means your cabin arrives designed for our challenging climate.

Browse the garden log cabin gallery for inspiration and ideas. Seeing completed projects helps you visualise possibilities for your own space, whether you need a home office, workshop, gym or peaceful retreat. Expert guidance on bespoke cabin design ensures every detail serves your intended purpose whilst maximising durability and ease of maintenance. Contact specialists for advice on maintenance products, treatment recommendations and solutions to specific challenges your cabin faces.
How often should I treat my garden cabin wood?
Treatment frequency depends on several factors including your cabin’s exposure to weather, the quality of previous treatments and manufacturer guarantees. Intervals vary from annual applications to every two to five years based on these conditions. Cabins in exposed locations facing prevailing winds and rain need more frequent attention than those sheltered by trees or other buildings. Rather than following rigid schedules, inspect your cabin regularly and reapply treatment when you notice fading, increased water absorption or surface degradation. Quality products applied correctly last longer, making the initial investment worthwhile.
What are the best ways to prevent condensation inside my cabin?
Condensation control requires active ventilation management and humidity reduction. Ensure good ventilation through adjustable vents and open windows when possible, wipe condensation from windows regularly and manage humidity from appliances. Single-glazed windows need particular attention, as they’re most prone to condensation formation. Install trickle vents for continuous background airflow even when windows stay closed. Avoid activities that generate excessive moisture inside the cabin, such as drying laundry or using unvented heating appliances. A small dehumidifier helps during particularly humid periods, though proper ventilation remains the primary solution.
How can I check if my cabin wood moisture is safe for treatment?
Use a digital moisture meter to test wood before applying any treatment. These affordable devices provide instant readings by inserting pins into the wood surface. Moisture content below 20% is recommended before treatment application to prevent trapping water that causes rot and finish failure. Test multiple locations including walls, door frames and areas that receive less sun exposure, as moisture content varies across the structure. Newly installed cabins typically need one to three weeks of settling time before reaching appropriate moisture levels. If readings exceed 20%, wait longer and improve ventilation to accelerate drying. Never rush treatment application, as patience during this stage prevents serious problems later.
What should I do if I discover rot in my cabin wood?
Address rot immediately before it spreads to healthy wood. Small areas of surface rot can often be treated with wood hardeners and epoxy fillers after removing all affected material. Cut away rotted sections until you reach solid wood, then treat the area with fungicidal preservative before filling and refinishing. Larger areas of structural rot require professional assessment, as they may indicate deeper moisture problems needing comprehensive solutions. Identify and eliminate the moisture source causing the rot, whether it’s poor drainage, inadequate ventilation or damaged treatments allowing water penetration. Prevention through proper maintenance is far easier and cheaper than rot repair, making regular inspections essential.


