

Blog

You step into your garden cabin on a grey January morning, coffee in hand, ready to use the space. But it’s freezing. The walls feel damp, your breath fogs up, and within ten minutes you’re back inside the house. Sound familiar? Getting the heating right in a garden cabin is one of the most important decisions you’ll make, yet it’s often an afterthought. This guide walks you through everything: from choosing the right heating method and preparing your cabin properly, to installing it safely and avoiding the most common mistakes. We’ll keep costs and your health in mind throughout.
Table of Contents
- Understanding your heating options for garden cabins
- Preparing your garden cabin for effective heating
- Step-by-step guide: Installing garden cabin heating
- Solving common problems and mistakes with cabin heating
- Why the best heating solution depends on your cabin and usage
- Transform your garden cabin with bespoke heating solutions
- Frequently asked questions
Key Takeaways
| Point | Details |
|---|---|
| Infrared panels lead | Infrared heating is highly efficient and healthy for small, insulated garden cabins. |
| Insulation is essential | Good insulation and draught-proofing make any heating system far more cost-effective. |
| Sizing makes the difference | Choosing the right heater size and placement prevents cold spots and wasted energy. |
| Custom solutions suit best | A tailored heating solution matched to your cabin’s use gets the best all-season results. |
Understanding your heating options for garden cabins
Now that you understand the importance of heating, let’s examine what options are actually available and what sets them apart.
There are more ways to heat a garden cabin than most people realise. Each method suits a different type of cabin, budget and usage pattern. Here’s a quick overview of the main options:
| Heating type | Typical cost | Ease of install | Energy efficiency | Maintenance |
|---|---|---|---|---|
| Electric radiators | Low to mid | Easy | Moderate | Low |
| Infrared panels | Low to mid | Very easy | High | Very low |
| Underfloor heating | Mid to high | Complex | High | Low |
| Log burner | Mid to high | Requires professional | Variable | Moderate |
| Oil heaters | Low | Very easy | Low | Low |
| Convector heaters | Low | Very easy | Moderate | Low |
Infrared panels are worth a special mention here. Unlike convector heaters, which warm the air (which then escapes every time a door opens), infrared heats objects and surfaces directly. In a small, enclosed cabin, that makes a real difference. As this infrared efficiency guide explains, infrared outperforms convection for efficiency in cabins because it doesn’t waste energy heating air. There’s a health bonus too: no air circulation means no dust being blown around, which is great news if you suffer from allergies.
Here’s a quick summary of the pros and cons to keep in mind:
- Infrared panels: Low running costs, easy to fit, no dust circulation, works well with solar panels
- Electric radiators: Reliable and widely available, but slower to heat a space
- Underfloor heating: Luxuriously comfortable, but costly to retrofit in an existing cabin
- Log burners: Cosy and atmospheric, but require ventilation and professional installation
- Oil heaters: Cheap to buy, but expensive to run and not ideal as a primary source
- Convector heaters: Quick to heat air, but inefficient if the cabin isn’t well sealed
If you’re exploring energy-saving heating options or want to understand more about year-round comfort solutions, it’s worth taking time to match the method to how you actually use your cabin.
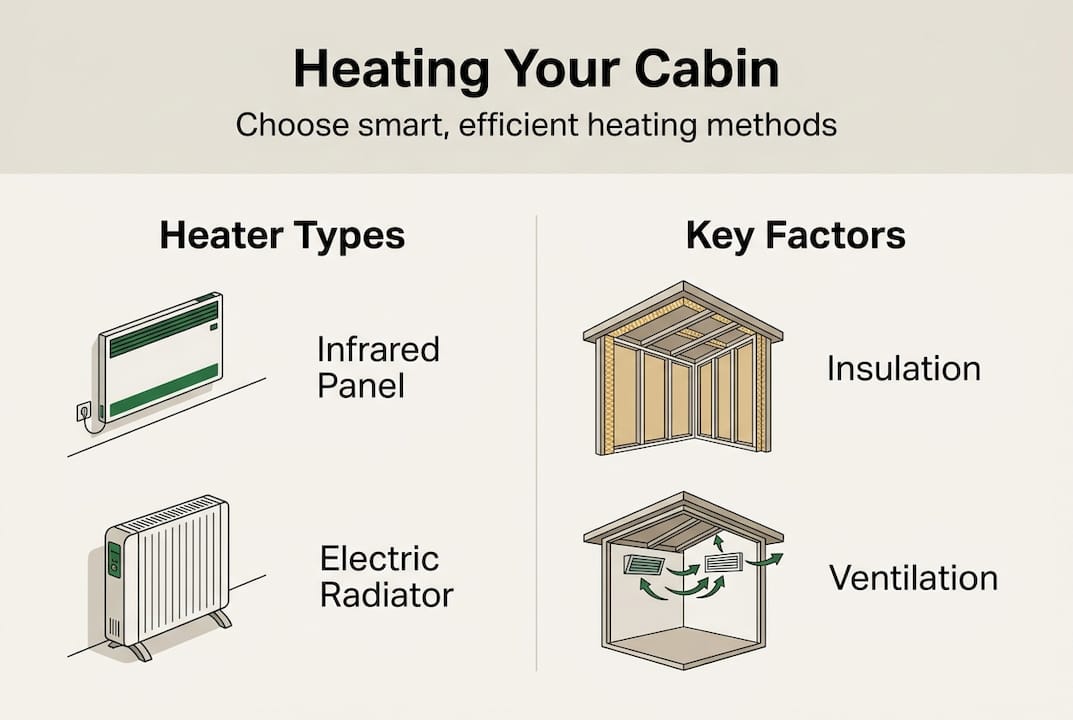
Preparing your garden cabin for effective heating
With your main heating methods in mind, next comes the vital foundation: ensuring your cabin makes the most of any heat generated.
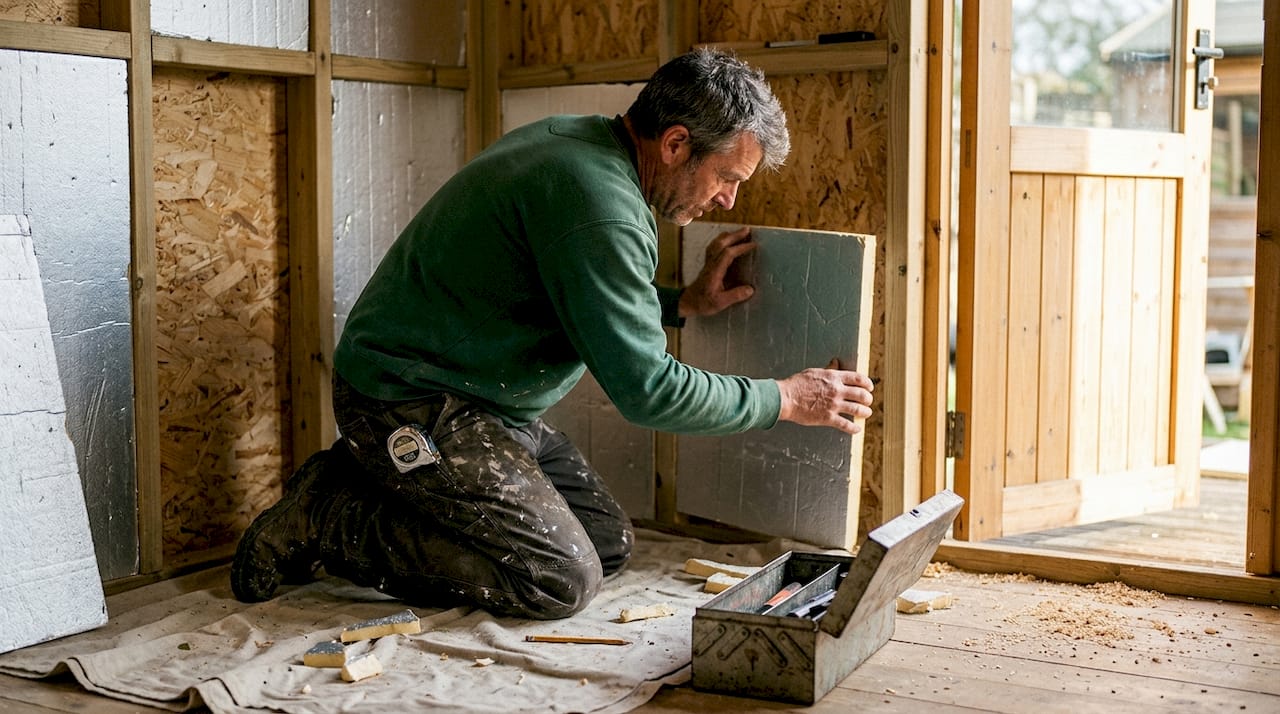
No heater in the world will keep a poorly insulated cabin warm. Before you spend a penny on heating equipment, it’s worth assessing what you’re working with. Here are the most common insulation types and how they compare:
| Insulation type | R-value (approx.) | Cost | Ease of retrofit |
|---|---|---|---|
| Rigid foam boards | 3.8 to 6.5 per inch | Mid | Moderate |
| Mineral wool batts | 2.2 to 3.8 per inch | Low to mid | Easy |
| Spray foam | 3.7 to 6.5 per inch | High | Difficult |
| Reflective foil | 1.0 to 1.5 per inch | Low | Very easy |
As the team at Log Cabin Kits points out, proper insulation reduces heat loss dramatically and keeps running costs down in heated cabins. It’s the single most impactful thing you can do before installing any heater.
Follow these steps to get your cabin ready:
- Assess your current insulation. Check walls, floor and roof for gaps or thin coverage. Even a basic inspection reveals a lot.
- Draught-proof windows and doors. Self-adhesive foam strips are inexpensive and take minutes to fit.
- Consider a vapour barrier. This prevents moisture from working its way through walls, which is especially important in timber cabins.
- Plan your heater positioning. Place heaters where cold air enters, such as near doors or windows, for best results.
Pro Tip: A simple draught test using a lit incense stick or a candle near door frames and window edges will reveal exactly where cold air is sneaking in. Seal those gaps first and you’ll notice an immediate improvement.
Worth noting: Skipping the preparation stage is the most common reason cabin owners end up with persistent cold spots and unexpectedly high energy bills. No heater can compensate for a poorly sealed space. Sort the basics first.
For more detail on insulation impact and practical steps for making your cabin energy efficient, those guides are well worth a read before you buy anything.
Step-by-step guide: Installing garden cabin heating
Once your cabin is well prepared, you’re ready to install your chosen heating solution. Let’s break down exactly how to do it, step by step.
Before you buy a heater, you need to do a little groundwork. Here’s how to approach it:
- Check your power supply. Does your cabin have a dedicated electrical circuit? A standard 13-amp socket is fine for most plug-in heaters, but underfloor heating or larger units may need a separate circuit installed by a qualified electrician.
- Measure your cabin. Calculate the floor area in square metres. A rough guide is 100 watts per square metre for a well-insulated cabin.
- Choose your heater size. A 3m x 4m cabin (12 square metres) needs roughly 1.2kW as a minimum. For older or less insulated cabins, add 20 to 30 percent.
- Select your heater type. Based on your preparation work and budget, choose from the options covered earlier. Infrared panels are a popular first choice for their simplicity.
- Position the heater correctly. For infrared, mount panels on the wall or ceiling so they face the area you use most. For convector heaters, place them low down near an exterior wall.
- Install and test. Follow the manufacturer’s instructions carefully. Test the heater before relying on it in cold weather.
For help with calculating electric heating needs or guidance on picking the right heating system, those resources will give you more detailed figures.
As the infrared heater power efficiency data shows, infrared needs less power than convection heaters to warm a cabin space efficiently. That means lower bills for the same level of warmth.
Pro Tip: Plug-in infrared panels are a brilliant starting point if you’re unsure about your layout. You can move them around, try different positions, and only commit to a permanent fix once you know what works best for your space.
Always leave adequate clearance around any heater and never cover it with clothing or towels. Proper spacing and ventilation keep things safe and efficient.
Solving common problems and mistakes with cabin heating
Even with the best preparation and installation, issues can occasionally arise. Here’s how to avoid or resolve the most frequent ones.
Cabin heating problems usually come down to a handful of causes. Most are easy to fix once you know what to look for.
- Cold spots: Usually caused by poor heater placement or gaps in insulation. Try repositioning the heater closer to the cold area and re-check your draught-proofing.
- Condensation on windows or walls: A sign that warm, moist air is meeting cold surfaces. Improve ventilation slightly and check your vapour barrier.
- High energy bills: Often the result of an undersized heater working too hard. Check the wattage against your cabin size and upgrade if needed.
- Heater cycling on and off frequently: This usually means the thermostat is poorly positioned. Move it away from direct heat sources for a more accurate reading.
- Uneven warmth: If one end of the cabin is warm and the other isn’t, consider adding a second smaller heater rather than replacing the existing one.
Important: As highlighted in this guide to heating options for cabins, poor placement and underpowered heaters are the top two causes of ineffective cabin heating. Getting these two things right from the start saves a lot of frustration.
Seasonal checks make a big difference too. At the start of autumn, test your heater, check seals around windows and doors, and clear any debris from around external vents. A quick annual review keeps everything running well through the coldest months.
For more practical advice, take a look at these easy ways to heat your cabin and a detailed breakdown of how to heat your garden cabin efficiently.
Why the best heating solution depends on your cabin and usage
Here’s something we’ve noticed after years of helping customers plan their cabins: most people ask “what’s the best heater?” when the more useful question is “what’s the best heater for how I’ll use this space?”
A cabin used as a daily home office needs consistent, reliable warmth from early morning. An infrared panel on a timer works brilliantly for that. But a guest room used a few weekends a year? A portable oil heater switched on an hour before guests arrive is probably all you need. Over-engineering the heating in a low-use space is a waste of money.
We also see a lot of new cabin owners commit too heavily to one system before they’ve lived with the space. Our honest advice: start flexible. A plug-in infrared panel costs very little and teaches you a lot about how your cabin heats up and where the cold spots are. Then you can invest in something more permanent with confidence.
Think about future adaptability too. If you might add solar panels in a couple of years, an electric system is a much smarter long-term choice than a log burner. Planning for maximising comfort in your garden cabin means thinking about where your needs might go, not just where they are today.
Transform your garden cabin with bespoke heating solutions
If you’re planning a new cabin and want heating sorted from day one, we can help. Our custom build log cabins are designed with all-season usability in mind, so you can plan cavity layouts, insulation and power supply before a single log is laid.

Working with specialists means you won’t have to retrofit anything later, which saves both time and money. Browse our garden log cabin gallery to see how other customers have created warm, welcoming spaces they use all year round. When you’re ready, get in touch for a bespoke quote tailored to your space and how you plan to use it.
Frequently asked questions
What is the cheapest way to heat a garden cabin?
Electric infrared panels are often the cheapest to run in well-insulated cabins, combining low power draw with targeted heat. Their efficiency over convection makes them a smart choice for smaller spaces.
Can I use a log burner in my garden cabin safely?
Yes, but always ensure proper ventilation, install a carbon monoxide detector, and use a qualified professional for fitting. Safety comes first with any solid fuel appliance.
How much power does a typical cabin heater need?
Most garden cabins need between 1kW and 2.5kW, depending on size, insulation and heater type. Because infrared uses less power than convection alternatives, it’s often the more efficient choice at the lower end of that range.
How do I prevent condensation in my cabin while heating?
Pair your heating with adequate ventilation and ensure your insulation is properly fitted. Good insulation reduces heat loss and helps maintain a stable temperature that minimises condensation risk.


