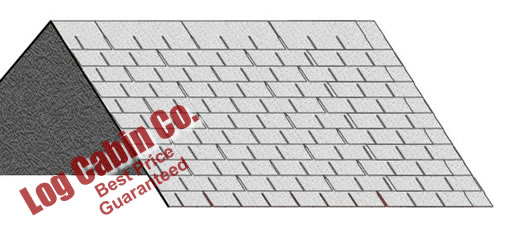
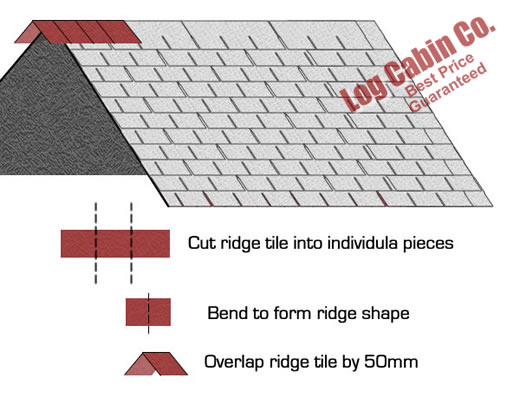
Fitting Bitumen Felt Shingles
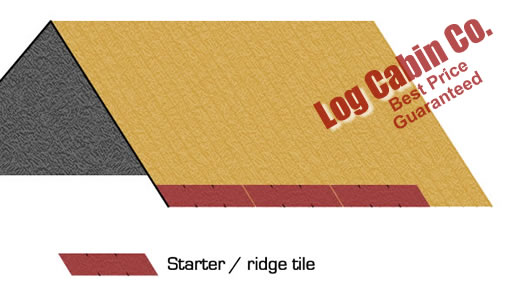
Compared to standard roofing felt, felt shingles provide a better quality, longer lasting alternative to shed felt and also are far more pleasing on the eye. We would recommend you seriously consider using these as a means of weather proofing your cabin. Assuming the roof pitch is at least 10degrees. The felt shingles manufaxcturer recomend using an underlay on any pitch less than 14degrees
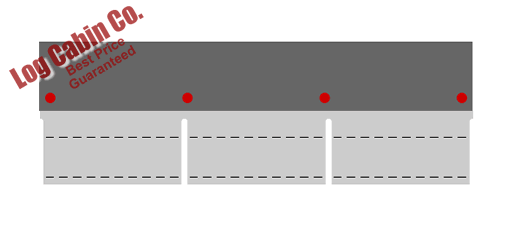
We currently offer four colour options, green, grey, black and red :

Please note : – Sometimes a small deviation in color of the tiles will be evident in different packs and sometimes even the same pack. This is not a defect of the material and is actually designed to enhance the decorative beauty of the completed felt shingle roof. In order to reduce colour difference during installation of the tiles, it is recommended to mix tiles from packs at random in order to create a mixed colour effect.
How much will each pack cover ?

Author - Martin Corby
Posted - 01 Sep 2013
Dave Pearce
![]() Verified Customer
Verified Customer
Livata 4x3
Very good quality cabin ,instructions could be better, but very pleased with end product.Martin kept me informed on order delivery was great, no damage or missing bits.
02 Feb 2024 - ""

Peter Thompson
![]() Verified Customer
Verified Customer
Clockhouse
Delivery was efficient, all well packaged and protected from damage. Constructed by three of us in one and a half days. Everything fitted perfectly and needed gentle mallet to locate exactly. Instruction book was clear simple and explicit. Thoroughly delighted with the construction and the finish. Very pleased that Martin was able to redraw the design to our specification. Delighted with the whole thing, finish, price and service. Thanks Martin.
06 Dec 2023 - Paignton, United Kingdom

Philp Eaton
![]() Verified Customer
Verified Customer
Livata 4x3
Great product. Lots of surplus parts supplied which is helpful. Quality of wood is fantastic. Cannot fault the service.
01 Nov 2023 - ""
Patrick Ford
![]() Verified Customer
Verified Customer
Bespoke Cabin
Very good cabin, and came flat packed for us to put up. Easy instructions and went together really well. would recommend. we would use this company again, good product, good price and brilliant customer service.
31 Oct 2023 - , United Kingdom

Charles Chalmers
![]() Verified Customer
Verified Customer
Bespoke Cabin
Delivered on time with friendly driver.All components in good order and assembly went well.Good service.
17 Oct 2023 - Washington, United Kingdom
Jon Budd
![]() Verified Customer
Verified Customer
Livata 6x4
Great quality item with simple, concise instructions, easily constructed by the family. Great delivery service. However, the customer service from Garden Adventure was not great; the cabin was a month late arriving, we had to chase for information regarding this as none was forthcoming. The incorrect bearers arrived and although we received a refund we had to chase for this. Not sure I would recommend them but the cabin materials were great.
25 Sep 2023 - Slough, United Kingdom

Andrew Buckland
![]() Verified Customer
Verified Customer
Meribel 5x3
Seamless ordering, Martin was extremely helpful with all my questions.Delivery was also fantastic with the delivery guy very helpful (it's a big delivery). Took me and elderly father in law 2 days to get it all up and built/weather tight, went together very easily with no issues. I went for the shingle roof, it still came also with felt which could be used as roof underlay. For spec I went for the superior level glazing with toughened glass, also went for the larger logs (68mm) and glad I did as feels so sturdy/insulated although am sure the 44mm would be great also. I Insulated the floor with celotex, could have done the roof but as this is a garden room rather than office etc I didn't go that far.Overall a highly recommended product, for what you get I think it's a very competitive price, much better than others I had seen that weren't so good. The only parts I bought myself were the insulation and guttering (and paint/preserve of course). I want it to last so did two coats of preserve, knotting and two of paint, also have a sealant to go on which is yet to be done. A sprayer really helped/cut down on time.Would not hesitate in recommending Martin to purchase through, helpful all through the process and very quick to respond. 5*
22 Aug 2023 - Basildon, United Kingdom

Chris Green
![]() Verified Customer
Verified Customer
Meribel 4x3
Great cabin. Excellent quality. From the initial ordering and having it customised to my specs, to screwing on the last piece of trim this has been a pleasure. Straight forward to assemble. Had everything but the roof covering done in a day on account of how well it went together. Sturdy high quality build. Could not be happier. This company have been an absolute pleasure to deal with. Top marks 👍
12 Dec 2022 - Rugeley, United Kingdom

Luke Stevens
![]() Verified Customer
Verified Customer
Torgnon 6x3
Really pleased with our log cabin! Can't believe the quality of the wood. It took the installation team (Lee Stuart and 3 others who were recommended by Martin) 6.5 hours which was really impressive given the weather conditions on the day, and even they said how good the quality was. It is so warm inside and we didn't even have the insulation installed. Great correspondence from Martin from the start to keep us in the loop regarding production and delivery times. Would highly recommend to anyone. Thanks Martin!
15 Nov 2022 - Swansea, United Kingdom

Steve Rycroft
![]() Verified Customer
Verified Customer
Livata 5x3
Quick service and delivery - any issue with missing parts solved quickly
12 Oct 2022 - ""

Log Cabin Kits - Part of the Garden Adventure Group

19 Manor Road
East Grinstead
West Sussex
RH19 1LP
01342 477774
sales@gardenadventure.co.uk
© Copyright 2001 - 2024 Garden Adventure Ltd

